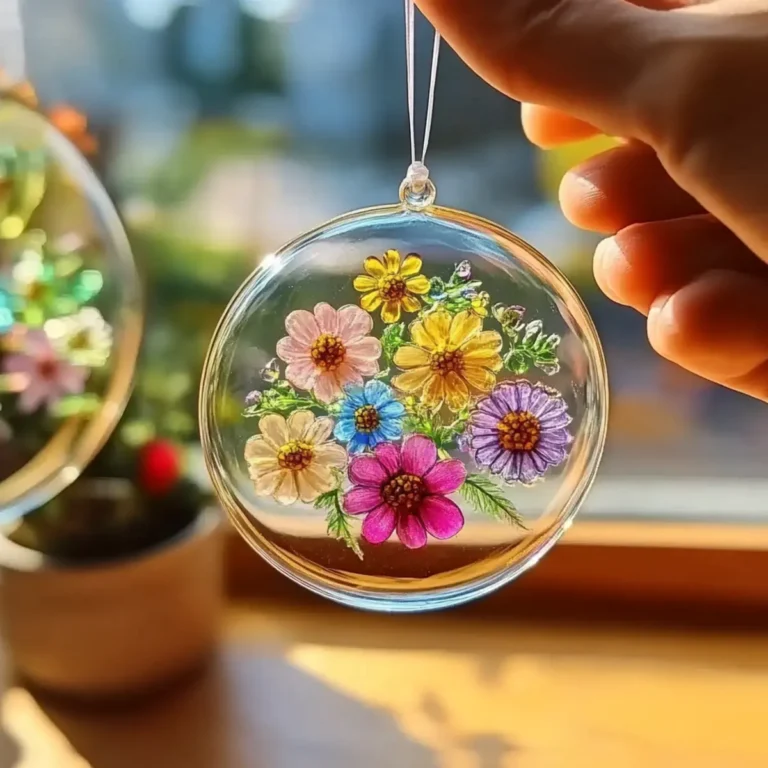
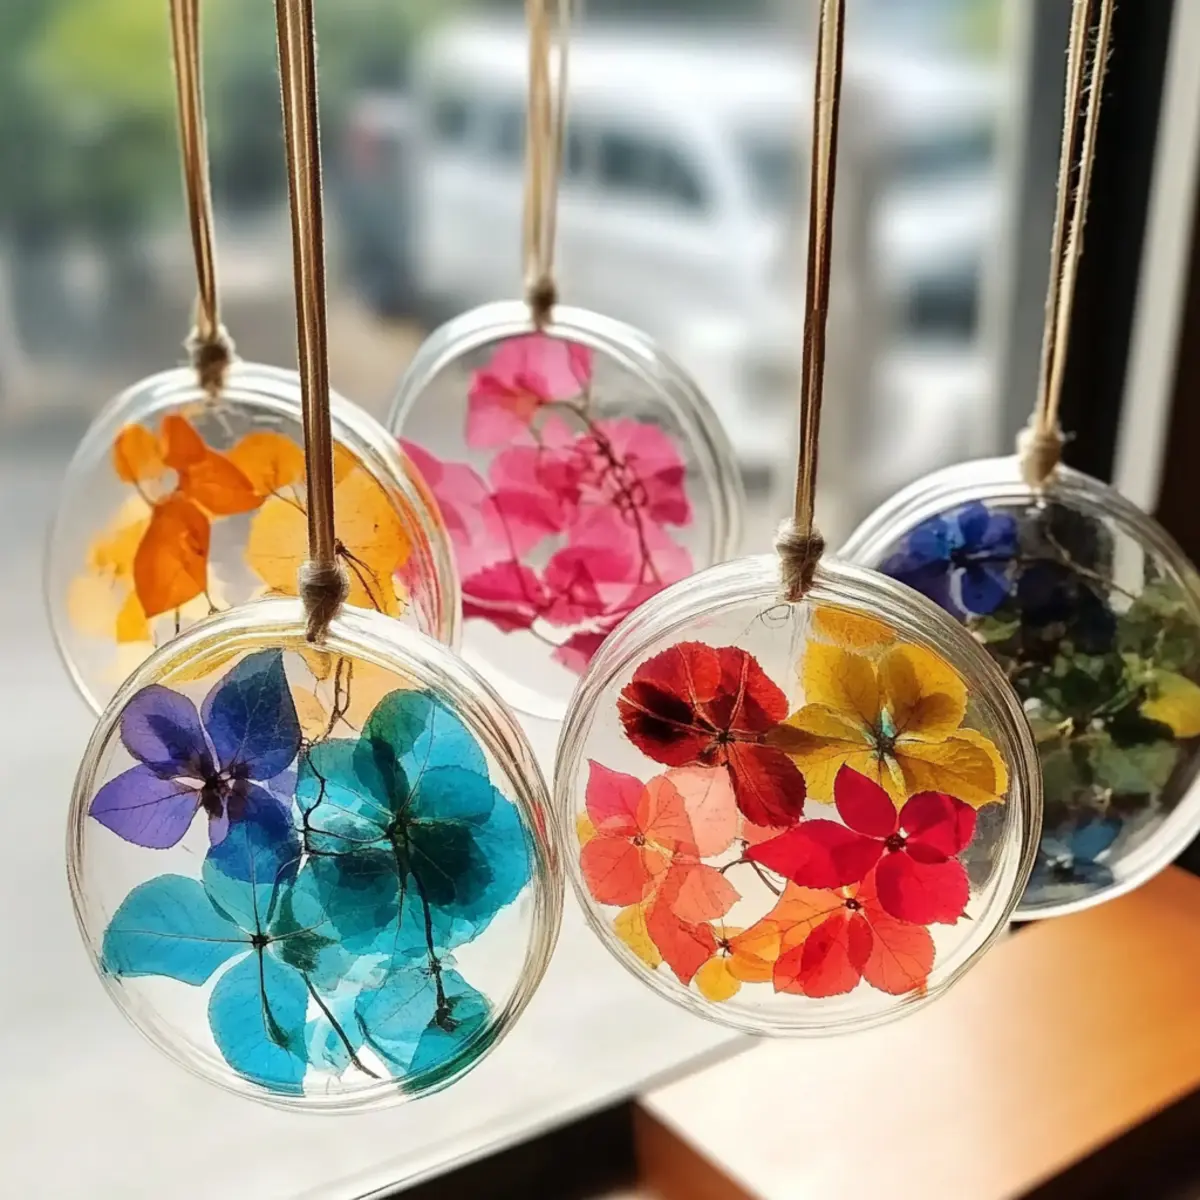
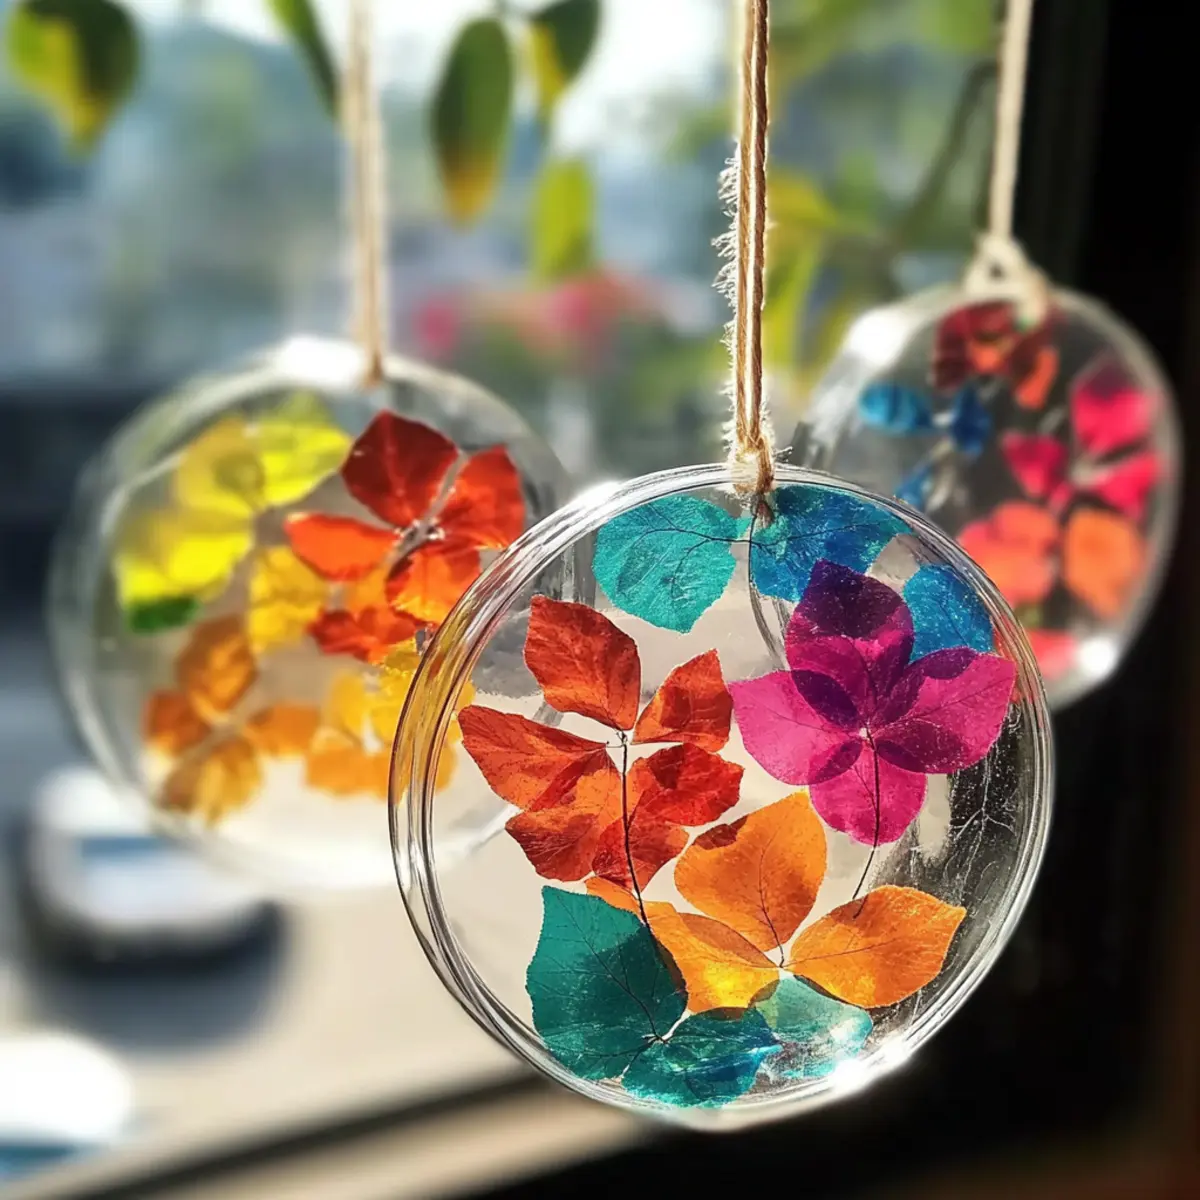
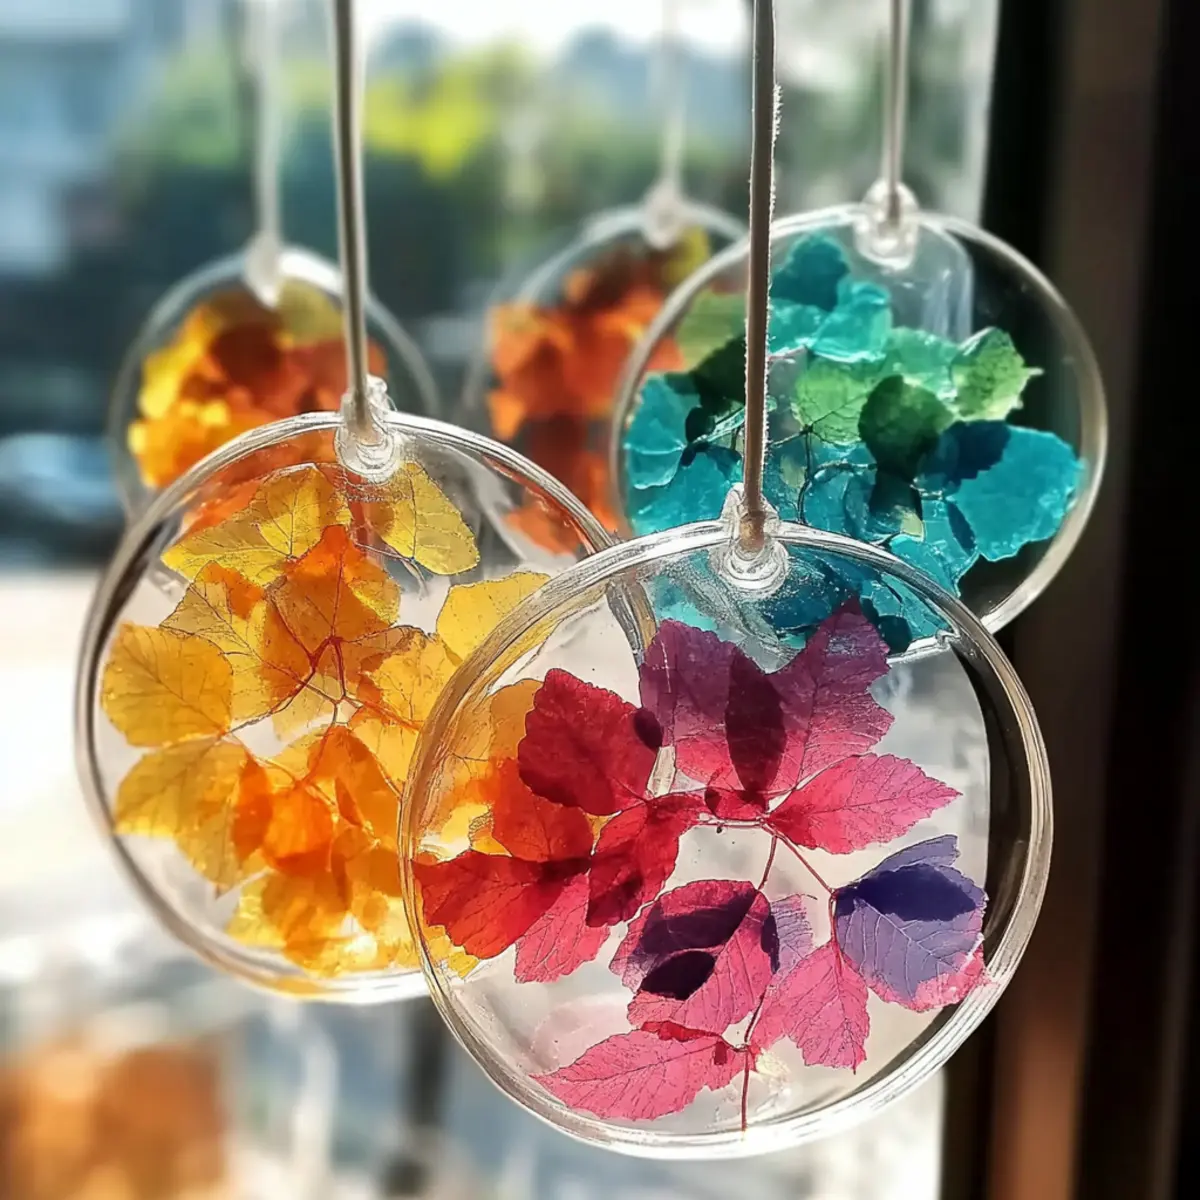
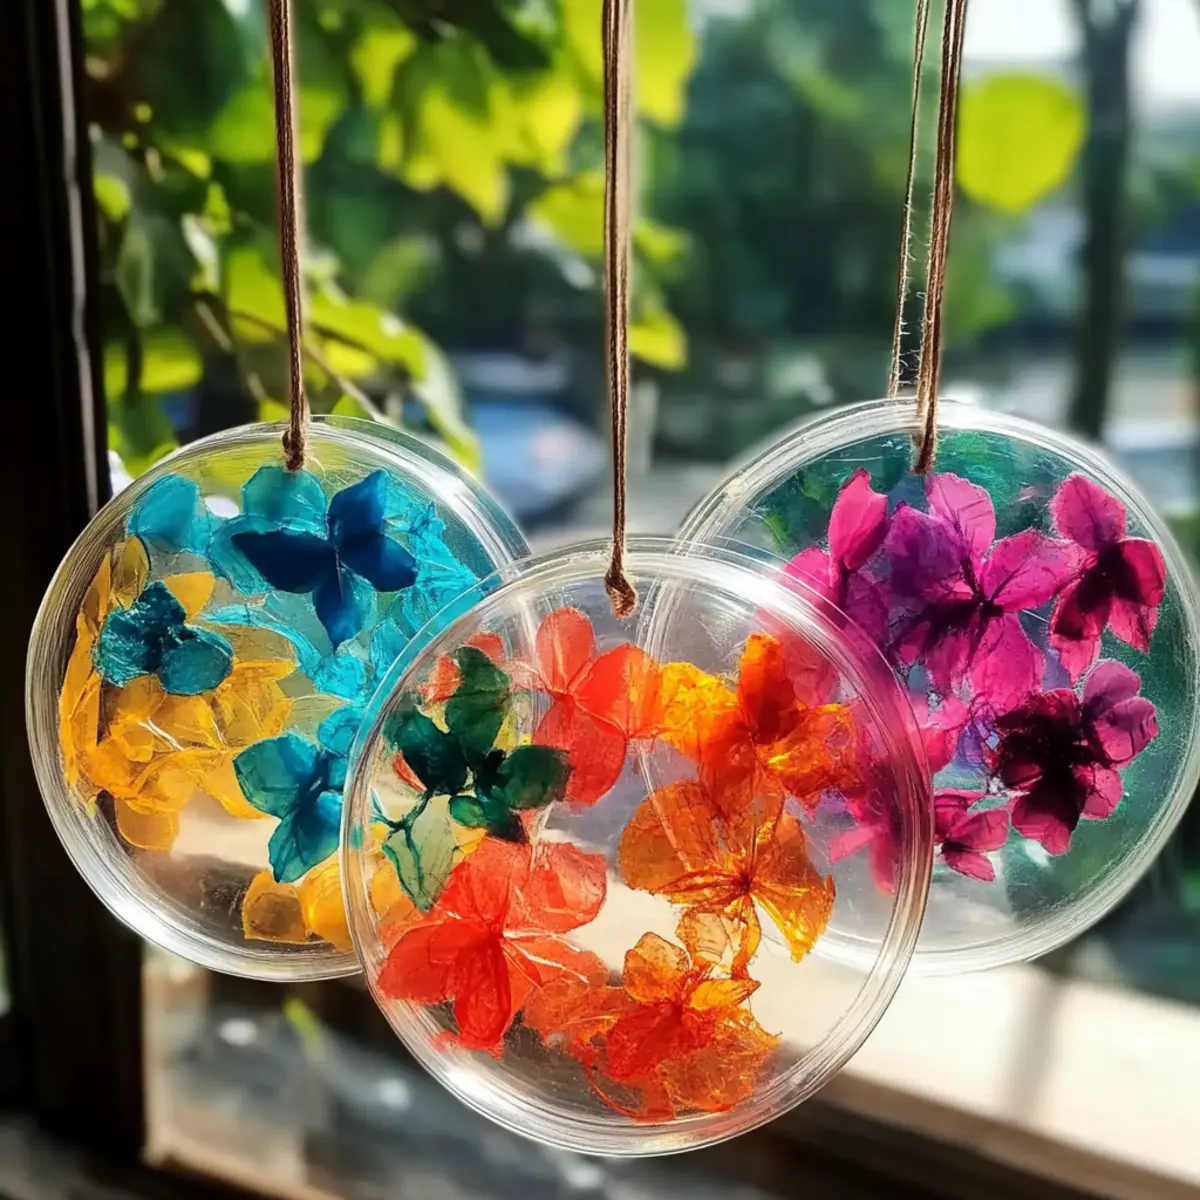
Savory Splash: Easy Bioplastic Suncatchers DIY Project
As the sun begins to peek through the clouds, casting a warm glow on my living room, I can’t help but feel inspired to brighten up my space. That’s when I thought of a delightful DIY project: bioplastic suncatchers. Guided by a passion for both creativity and sustainability, this project turns simple ingredients like cornstarch and water into colorful, translucent wonders that shimmer in the sunlight.
Not only are these suncatchers a feast for the eyes, but they’re also an eco-friendly way to bring a touch of nature indoors. Gone are the days of plastic waste! This quick and easy craft not only provides a playful outlet for adults and children alike but also aligns perfectly with our growing desire to create a healthier planet.
Join me in exploring how to transform a few natural ingredients into vibrant decor that catches and refracts light, illuminating the essence of home while promoting a sustainable lifestyle. Let’s dive into this colorful adventure together!
Why Bioplastic Suncatchers DIY Will Brighten Your Day
Simplicity and Fun: Crafting these suncatchers requires basic ingredients and minimal effort, making it perfect for crafters of any skill level.
Vibrant Reflections: Watch as your creations shimmer in the sunlight, adding a burst of color and joy to your home.
Eco-Friendly Choice: By using natural ingredients, you’re not just crafting; you’re supporting a sustainable lifestyle.
Creative Outlet: Experiment with colors and shapes, allowing your imagination to run wild and creating unique designs everyone will love.
Family-Friendly Activity: This project is ideal for both kids and adults, providing a fun way to bond while promoting eco-conscious habits.
Great for Gifting: Consider gifting these lovely creations to friends or family, sharing a piece of your creativity and sustainability efforts.
Let’s embrace this colorful journey by diving into our DIY project together!
Bioplastic Suncatchers DIY Ingredients
• You’re only a few steps away from creating your own vibrant treasures!
For the Suncatcher Mixture
- Cornstarch – Provides structure and gel-like consistency to the suncatcher; ensure it’s fully dissolved for the best results.
- Water – Acts as the base to mix with cornstarch, creating the perfect gel for your DIY project.
- Glycerin – Enhances the clarity and vibrancy of the final product, making colors pop beautifully.
- Vinegar (as needed) – Used to adjust pH and improve the longevity of your suncatchers.
For the Color
- Natural Food Coloring – Adds customizable color; adjust the amount for the vibrancy that matches your style.
- Essential Oils (optional) – Choose scents that appeal to you, giving your suncatchers an aromatic twist!
With these simple ingredients at your fingertips, you’re ready to embark on your eco-friendly crafting adventure!
How to Make Bioplastic Suncatchers DIY
Combine Ingredients: In a pot, mix 120 grams of cornstarch with 250 ml of water. Stir the mixture until the cornstarch is fully dissolved, ensuring a clump-free blend for your project.
Add Enhancers: Pour in 5 ml of glycerin and a few drops of vinegar, mixing well for added clarity and longevity in your suncatchers.
Heat the Mixture: Place the pot on low heat, stirring consistently. Keep at it until the mixture thickens to a gel-like consistency, usually about 5-7 minutes.
Cool Down: Once thickened, carefully remove the pot from heat and let the mixture cool slightly—it should still be warm for the next steps.
Color It Up: Divide the warm mixture into separate bowls. Add different natural food colorings to each bowl, mixing until you achieve vibrant colors that inspire your creativity.
Shape Your Suncatchers: Pour the colorful mixtures into cookie cutter shapes placed on a parchment-lined tray. This is where your unique designs will take form!
Set to Firm: Allow the suncatchers to set until firm. This could take several hours or overnight—resist the temptation to touch them until they’re fully hardened.
Experiment if Desired: Optionally, layer colors or use different shapes for added creativity before the mixture sets.
Optional: Sprinkle biodegradable glitter for a magical touch!
Exact quantities are listed in the recipe card below.
Expert Tips for Bioplastic Suncatchers DIY
- Dissolve Completely: Ensure that the cornstarch is thoroughly dissolved in water to avoid clumps that can ruin the gel-like texture of your suncatchers.
- Experiment with Colors: Feel free to mix and match natural food colorings to create unique hues; the more adventurous, the more vibrant your creations will be!
- Keep it Low Heat: When heating, maintain low heat to avoid burning the mixture. Stir consistently for even thickening, leading to perfect bioplastic suncatchers.
- Cool Briefly: Let the mixture cool slightly before pouring it into shapes; this helps prevent accidental melting of the shapes before they’re set.
- Layer Wisely: If layering colors or shapes, pour the next layer gently to avoid mixing; let each layer set slightly for more defined sections.
Bioplastic Suncatchers DIY Variations & Substitutions
Feel free to get creative by customizing your suncatchers with these fun variations!
Tapioca Starch: Swap cornstarch with tapioca starch for a chewier texture that adds a unique twist.
Natural Color Sources: Use beet juice for a rich red, spinach for green, or turmeric for sunny yellow hues.
Fragrant Touch: Incorporate a few drops of essential oils like lavender or eucalyptus for an aromatic dimension.
Glitter Glam: Enhance your suncatchers with biodegradable glitter or confetti for added sparkle in the sunlight!
Layering Techniques: Try layering colors in your cookie cutters; pour one color, let it set slightly, then pour another for a stunning gradient.
Cookie Cutter Shapes: Explore unique shapes like leaves, flowers, or stars to match your home décor theme and style.
Heat Level Variation: Create some suncatchers infused with spices like cayenne or cinnamon for a subtle warmth and inviting scent.
Texture Variation: Blend in tiny pieces of dried flowers or leaves for added texture, making each suncatcher a work of art!
How to Store and Freeze Bioplastic Suncatchers DIY
Airtight Container: Store any unused mixture in an airtight container to keep it from hardening; it can stay fresh for up to 3 days.
Room Temperature: Keep your finished suncatchers in a cool, dry place away from direct sunlight to maintain their vibrant colors and clarity.
Fridge: If you prefer to keep them for longer, refrigerate your suncatchers in a sealed container. This can extend their lifespan to about 1 week.
Reheating: If you notice any hardening, gently reheat the mixture on low heat while stirring to restore its gel-like consistency. Enjoy crafting these eco-friendly suncatchers at your own pace!
What to Serve with Bioplastic Suncatchers DIY?
Brighten any day with these fun, vibrant creations that bring nature indoors, making your space truly enchanting.
Colorful Nature Walk: Immerse yourself in nature by collecting leaves or flowers to decorate around your suncatchers. These natural elements enhance the beauty and showcase your creativity in eco-friendly style.
Sunny Reading Nook: Create a cozy corner in your home to relax and read. The colorful reflections from your suncatchers will inspire creativity and calmness—perfect for unwinding with your favorite book.
Sustainable Gifting: Using these suncatchers as gifts can spread joy while promoting eco-friendly crafting. Combine them with a handmade card or a small potted plant to encourage sustainable living among friends and family.
Seasonal Displays: Change up your decor with the seasons! Hang different colors or shapes to celebrate holidays or seasonal changes, making each occasion a little more radiant.
Beverage Pairing: Enjoy a refreshing herbal iced tea while crafting. The calming scents complement your creative process, adding to the overall experience of making delightful suncatchers.
DIY Crafting Party: Invite friends for an evening of creativity! Each person can bring their own designs and colors, turning your space into a vibrant crafting studio together.
Make Ahead Options
These Bioplastic Suncatchers DIY are perfect for busy crafters looking to streamline their projects! You can prepare the suncatcher mixture up to 24 hours ahead of time by following the initial steps—combine the cornstarch, water, glycerin, and vinegar, then store it in an airtight container at room temperature to maintain its quality. When you’re ready to create, simply reheat the mixture gently to bring it back to a gel-like consistency and rinse any clumps away. After coloring and pouring it into shapes, allow the suncatchers to set until firm, which may take several hours or overnight. Enjoy a delightful crafting experience with minimal fuss and super vibrant results!
Bioplastic Suncatchers DIY Recipe FAQs
What type of cornstarch should I use for my suncatchers?
I recommend using regular cornstarch as it’s highly effective in creating the gel-like consistency needed for your bioplastic suncatchers. Ensure it’s pure without any additives, as this will give you the best texture and clarity in your finished product.
How should I store my finished suncatchers?
To keep your beautiful suncatchers fresh, store them in a cool, dry place in an airtight container. They can maintain their vibrant colors and shapes for about a week when kept at room temperature. If you wish to prolong their life even further, you can refrigerate them, which may extend their lifespan up to two weeks.
Can I freeze my bioplastic suncatchers?
Absolutely! If you want to store the suncatchers for an extended time, you can freeze them. Place them in a single layer on a baking sheet lined with parchment paper until solid, then transfer them to a freezer-safe bag or container. These can be kept for up to 3 months. When you’re ready to use them, allow them to thaw at room temperature before hanging.
What should I do if the suncatchers are too flimsy or break easily?
If your suncatchers turn out too flimsy, it might be due to not heating the mixture long enough. Make sure to stir consistently over low heat until it thickens to a gel consistency before pouring into shapes. If they do break, don’t worry! Simply melt the mixture down again (using low heat), then add extra cornstarch to thicken and re-mold them.
Are there any allergy considerations for this recipe?
While the ingredients are generally safe, it’s always wise to check for allergies. The cornstarch and glycerin used are gluten-free, but if you’re experimenting with natural colorings, such as beet juice or turmeric, ensure no one in your crafting group is allergic to these. It’s also best to avoid essential oils if there are any sensitivities present.
How can I add scent to my bioplastic suncatchers?
To incorporate your favorite aroma, simply add a few drops of essential oils directly into the mixture after combining all main ingredients but before heating. Stir well to ensure it’s evenly distributed. A little goes a long way—just enough to create a delightful fragrance when hung near a window!
Savory Splash: Easy Bioplastic Suncatchers DIY Project
Ingredients
Equipment
Method
- Combine Ingredients: In a pot, mix cornstarch with water. Stir until fully dissolved.
- Add Enhancers: Pour in glycerin and a few drops of vinegar, mixing well.
- Heat the Mixture: Place the pot on low heat, stirring consistently until it thickens to a gel-like consistency, about 5-7 minutes.
- Cool Down: Remove the pot from heat and let the mixture cool slightly.
- Color It Up: Divide the warm mixture into separate bowls and add food coloring.
- Shape Your Suncatchers: Pour colorful mixtures into cookie cutter shapes on a parchment-lined tray.
- Set to Firm: Allow suncatchers to set until firm, several hours or overnight.
- Experiment if Desired: Optionally layer colors or use different shapes before mixture sets.