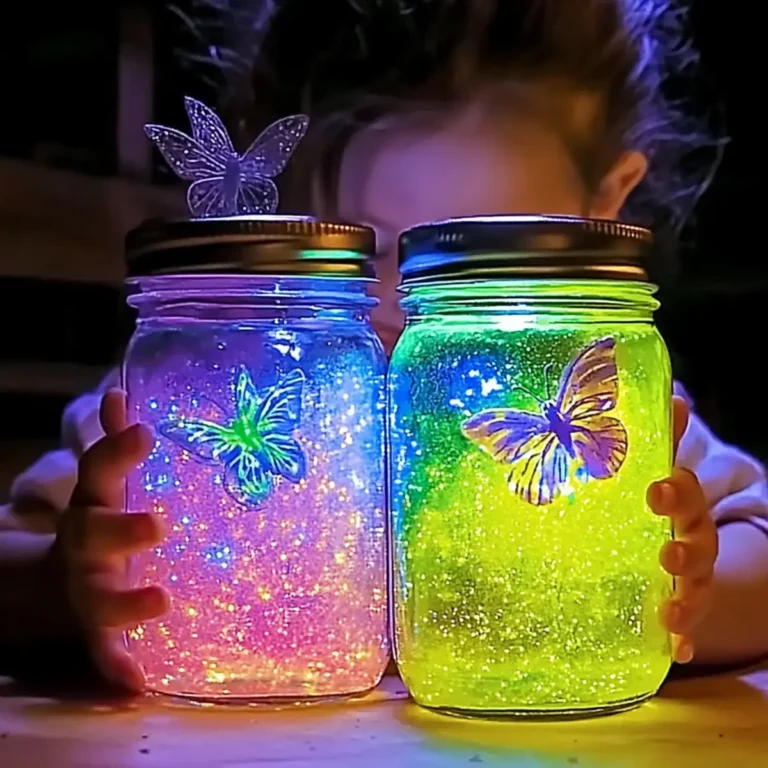
Bubble Painting Adventure: The Best Colorful Craft for All!
As I sat on a warm afternoon, the sunlight streaming through the windows, I realized that creativity can come from the simplest of moments. Inspired by the laughter of kids nearby, I decided to embark on a colorful adventure: crafting my own rainbow glow bouncy balls! It’s incredible how a handful of everyday ingredients can transform into vibrant, bouncy orbs, filled with joy and imagination. This DIY art activity is not just for kids—adults can join in the fun too, letting our inner child take over as we create something magical together. Whether you’re looking to break the monotony of fast-paced life or simply enjoy a creative outing with family, these bouncy balls will ignite your playful spirit. With quick prep and easy instructions, get ready to unleash a burst of creativity that’s sure to brighten your day!
Why will you love Rainbow Glow Bouncy Balls?
Incredible Fun: The joy of making these bouncy balls is infectious, perfect for playful afternoons with family or friends.
Creative Exploration: Dive into a world of colorful fun by mixing paints and designing unique patterns that reflect your style.
Easy to Make: With just a few common household ingredients, you can whip up these vibrant orbs in no time—no advanced skills required!
Sensory Experience: Ideal for both kids and adults, this activity sparks imagination while offering a tactile crafting experience that’s as satisfying as it is exciting!
Perfect for Any Occasion: Whether it’s a rainy day activity or a birthday party craft, these bouncy balls become a wonderful addition to your crafting repertoire.
Looking for more creative projects? Check out our delightful bubble painting adventure to add even more splash to your crafting experience!
Heading
Rainbow Glow Bouncy Balls Ingredients
Ingredient groups
For the Mixture
Small cups or bowls – Perfect for mixing colors; try using recyclable options to be eco-friendly.
Liquid watercolors or food coloring – These provide the vibrant colors; you can substitute with natural food dyes for softer tones.
Dish soap – Essential for binding ingredients and allowing elasticity; avoid concentrated brands for best results.
Water – This is crucial for consistency; any clean water will work, just adjust the quantity to achieve the desired texture.
For Crafting and Displaying
Straws – Great for scooping the mixture to form shapes; choose regular or oversized straws depending on your preferences.
White cardstock or watercolor paper – This serves as the base for showcasing your finished products; recycled paper is a fantastic option!
Tray or table covering – Keeps your crafting area tidy and mess-free; old newspapers or plastic sheets work wonders.
Glitter or shimmer watercolor – Adds a magical sparkle to your bouncy balls and is a fun optional enhancement.
For Final Touches
Washable markers – Ideal for outlining designs, allowing for any color creativity once the balls are dry.
Masking tape – Use this to create design spaces on your cardstock; it’s easy to remove after crafting.
Stencils or cutouts – Elevate your designs, especially for bubble layering; DIY stencils add your personal flair.
Embrace the joy of crafting with these Rainbow Glow Bouncy Balls ingredients, and let your imagination soar as you embark on this colorful adventure!
How to Make Rainbow Glow Bouncy Balls
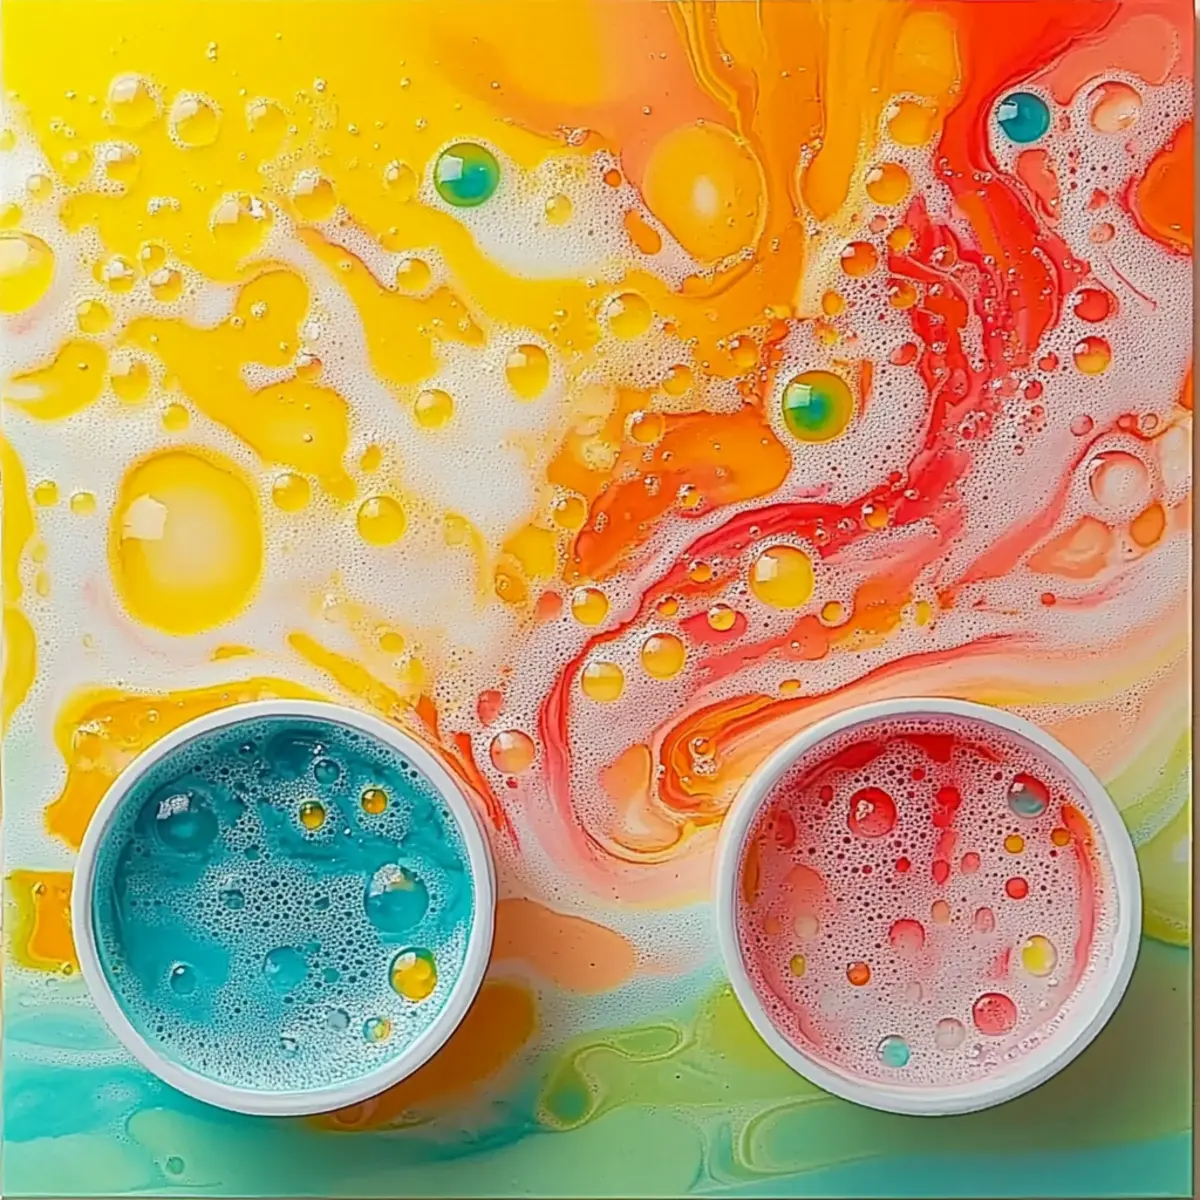
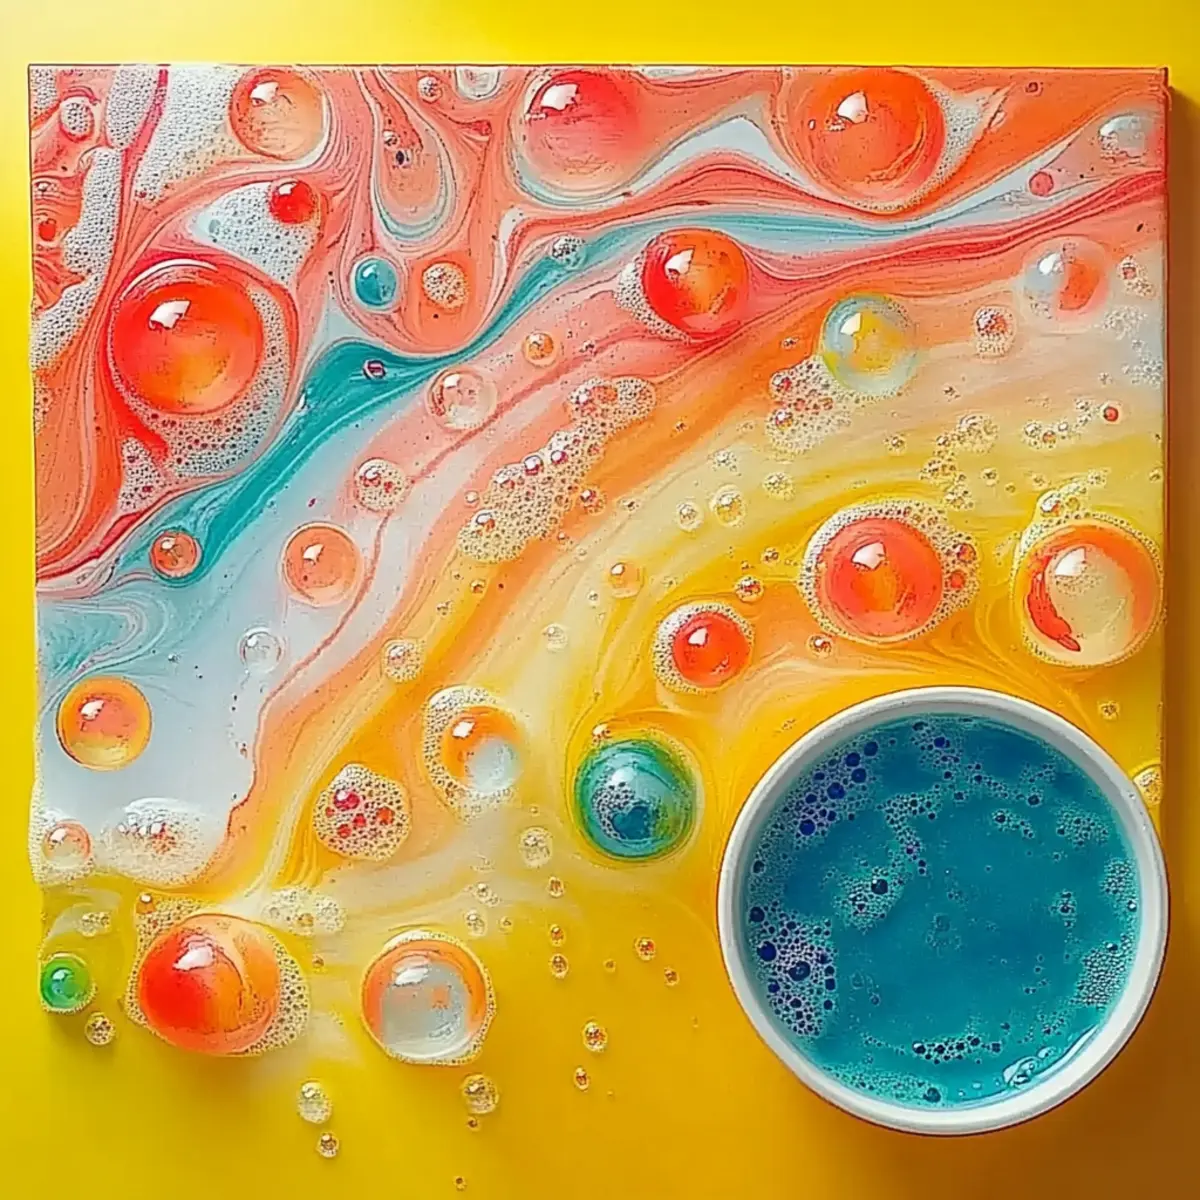
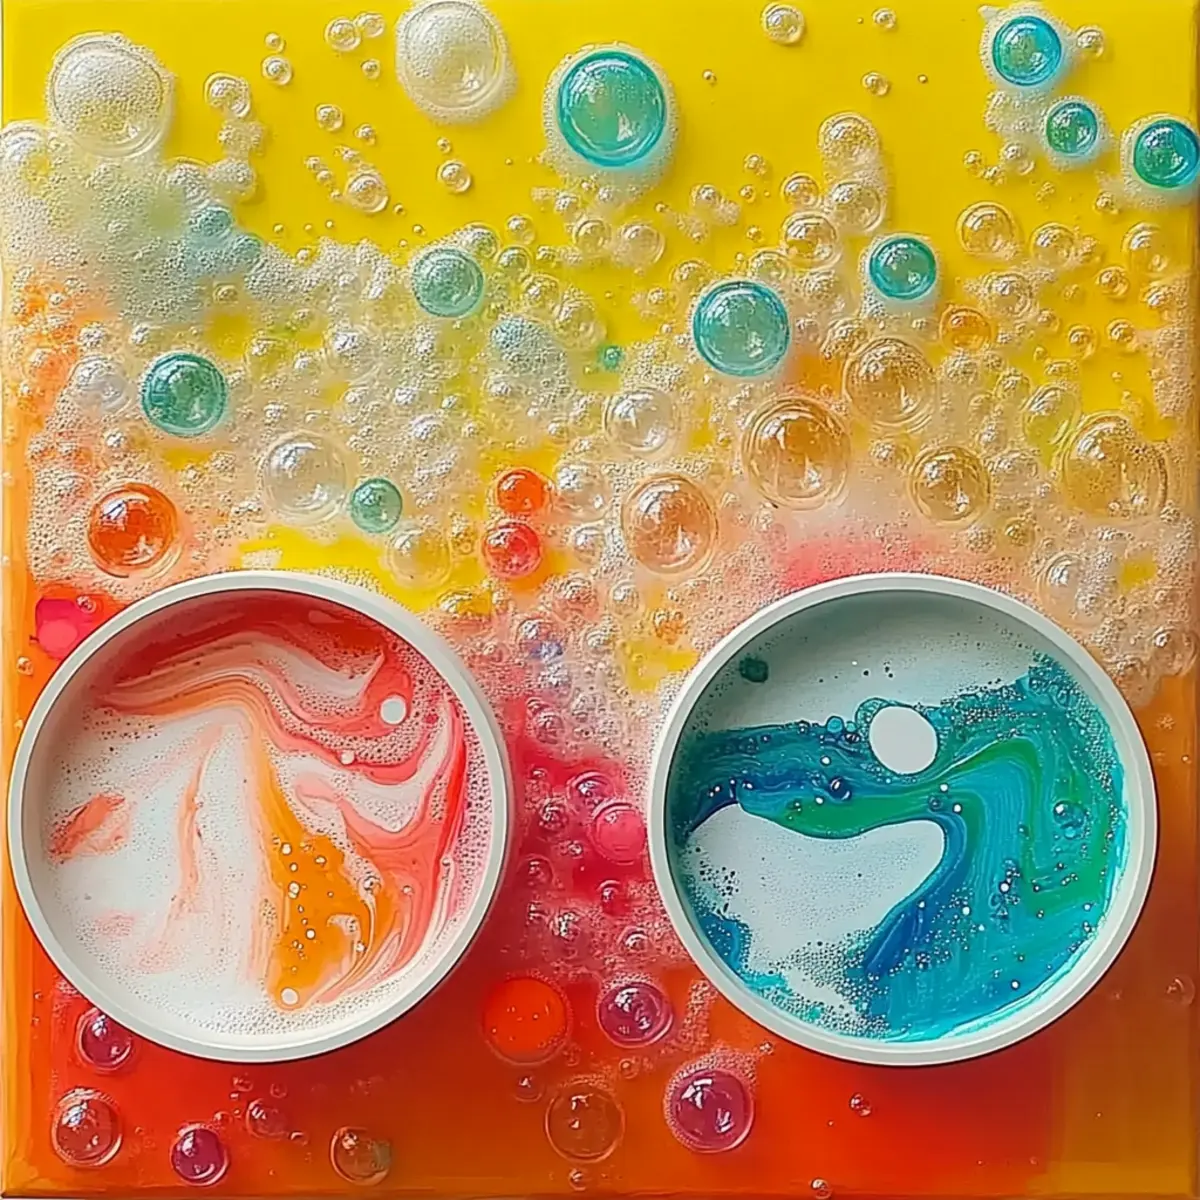
Prepare Workspace: Set up your crafting area by covering your table with a tray or table covering to catch any spills and keep everything tidy. A clean space makes the crafting experience more enjoyable!
Mix Ingredients: In separate small cups, combine liquid watercolors or food coloring with dish soap and water. Stir until you have a mixture that’s viscous yet easy to pour—this is your colorful base!
Shape Balls: Grab your straws and scoop the colorful mixture to form round shapes. Gently release the mixture onto your cardstock or watercolor paper, letting gravity do its magic as they settle into beautiful orbs.
Design Application: Use masking tape to create fun patterns on the surface of your paper. Once you’re satisfied, sprinkle glitter or apply shimmer watercolor for an extra dash of magic!
Drying: Allow your bouncy balls to dry for about 1 hour. This is a crucial step—make sure they are firm but still a tad tacky before you touch them to ensure they hold their shape perfectly.
Final Touches: Once dry, it’s time to bring your creations to life! Use washable markers to outline your designs, enhancing each bouncy ball’s visual appeal and making it truly unique.
Showcase: Finally, display your vibrant bouncy balls flat on the table. This will help maintain their shape and keep them looking fresh while you admire your colorful art pieces!
Optional: Add a sprinkle of joy by creating a mini-gallery on your wall with your bouncy ball designs!
Exact quantities are listed in the recipe card below.

Tips for the Best Rainbow Glow Bouncy Balls
Mix Consistently: Ensure your liquid and dish soap blend well; undissolved lumps can cause bouncy balls to lose shape.
Watch the Texture: Aim for a mixture that’s viscous; too watery can lead to flat balls. If it’s too thick, adjust with a splash more water.
Drying Time Matters: Keep an eye on drying; it’s crucial that bouncy balls dry firm yet slightly tacky for best results.
Color Mixing Fun: Don’t be afraid to get creative! Swirl colors together for unique color patterns, enhancing the fun of your Rainbow Glow Bouncy Balls.
Safe Crafting Space: Always cover your workspace adequately to catch spills; this will make clean-up an absolute breeze.
Enjoy your crafting adventure!
What to Serve with Rainbow Glow Bouncy Balls?
Elevate your crafting experience with delightful companions that inspire creativity and playfulness.
- Colorful Storybooks: Immerse kids in tales that spark imagination, making crafting even more magical and meaningful.
- Creative Snacks: Offer a selection of vibrant fruits like strawberries and blueberries to keep energy levels up while crafting.
- DIY Art Supplies: Encourage extra creativity with stencils, stickers, or additional paint for even more personal design options.
- Outdoor Playtime: After making your bouncy balls, head outside for some active fun—watch them bounce and brighten up the yard!
- Crafting Music Playlist: Curate a lively playlist to uplift spirits and keep everyone engaged in the crafting process.
- Themed Drinks: Serve colorful fruit punches or smoothies for a refreshing treat that complements the vibrant colors of your bouncy balls.
- Crafting Aprons: Have everyone wear cheerful aprons or T-shirts, turning the crafting adventure into a playful, coordinated event.
- Art Display Area: Designate a spot to showcase the finished bouncy balls, enhancing the joy of creation and encouraging proud displays.
Storage Tips for Rainbow Glow Bouncy Balls
Cool, Dry Place: Store your bouncy balls at room temperature in a cool, dry area to maintain their shape and longevity. Avoid direct sunlight, which can cause fading.
Airtight Container: Keep the bouncy balls in an airtight container or a resealable plastic bag to prevent them from drying out, ensuring they remain bouncy and vibrant for up to 3 weeks.
Reheating: If balls lose their bounce, you can lightly rinse them with warm water, reshape, and let them air dry to restore their original form and enjoyment.
Display Suggestions: For the best aesthetic, showcase your colorful creations in a decorative bowl or on a shelf where they can be admired without being squished or damaged.
Rainbow Glow Bouncy Balls Variations
Feel free to sprinkle your own creativity into this delightful recipe!
Essential Oils: Add a few drops of your favorite essential oil for a delightful scent that makes crafting even more enjoyable. Imagine the joyful aroma of fresh oranges while you craft!
Glow-in-the-Dark: Incorporate glow-in-the-dark powder to your mixture for bouncy balls that shine during nighttime fun. A magical surprise for the kids during evening play!
Natural Dye: Swap liquid watercolors for beet juice, turmeric, or spinach for an all-natural coloring experience. This adds an earthy texture and unique visual appeal!
Textured Elements: Mix in small, smooth pebbles or craft sand to create bouncy balls with a unique surface texture. This sturdy variation elevates the sensory experience for curious little hands.
Foam Balls: For even more bounce, you can add tiny foam balls to your mixture to create a hybrid bouncy ball. This twist will amplify the fun as they leap and roll!
Patterned Tapes: Use colorful washi or duct tape instead of masking tape for design spaces. This adds an extra artistic flair that makes your bouncy balls pop with personality.
Fruit Flavoring: Mix in powdered drink mixes or flavored gelatin for a unique fruity scent, giving each bouncy ball a delightful twist. Who knew crafting could smell this delicious?
Let your imagination run wild and adapt this recipe to fit your mood and creativity!
Make Ahead Options
These Rainbow Glow Bouncy Balls are perfect for busy home cooks who want to enjoy creative activities without the last-minute rush! You can mix the liquid watercolors, dish soap, and water in advance, allowing you to prepare this colorful mixture up to 24 hours ahead of time. Just store the mixed ingredients in airtight containers or covered cups to prevent them from drying out. When you’re ready to create, simply scoop the mixture into straws and shape the balls, followed by designing and drying them as instructed. This prep-ahead method not only saves time but ensures your crafting session is fun and stress-free, producing just as delightful results!
Rainbow Glow Bouncy Balls Recipe FAQs
How do I choose the right colors for my bouncy balls?
Absolutely! When selecting your liquid watercolors or food coloring, look for vibrant options to give your bouncy balls that eye-catching appeal. If you prefer a softer look, try natural food dyes made from fruits or vegetables. Mixing different colors can also yield stunning, unique results. Get creative and have fun experimenting!
What is the best way to store Rainbow Glow Bouncy Balls?
To keep your bouncy balls in top shape, store them at room temperature in a cool, dry place—ideally away from direct sunlight to prevent fading. An airtight container or resealable plastic bag works wonders in preserving their bounciness for up to 3 weeks. This way, you can enjoy playing with them over and over again!
Can I freeze the Rainbow Glow Bouncy Balls?
While freezing isn’t typically recommended for these homemade bouncy balls, if you want to keep them longer, you can refrigerate them for a day or two. Just make sure they’re in an airtight container to avoid moisture, which can alter their texture. Freezing might lead to a loss of elasticity and bounciness, so it’s best to stick to cool storage.
What if my bouncy balls don’t hold their shape?
Very! If your bouncy balls seem to lose their shape, it could be due to an overly watery mixture. To troubleshoot, ensure your dish soap and water mixture is thick and concentrated before forming them. If the balls are already made, you can try gently rinsing them with warm water, reshape them slightly, and air dry again to restore their form.
Are Rainbow Glow Bouncy Balls safe for young children?
Absolutely! These bouncy balls are made from non-toxic ingredients like dish soap and watercolors. However, always supervise young kids during the activity to prevent any mixing of materials they shouldn’t ingest, such as glitter or certain paints. It’s a great way to introduce safe crafting fun while keeping creativity flowing!
What can I do if my bouncy balls are too sticky?
If your bouncy balls feel sticky even after drying, it might be due to moisture from humidity. Here’s a simple fix: place them in a cool, dry room for a few hours until they firm up. If they still feel tacky, lightly dust them with cornstarch to reduce sticking while maintaining their vibrant look and bounciness!
Bubble Painting Adventure: The Best Colorful Craft for All!
Ingredients
Equipment
Method
- Prepare your workspace by covering your table with a tray or table covering.
- In separate small cups, mix liquid watercolors or food coloring with dish soap and water.
- Use straws to scoop the mixture, forming round shapes on your cardstock or watercolor paper.
- Use masking tape to create fun patterns, then sprinkle glitter or apply shimmer watercolor.
- Allow the bouncy balls to dry for about 1 hour until firm yet slightly tacky.
- Once dry, use washable markers to outline your designs, enhancing their visual appeal.
- Display your vibrant bouncy balls flat to maintain their shape.