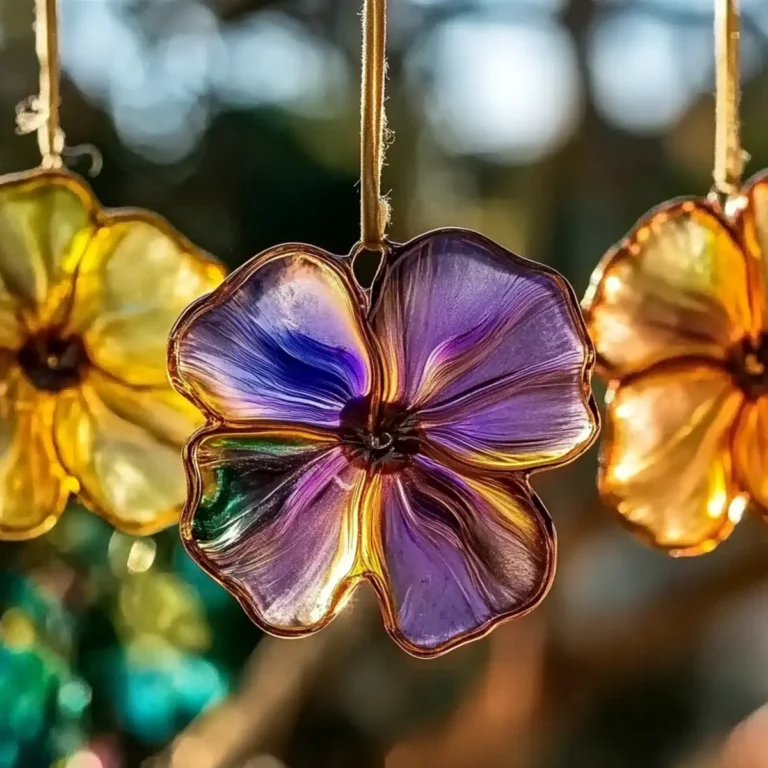
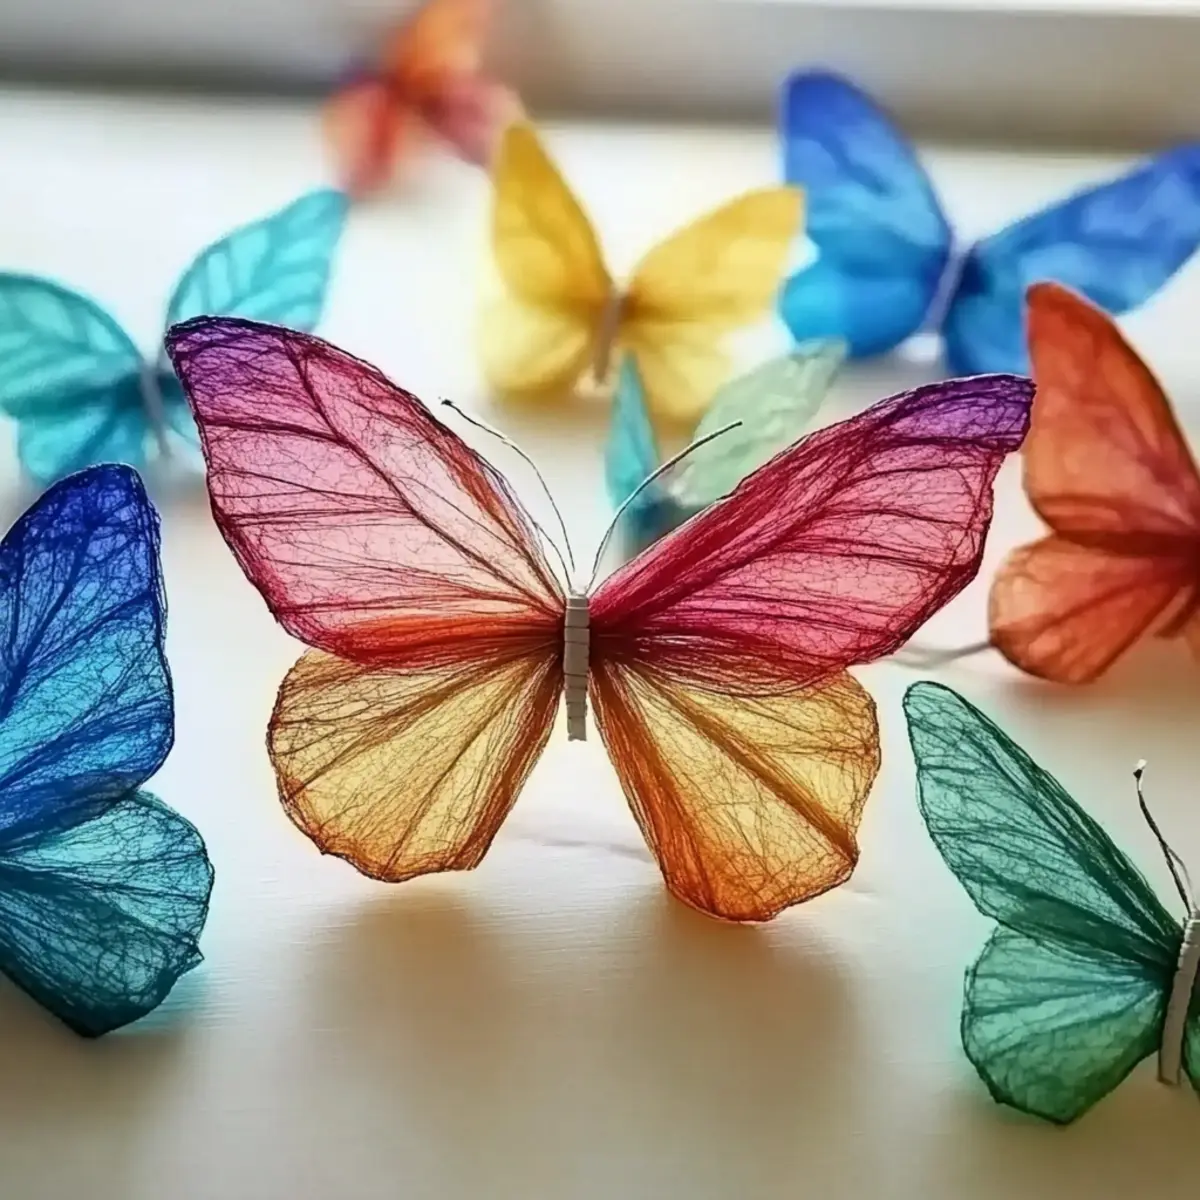
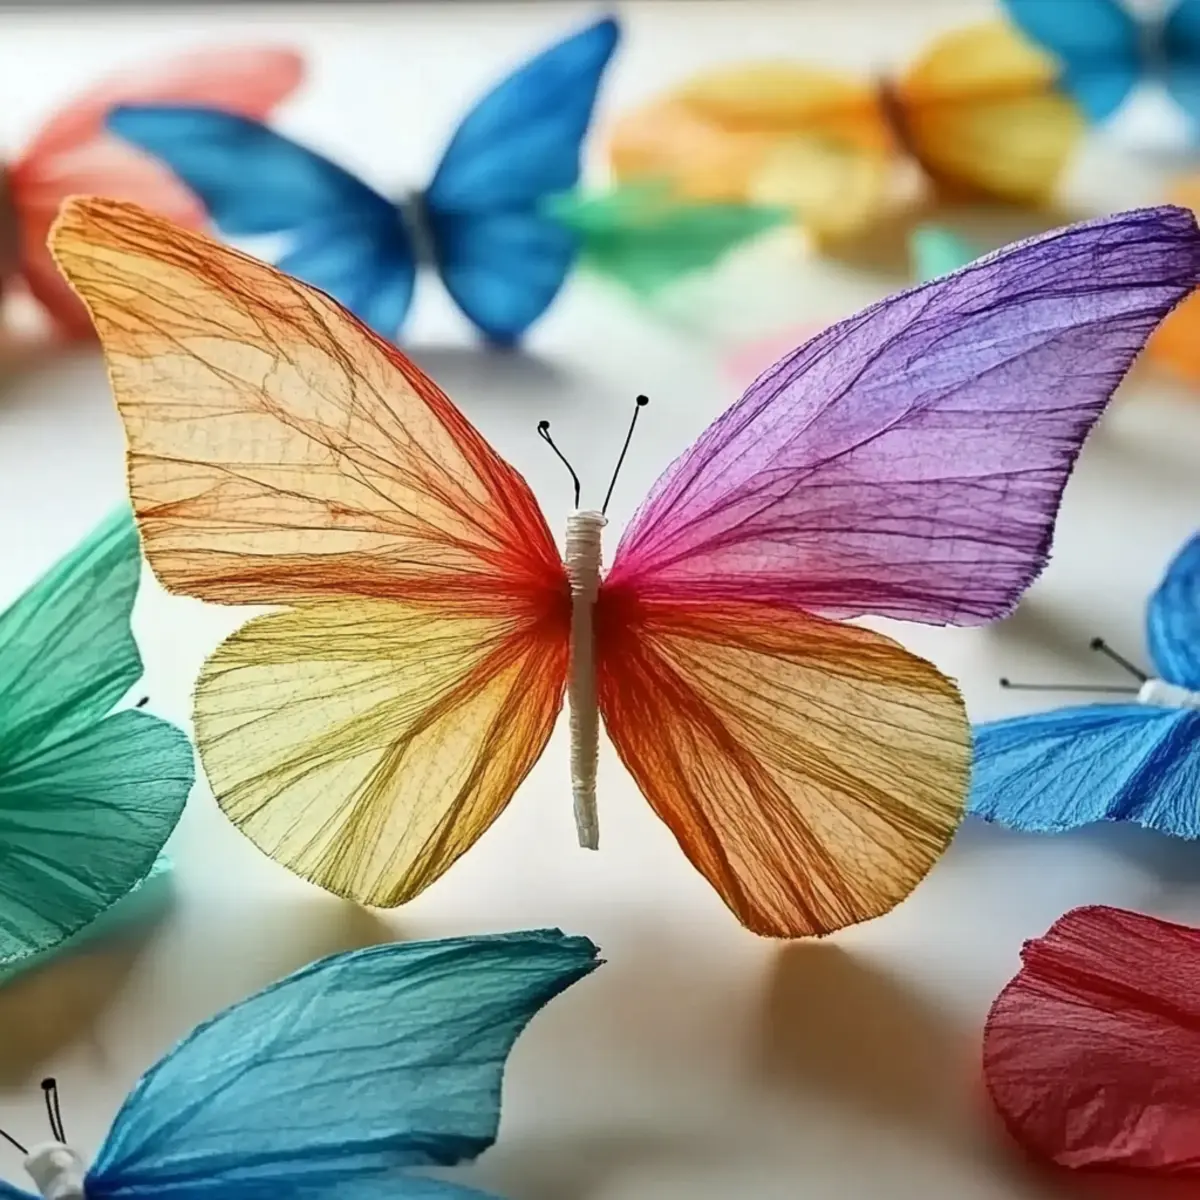
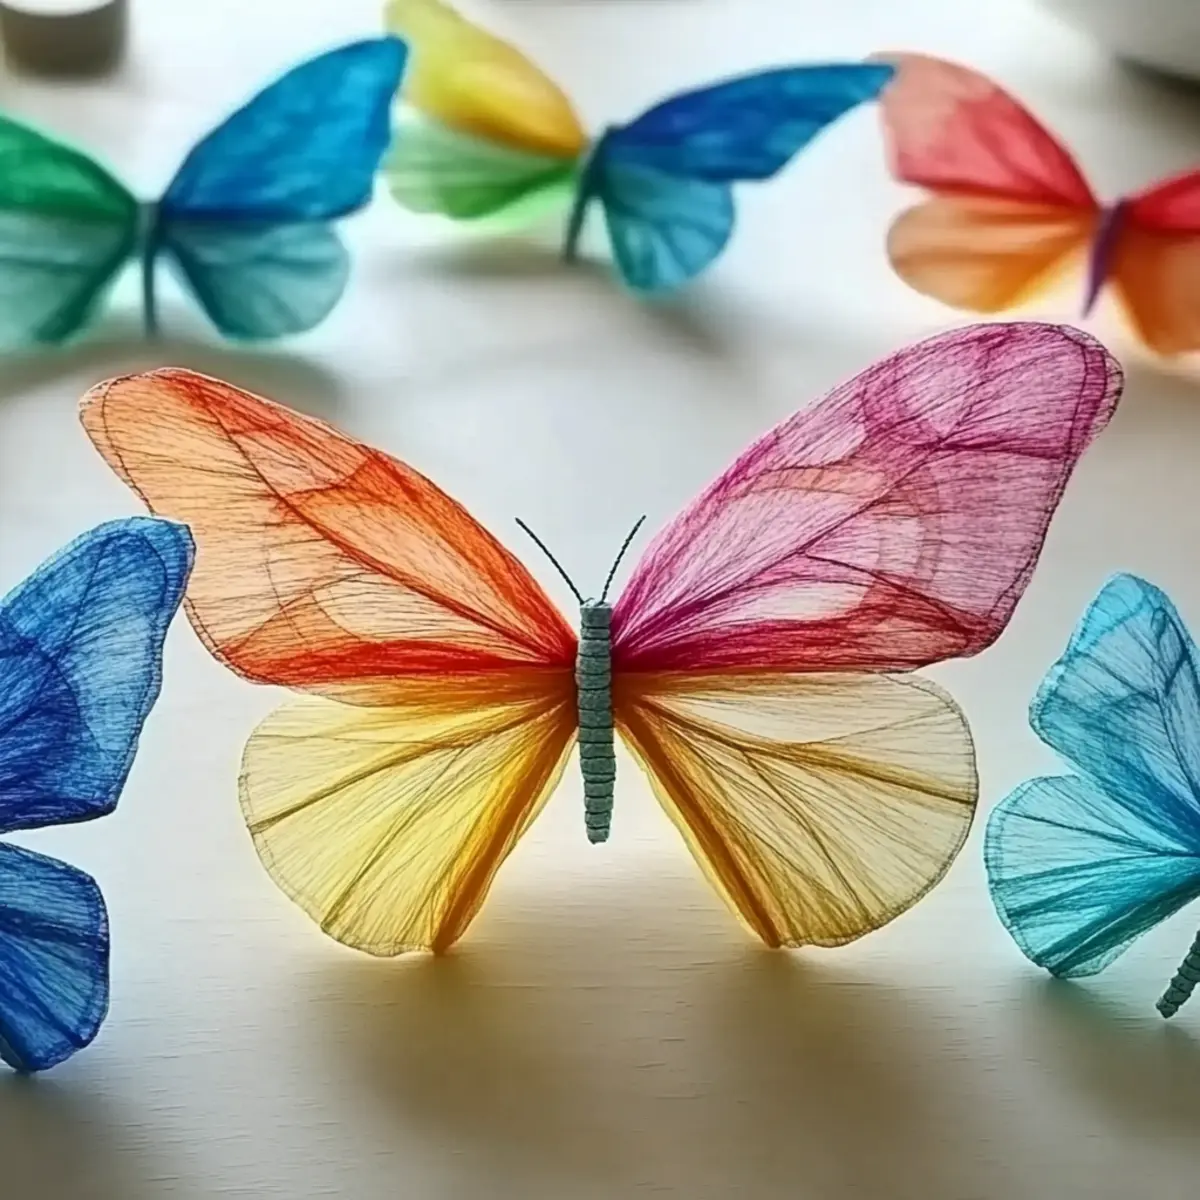
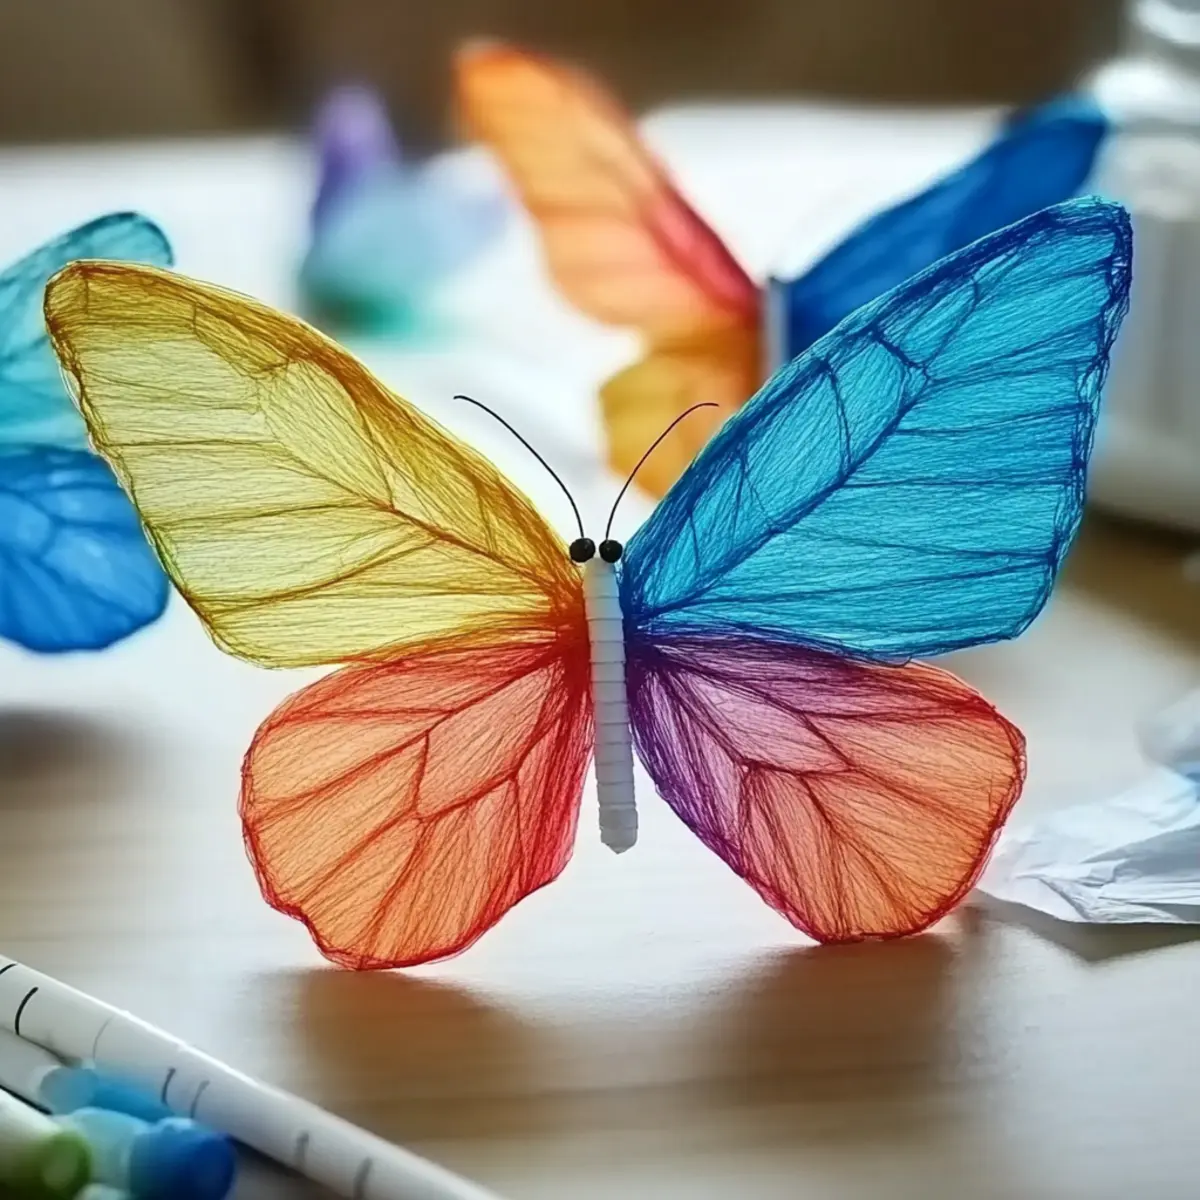
Colorful Chromatography Coffee Filter Butterflies for Kids
When the leaves started to hint at their vibrant fall colors, I found myself seeking a creative way to engage my little ones indoors. That’s when I stumbled upon the delightful world of crafting colorful butterflies using ordinary coffee filters! This whimsical project not only brightens up our space but also adds a splash of color to our day—perfect for those moments when fast-paced routines leave us craving a little creativity.
Using simple materials like washable markers and pipe cleaners, these Chromatography Coffee Filter Butterflies become exciting creations that children can personalize to their hearts’ content. As they watch colors blend magically before their eyes, this activity fosters creativity while enhancing fine motor skills. It’s the perfect way to turn a quiet afternoon into a vibrant art session that kids will adore. Grab your supplies and join me in this fun science-meet-craft adventure!
Why love Chromatography Coffee Filter Butterflies?
Engaging Creativity: This project is a fantastic way to spark creativity in kids, allowing them to express themselves while having fun.
Interactive Learning: Combine art with science as kids witness color blending in real-time—a captivating STEM experience!
Easy Setup: With minimal supplies like coffee filters and markers, preparation is a cinch, making it perfect for spontaneous crafting.
Customizable Fun: Kids can personalize their butterflies with decorations, ensuring each creation is unique.
Mess-Free Enjoyment: A simple spray bottle keeps things tidy, letting you focus on the fun!
If you’re looking for more exciting kids’ activities, check out our post on easy homemade crafts.
Chromatography Coffee Filter Butterflies Ingredients
For the Butterflies
• White Coffee Filters – A must-have base for creating colorful butterflies; unbleached filters provide the most vibrant hues.
• Washable Markers – Opt for these bold, water-based colors to decorate; they’re easy to clean and perfect for blending!
• Spray Bottle or Pipettes – Essential for applying water to the filters, which activates the color blending magic.
• Pipe Cleaners – These flexible stems form the butterfly body and antennae, adding structure to the whimsical designs.
• Tray or Baking Sheet – Keeps your workspace tidy and contains water during the coloring process, preventing messes.
Optional Decorative Items
• Googly Eyes – Add a playful touch to your butterflies, bringing them to life with personality.
• Glitter – Sprinkle some sparkle on your creations for an extra whimsical flair!
• Stickers – Let imagination run wild by personalizing butterflies with stickers of all shapes and sizes.
Embrace the fun of Chromatography Coffee Filter Butterflies and watch as your little ones transform simple materials into vibrant works of art!
How to Make Chromatography Coffee Filter Butterflies
Prepare Filters: Start by laying out the white coffee filters on a tray. This will keep your workspace tidy and allow easy access as you create your colorful butterflies.
Color Filters: Grab your washable markers and let your creativity flow! Make fun designs and bold patterns on the filters—this is where the magic begins!
Apply Water: Use a spray bottle or pipettes to lightly mist the decorated filters with water. Watch in awe as colors blend beautifully, enhancing your designs!
Dry Filters: Set the colored filters aside and let them dry completely. You may need to wait a little while, but the anticipation will make it even more exciting!
Assemble Butterflies: Once dry, gather the filters, pinch them in the middle, and secure with a pipe cleaner to create the butterfly body. It’s starting to take shape!
Decorate: This optional step is where the fun really shines! Add googly eyes, glitter, or stickers to personalize your butterflies and give them unique personalities.
Optional: For an artistic twist, try writing little wishes on the wings before assembling!
Exact quantities are listed in the recipe card below.
What to Serve with Chromatography Coffee Filter Butterflies?
Enhance the joy of your crafting session with delightful pairings that bring the experience to life!
- Colorful Fruit Platter: Fresh, vibrant fruits like strawberries, oranges, and grapes mirror the butterflies’ hues, bringing a burst of flavor to snack time.
- Homemade Lemonade: A refreshing drink that complements the creativity of the project while keeping everyone hydrated during their crafty adventure.
- Yogurt Parfaits: Layered with granola and fruit, these lightweight and nutritious treats are a perfect way to reward little crafters after their hard work.
- Veggie Sticks with Dip: Crisp veggies and a tasty dip provide a crunchy texture that balances out the sweetness of the crafts, making for a wholesome treat.
- Chocolate-Covered Pretzels: Sweet-and-salty bites that add a touch of indulgence and fun to the crafting experience, perfect for celebrating finished butterflies.
- Creative Craft-Themed Cookies: Consider baking butterfly-shaped cookies that echo the creations to reinforce the theme with a deliciously sweet treat.
- Fruit Juice Smoothies: Blend up a nutritious smoothie that’s as colorful as your butterflies, providing energy for more creative fun!
- Sparkling Water with Berries: A fizzy refreshment that’s both delightful and nutritious, adding an extra pop of color with fresh, whole berries.
Storage Tips for Chromatography Coffee Filter Butterflies
- Room Temperature: Allow your butterflies to dry fully before storing them. Keep them flat in a dry area to preserve their shape for up to two weeks.
- Fridge: To avoid any potential mold, don’t store your coffee filter butterflies in a humid environment, including the fridge.
- Freezer: While freezing isn’t recommended for these delicate creations, if you must, wrap each butterfly in parchment paper, then place them in an airtight container for up to a month.
- Long-term Display: Use a shadow box or a decorative envelope to store your Chromatography Coffee Filter Butterflies while showcasing them as vibrant decor in your home.
Variations & Substitutions for Chromatography Coffee Filter Butterflies
Feel free to explore these delightful twists to make this craft even more exciting for your little ones!
Monochrome Filters: Use only one color on your filters to showcase varying saturations. It reveals the beauty of color depth and creates a stunning visual effect!
Glitter Galore: Mix glitter glue with the colors on your filters for a sparkly finish. The glitter adds a magical touch, perfect for little ones who love a bit of bling!
Metallic Markers: Incorporate metallic markers for a shimmering effect. Kids will adore how their butterflies catch the light, making them extra special.
Personalized Wishes: Have children write their names or tiny wishes on the filters before assembly. This adds a heartfelt touch that makes their butterflies truly one-of-a-kind!
Bright Colors: Experiment with neon markers for vivid, eye-popping designs. With colors that shout, your butterflies will stand out even more in any window!
Nature-Inspired Colors: Use earthy tones for a nature-themed twist. Consider greens and browns to mimic the hues of real butterflies in the wild.
Small Accessories: Incorporate tiny ribbon bows, fabric scraps, or buttons for added detail on the butterfly’s body. This transforms them into little treasures full of character!
Themed Sets: Create butterflies based on seasonal themes—pastel colors for spring or deep reds and oranges for autumn. It’s an engaging way to connect crafting with the changing seasons!
Expert Tips for Chromatography Coffee Filter Butterflies
Choose the Right Markers: Use only water-based markers for the best color blending results. Avoid permanent markers, as they won’t create the desired effects.
Patience is Key: Allow the colored filters to dry completely before assembling. Wet filters can stick together, ruining your beautiful designs.
Supervise Craft Time: Always keep an eye on younger children during the crafting process. Small decorative items, like googly eyes, can pose a choking hazard.
Embrace Messiness: While a spray bottle minimizes mess, expect a splash or two! Cover your workspace with newspapers or a plastic sheet for easy cleanup.
Explore Different Variations: Get creative with monochrome filters or mix in glitter to create unique Chromatography Coffee Filter Butterflies every time!
Make Ahead Options
These Chromatography Coffee Filter Butterflies are perfect for busy home cooks looking to engage their children without the last-minute rush! You can prepare the coffee filters up to 24 hours in advance by coloring them and then spraying them with water to enhance the designs. Simply lay the wet filters flat on a baking sheet to dry completely before storing them in an airtight container, ensuring they remain vibrant and free from sticking. When you’re ready to finish the project, assemble the dried filters using pipe cleaners and let your kids personalize each butterfly with googly eyes or glitter. This way, you’ll have more quality time to create and enjoy together!
Chromatography Coffee Filter Butterflies Recipe FAQs
What type of coffee filters should I use?
I recommend using white unbleached coffee filters for the best results! They provide more vibrant colors compared to bleached ones because they’re less processed. When you color them, the colors come out bold and beautiful, allowing your butterflies to really stand out.
How should I store my finished butterflies?
To maintain their shape, store your Chromatography Coffee Filter Butterflies flat in a dry area, away from humidity. They should last for up to two weeks if properly stored. For a more decorative touch, consider placing them in a shadow box so everyone can admire your child’s handiwork!
Can I freeze my coffee filter butterflies?
Although it’s generally not recommended to freeze these delicate creations, if you prefer to keep them longer, you can! Wrap each butterfly in parchment paper, then place them in an airtight container. They can last up to one month this way, but make sure to thaw them gently to avoid any damage.
What if the colors don’t blend well?
No worries! If the colors aren’t blending satisfactorily, make sure you’re using water-based markers, as permanent markers won’t activate the blending effect. Additionally, ensure you’re applying enough water evenly with the spray bottle—this will help the colors merge beautifully. If there’s still an issue, I suggest giving it another light misting!
Are there any allergy considerations for this craft?
Great question! While the materials are generally safe, always check labels for allergens if your children have specific sensitivities, especially regarding decorative items like googly eyes or glitter. It’s also wise to supervise younger kids to prevent any choking hazards from small parts.
Can I personalize the butterflies further?
Absolutely! Personalizing is where the fun often comes alive! Kids can write their names, little wishes, or draw shapes on the wings using markers. Additionally, you can add stickers or glitter for that extra sparkle—every butterfly can tell its own special story!
Colorful Chromatography Coffee Filter Butterflies for Kids
Ingredients
Equipment
Method
- Prepare Filters: Start by laying out the white coffee filters on a tray.
- Color Filters: Use washable markers to create fun designs on the filters.
- Apply Water: Lightly mist the decorated filters with water using a spray bottle.
- Dry Filters: Set the colored filters aside to dry completely.
- Assemble Butterflies: Gather the filters, pinch in the middle and secure with a pipe cleaner.
- Decorate: Optionally add googly eyes, glitter, or stickers to personalize.