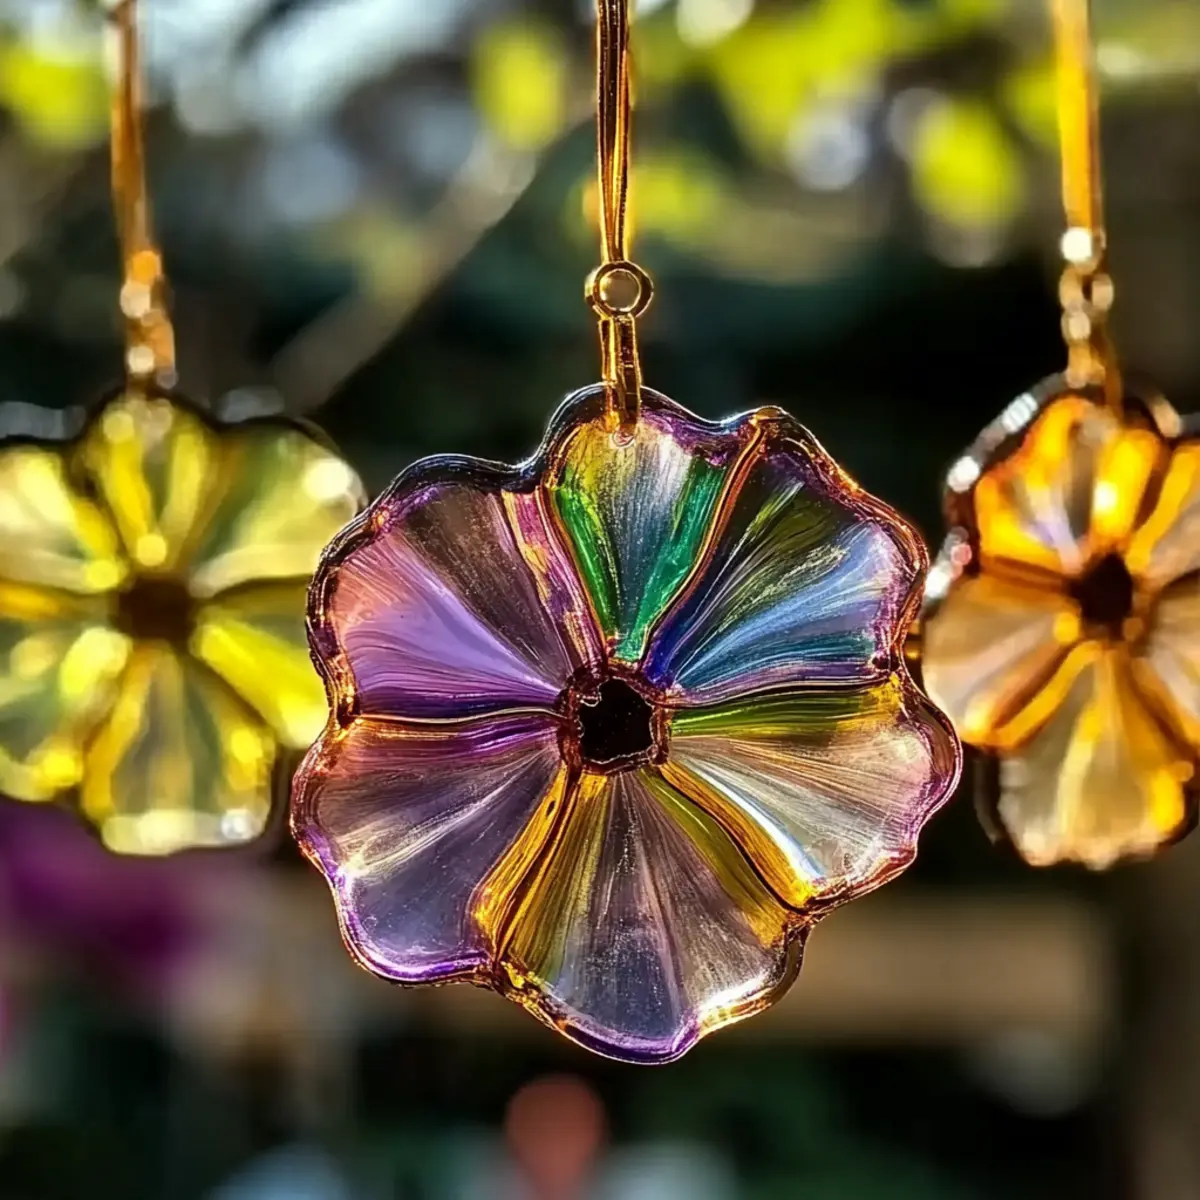
Brighten Up Your Home with DIY Bioplastic Suncatchers!
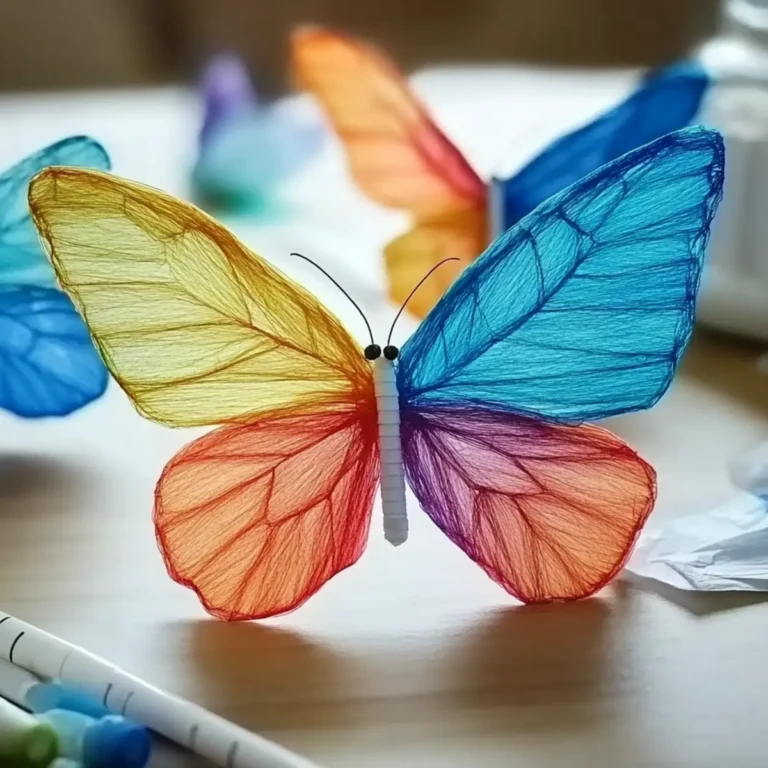
When the sun streams through the window on a lazy afternoon, it feels like a gentle reminder to brighten up my space. That’s when a wave of inspiration hit me, sparking a fun and eco-friendly project—DIY Bioplastic Suncatchers! Imagine creating vibrant, colorful masterpieces that not only uplift your environment but also embrace the beauty of sustainable crafting.
With simple, non-toxic ingredients that you probably already have in your kitchen, this whimsical project is perfect for families, solo crafters, and anyone longing to connect with nature while indulging their creative side. Plus, as each suncatcher catches the light, you’ll delight in how its translucent colors dance and bring joy to your home.
So, roll up your sleeves and get ready to transform a few common staples into magical suncatchers. This quick and straightforward craft promises a fun experience, all while celebrating our commitment to a greener planet. Let’s dive in!
Why DIY Bioplastic Suncatchers Are a Must-Try?
Unique and eco-friendly: These DIY Bioplastic Suncatchers are a vivid expression of creativity while being kind to the planet.
Simple ingredients make it accessible for anyone, meaning you can whip up beautiful crafts without breaking a sweat.
Endless customization allows for a personal touch—add glitter, or mix up natural colors for unique designs!
Instant gratification: You’ll see the results of your efforts unfolding in just a few hours as they dry and catch the sunlight.
Perfect for all ages: Whether you’re working with kids or enjoying a solo session, this project brings joy and creativity to everyone involved.
DIY Bioplastic Suncatcher Ingredients
For the Mixture
- Cornstarch – Thickening agent that provides structure; no substitution needed.
- Water – Essential liquid to dissolve cornstarch; standard tap water is perfect.
- Glycerin (optional) – Adds flexibility to finished suncatchers; you can skip it for a firmer texture.
- Vinegar – Enhances the mixture’s flavor and adds a slight tang; use white or apple cider vinegar for best results.
- Food Coloring (optional) – Tints your suncatchers vibrantly; feel free to swap with natural dyes if desired.
For Assembly
- Wax Paper or Parchment Paper – Needed for laying out and drying suncatchers; any non-stick paper will work fine.
- Scissors – Necessary for cutting out shapes once the suncatchers have dried, so keep them handy.
- Craft Knife or Hole Punch (optional) – Useful for creating hanging holes if you want to add that personal touch.
For Hanging
- String, Yarn, or Ribbon – Perfect for suspending your beautiful suncatchers; variations in color can enhance visual appeal.
- Flat Surface (like a baking sheet) – Ideal for laying out your mixture to dry evenly.
With these simple ingredients, you’re well on your way to creating stunning DIY Bioplastic Suncatchers that are not just fun to make but also gentle on our beloved planet!
How to Make DIY Bioplastic Suncatchers
Combine Ingredients: In a saucepan, mix cornstarch, water, vinegar, and glycerin (if using). Stir well until the mixture is smooth and free of lumps—this will be your magical base.
Heat the Mixture: Place the saucepan over medium heat, and stir constantly. Watch closely as the mixture begins to thicken in about 10 minutes; it should turn into a gel-like consistency.
Cool Slightly: Once thickened, remove the saucepan from the heat, and let it cool for a few minutes. Knowing how and when to cool this mixture is key for the next steps to shine!
Add Color: Stir in your chosen food coloring until it is fully blended. This is where your creativity can flourish, so don’t hold back!
Spread the Mixture: Pour the colorful mixture onto wax or parchment paper, spreading it gently to about ½ inch thick. Use a spatula or the back of a spoon for even spreading.
Shape Your Art: While the mixture is still wet, shape it as desired. Use cookie cutters or your hands to create fun designs, and then let it dry completely—this can take several hours to overnight.
Cut Out Shapes: Once the suncatchers are dry, carefully cut out the shapes using scissors. If you want to hang them, use a craft knife or hole punch to create holes, adding a little flair.
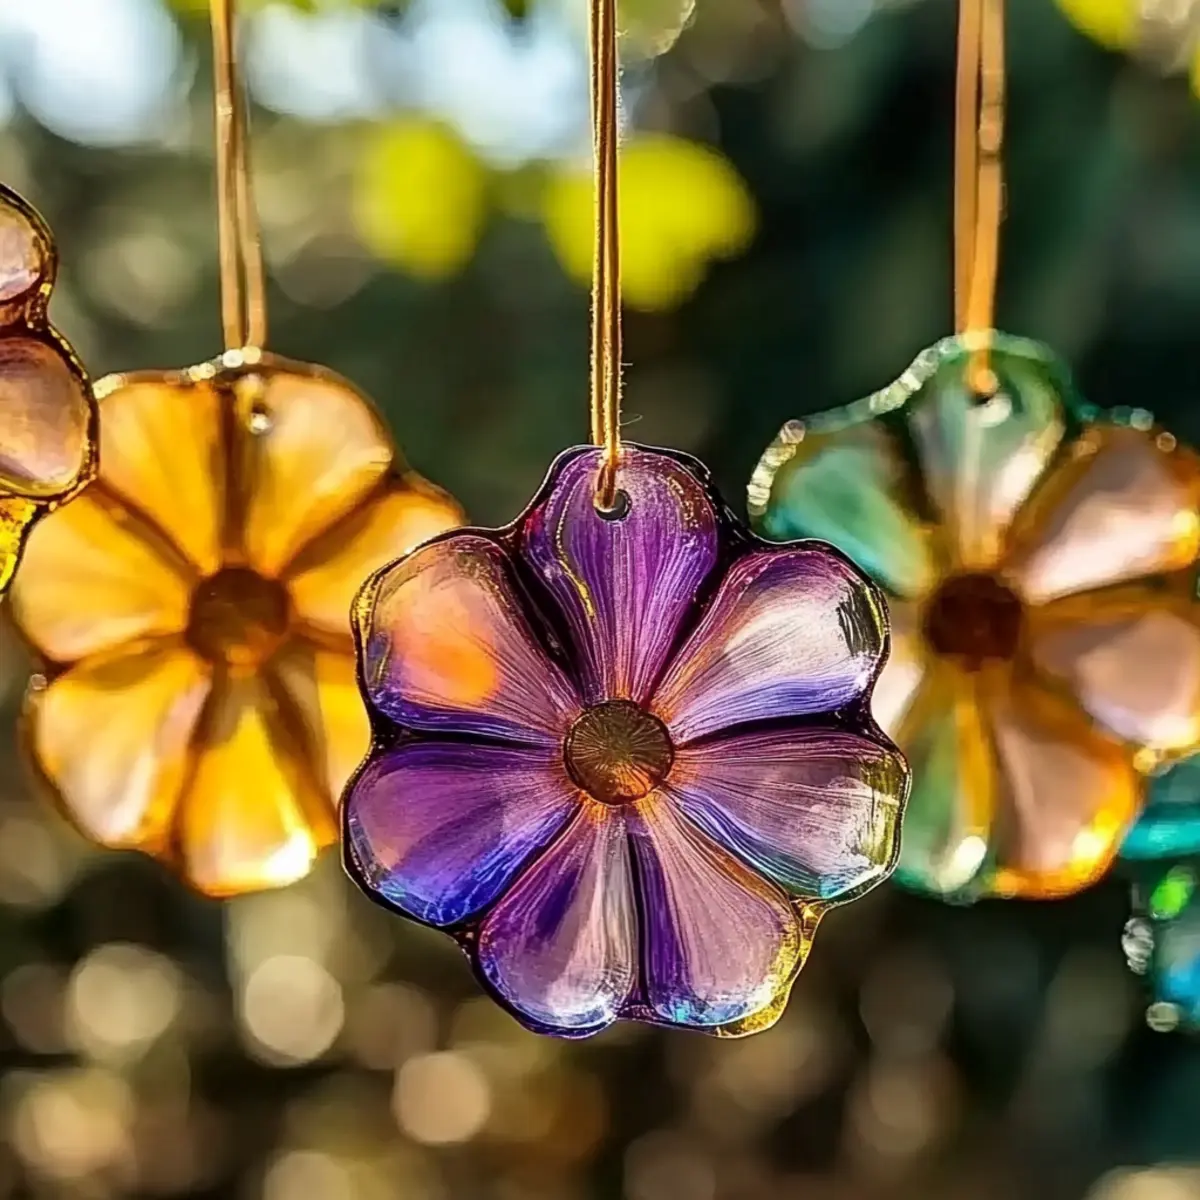
Hang and Enjoy: Thread string, yarn, or ribbon through the holes and display them in sunny windows. Sit back and watch as the light transforms your art into a magical wonderland!
Optional: Add glitter to the mixture before spreading for extra sparkle!
Exact quantities are listed in the recipe card below.
DIY Bioplastic Suncatchers Variations
Feel free to get creative with these delightful suncatcher variations that will make your crafting experience even more enjoyable!
Natural Colorants:
Experiment with beet juice, turmeric, or blueberries to dye your suncatchers naturally. These earthy hues will add a beautiful, organic touch.Glitter Boost:
Add biodegradable glitter to the mixture before spreading for a sparkling finish. It transforms your suncatchers into magical window displays that twinkle in the sunlight.Textured Add-Ins:
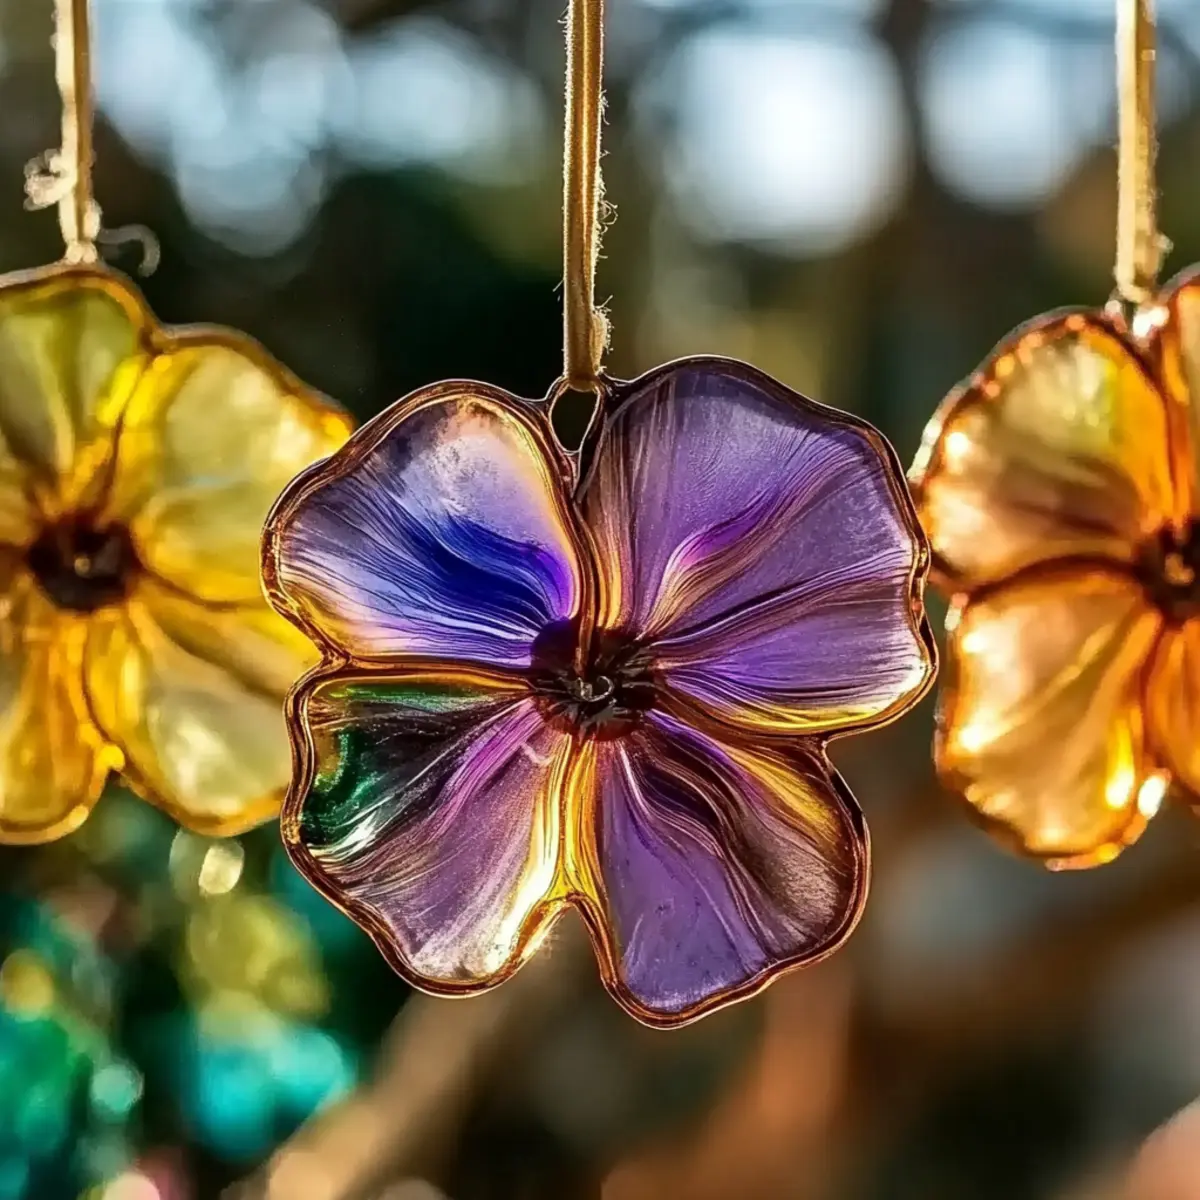
Try mixing in dried flowers or leaves to create a botanical design. The natural textures will bring a gorgeous, rustic charm to your suncatchers.Layered Effects:
Pour several thin layers of different colors in a flat surface, allowing each layer to set slightly before adding the next. This creates a stunning ombre effect that catches the light beautifully.Unique Shapes:
Use cookie cutters or shape the mixture by hand into fun designs, like animals or seasonal themes. Personalizing your suncatchers can create lasting memories while adding flair to your home.Scented Suncatchers:
A few drops of essential oils can be added to the mixture for a light fragrance when the sun warms them. Choose calming scents like lavender or uplifting citrus for a multisensory experience.Ombre Effect:
Add more food coloring to one edge of the mixture and less to the other, creating a beautiful gradient. As the sun shines through, expect breathtaking contrasts.Hanging Variations:
Instead of traditional strings, try using colorful washi tape or decorative twine for an extra design element. It’s a fun way to showcase your unique style!
Make Ahead Options
These DIY Bioplastic Suncatchers are perfect for busy home cooks looking to save time during the week! You can prepare the cornstarch mixture up to 24 hours in advance by following steps 1-4, then refrigerate it in an airtight container to maintain its quality. Just before you’re ready to create, gently reheat the mixture on the stovetop while stirring, as this will refresh its consistency. After spreading the mixture and cutting out shapes, leave the suncatchers to dry completely for several hours to overnight, ensuring they’re ready to catch the sunlight. This way, you can enjoy making beautiful crafts without the rush, bringing cheer to your home!
How to Store and Freeze DIY Bioplastic Suncatchers
Room Temperature: Keep your finished suncatchers in a cool, dry location away from direct sunlight to prevent them from fading or becoming too sticky.
Fridge: It’s not recommended to refrigerate your suncatchers, as excess moisture can cause them to warp.
Freezer: Suncatchers don’t freeze well due to their delicate nature. Store them at room temperature to maintain quality.
Reheating: If suncatchers become sticky, gently reheat them in a warm area and reshape if needed. Enjoy your eco-friendly creations as they catch the light beautifully!
What to Serve with Magical Eco-Friendly Suncatchers?
Add a touch of warmth and creativity to your crafting session by showcasing your beautiful suncatchers in style.
Fresh Lemonade: This refreshing drink’s citrusy zing perfectly complements your colorful suncatcher creations, adding a bright touch to your crafting atmosphere.
Herbal Tea: A soothing cup of chamomile or mint tea will enhance the tranquility of your crafting experience while providing a cozy contrast to your vibrant suncatchers.
Fruit Platter: A colorful array of seasonal fruits stimulates the senses and keeps energy levels up while you design your bright masterpieces.
Veggie Dippers: Crunchy vegetables served with a light dip add a fresh crunch to your craft time, balancing out the sweetness of your snacks.
DIY Crafting Playlist: While not a physical item, creating a cheerful playlist of your favorite tunes can infuse your crafting space with positive vibes, setting the perfect mood.
Crafty Baked Treats: Enjoying cookies or brownie bites while working on your suncatchers brings warmth and happiness, much like the joy of your artistic creations.
Expert Tips for DIY Bioplastic Suncatchers
Steady Stirring: Always stir the mixture continuously while heating; this prevents any burning and ensures a smooth texture throughout.
Drying Location: Choose a cool, well-ventilated area for drying your suncatchers. This helps expedite drying time and prevents them from becoming too sticky.
Color Experimentation: Don’t hesitate to mix different food coloring or natural dyes! This can create stunning gradients and unique patterns for your DIY bioplastic suncatchers.
Storage Solutions: If you want your suncatchers to last longer, store them in a cool, dry place away from direct sunlight to avoid fading.
Kid-Friendly Craft: When working with children, supervise during the heating process to ensure safety, as the saucepan will be hot.

DIY Bioplastic Suncatchers Recipe FAQs
How do I choose the right cornstarch for this recipe?
Absolutely! When selecting cornstarch, look for brands that are pure, without any additives or anti-caking agents. The texture should be fine and powdery. Most regular grocery store brands work perfectly.
What is the best way to store the finished suncatchers?
To store your DIY Bioplastic Suncatchers, keep them in a cool and dry place, away from direct sunlight. This prevents fading and maintains their vibrancy. Ideally, a closed container or zip-top bag for flat designs is perfect. They can last anywhere from a few weeks to several months if cared for properly.
Can I freeze my suncatchers to extend their shelf life?
No, it’s best not to freeze your suncatchers, as the delicate texture may not withstand extreme cold. Instead, store them at room temperature to keep them intact. If they ever get sticky, gently reshape them in a warm area—no freezing necessary!
What can I do if my mixture burns on the stove?
If the mixture begins to burn, it can affect the texture and the final result. Remove the pan from the heat immediately, and let it cool. If the mixture has solidified or has a burnt taste, it’s best to start over to ensure your suncatchers turn out beautifully.
Are these suncatchers safe for pets and children?
Very! These DIY Bioplastic Suncatchers are made from non-toxic ingredients and are safe for kids and pets alike. However, always supervise young children during crafting sessions to ensure safety and guidance during heating steps.
Can I use natural dyes instead of food coloring?
Absolutely! Feel free to experiment with natural dyes. Vegetable juices, beet juice for reds, or turmeric for yellows can provide unique colors if you prefer to avoid synthetic options. Adjust the amounts to achieve your desired shades!
Brighten Up Your Home with DIY Bioplastic Suncatchers!
Ingredients
Equipment
Method
- Combine cornstarch, water, vinegar, and glycerin (if using) in a saucepan. Stir until smooth.
- Heat the saucepan over medium heat, stirring constantly until the mixture thickens, about 10 minutes.
- Remove from heat and let the mixture cool for a few minutes.
- Stir in food coloring until fully blended.
- Pour the mixture onto wax or parchment paper, spreading it to about ½ inch thick.
- Shape the mixture as desired using cookie cutters or by hand. Let it dry completely, which may take several hours to overnight.
- Once dry, cut out shapes with scissors and create holes for hanging if desired.
- Thread string, yarn, or ribbon through the holes and display in sunny windows.