Irresistibly Festive Christmas Cake Pops Recipe You’ll Love
As the holiday season sweeps in, there’s something truly enchanting about the kitchen filled with sweet aromas and laughter. Picture the hustle and bustle of family gatherings, where everyone’s smiling and sharing delicious treats. That’s precisely what these Festive Christmas Cake Pops bring to the table!
In just a few simple steps, these charming bites transform moist cake and creamy frosting into colorful, merry pops, perfect for delighting loved ones or as a cheerful edible gift. Their vibrant coating and festive sprinkles add a dash of holiday magic, making each pop not just a treat but a centerpiece of joy. Whether you’re looking to impress at a holiday party or simply indulge at home, these cake pops are versatile enough to please any palate! Let’s dive into this jolly recipe that promises to fill your gatherings with sweetness and cheer.
Why will you adore this Festive Christmas Cake Pops Recipe?
Delightfully Simple: This recipe shines with its easy-to-follow steps, making it a perfect project for both novice and experienced bakers.
Customizable Creations: Unleash your creativity by experimenting with different flavors and festive decorations!
Crowd-Pleasing Treats: These colorful cake pops are guaranteed to be a hit at holiday gatherings, charming both kids and adults alike.
Guilt-Free Indulgence: With just around 160 calories per pop, you can enjoy these treats without the holiday splurges weighing you down.
Perfect Gifts: Package them beautifully, and they become an enchanting edible gift that spreads joy—ideal for friends, family, or coworkers.
Ready to make your kitchen a hub of festive joy? These pops will be the highlight of your celebrations!
Festive Christmas Cake Pops Ingredients
• To craft these delightful treats, gather the essential ingredients below!
For the Cake Base
- Boxed Cake Mix – This provides the foundation flavor. Feel free to replace it with your favorite homemade cake recipe for added personalization.
- Frosting – This adds richness and serves as a binder; consider using cream cheese frosting for a tangy twist!
For the Coating
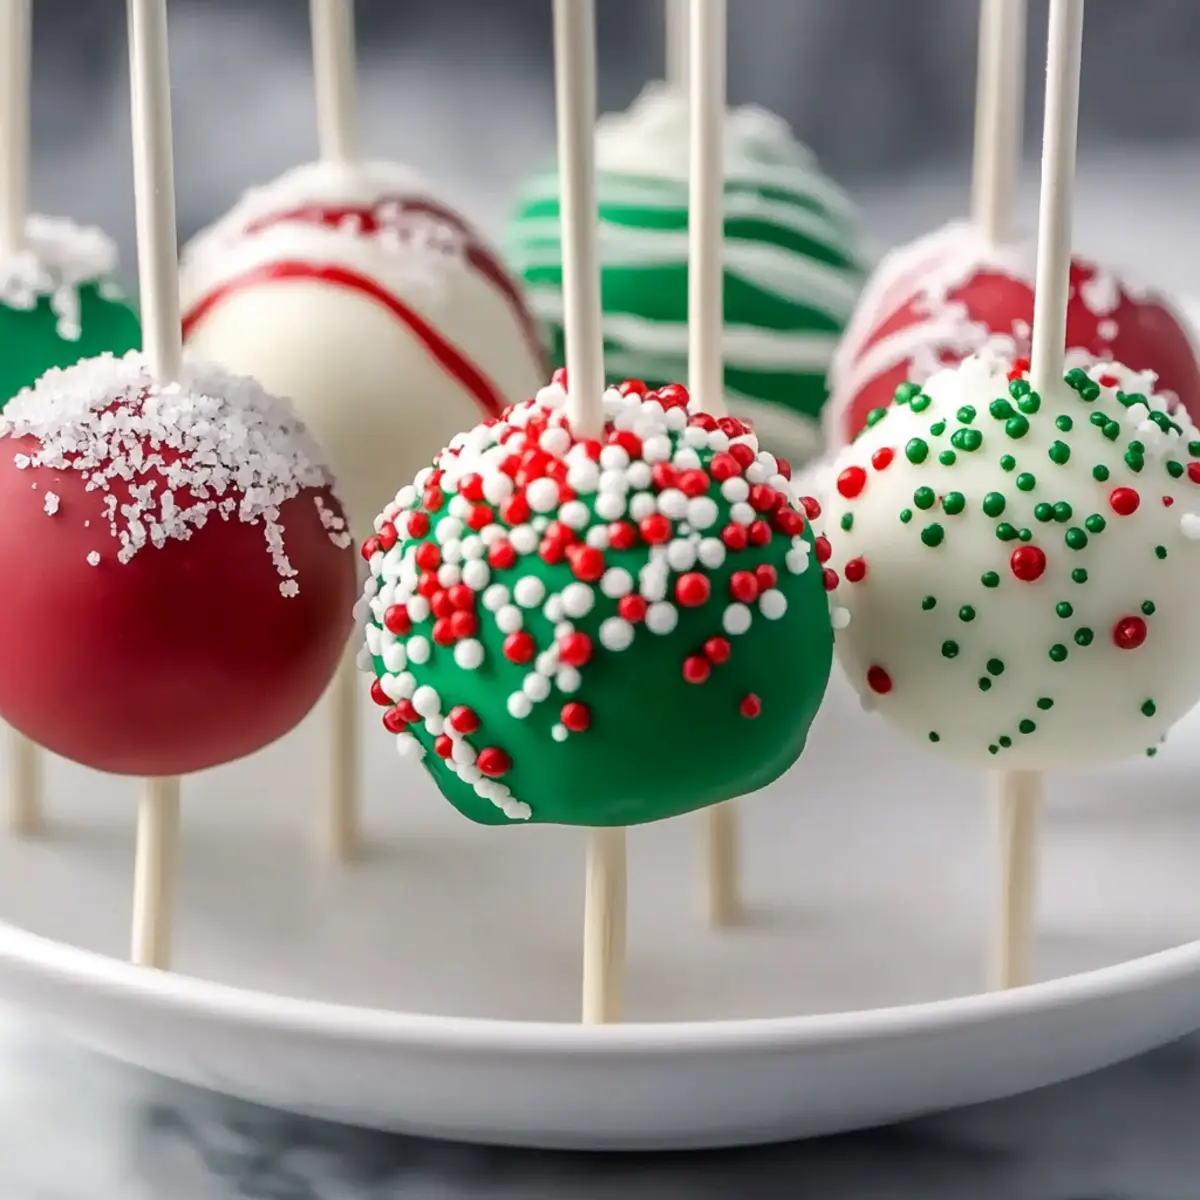
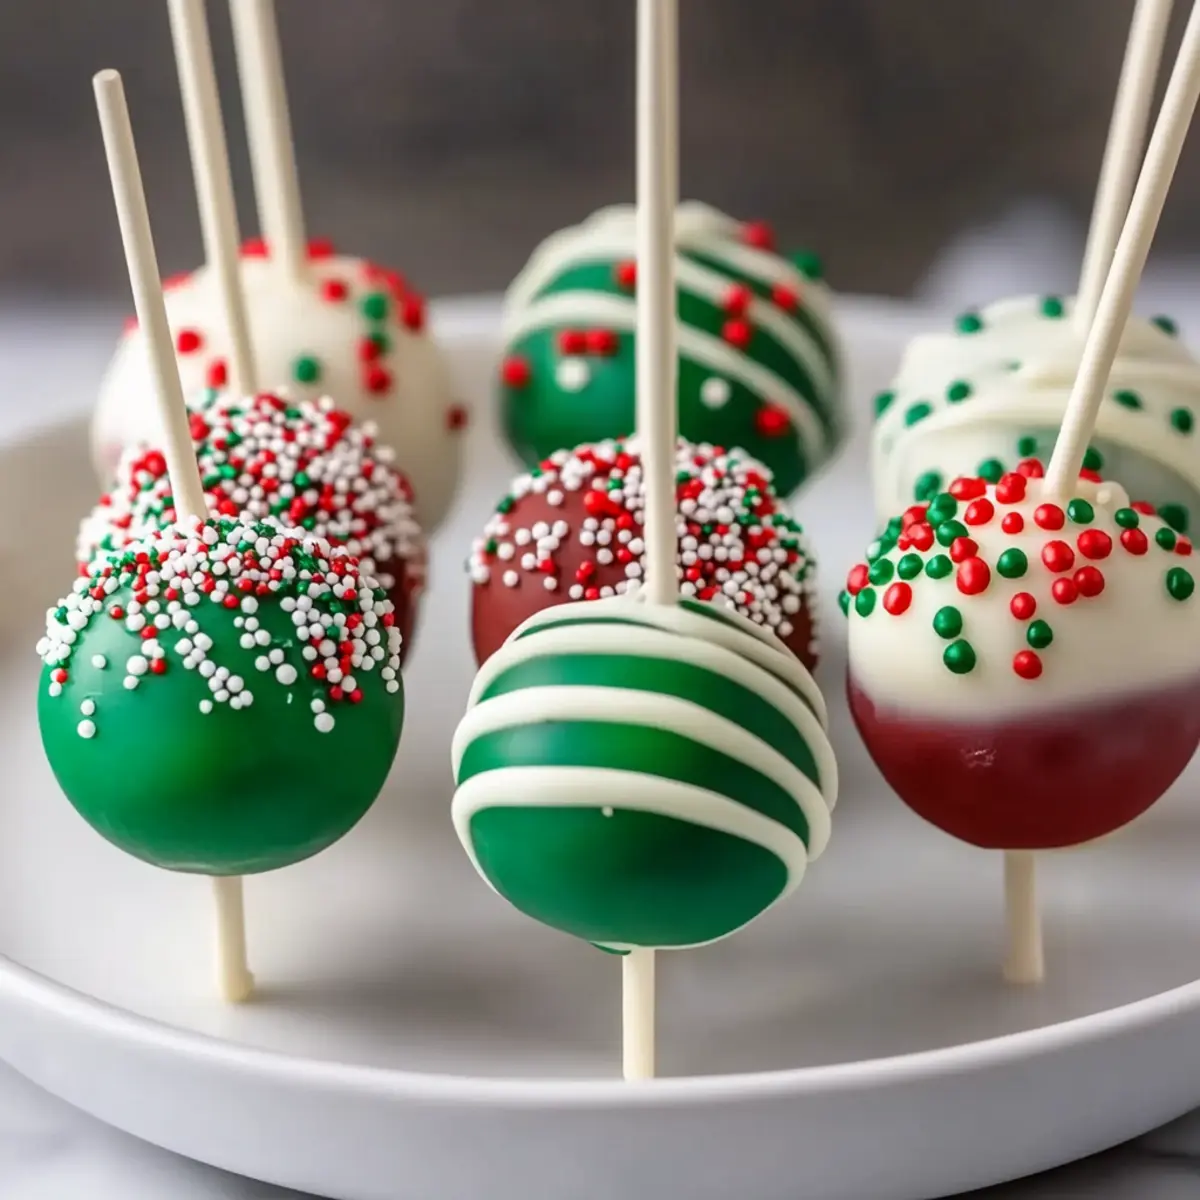
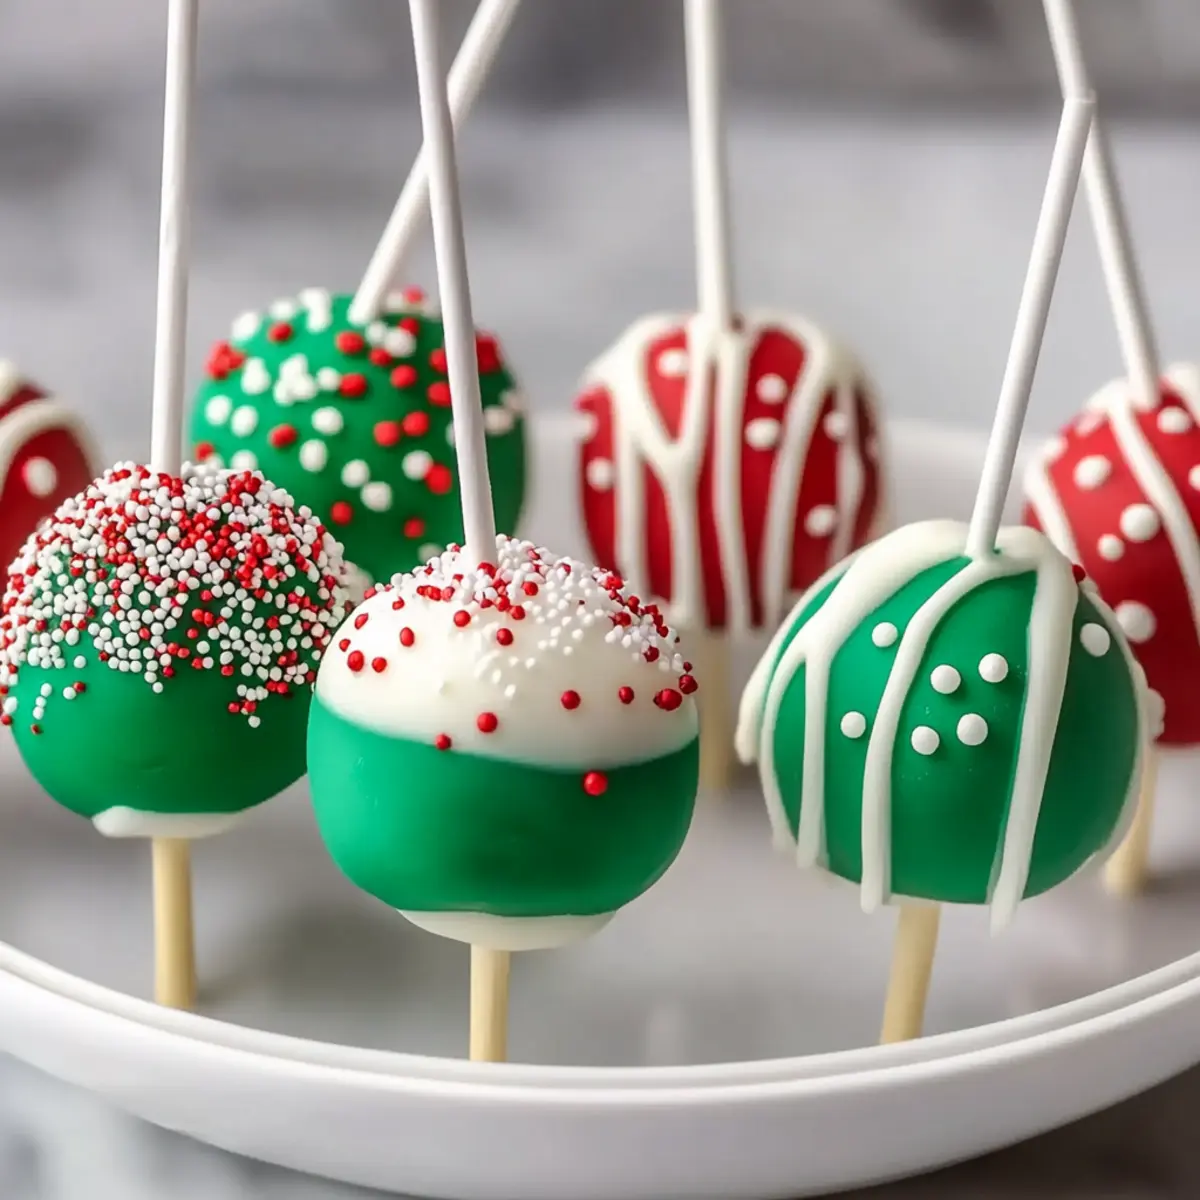
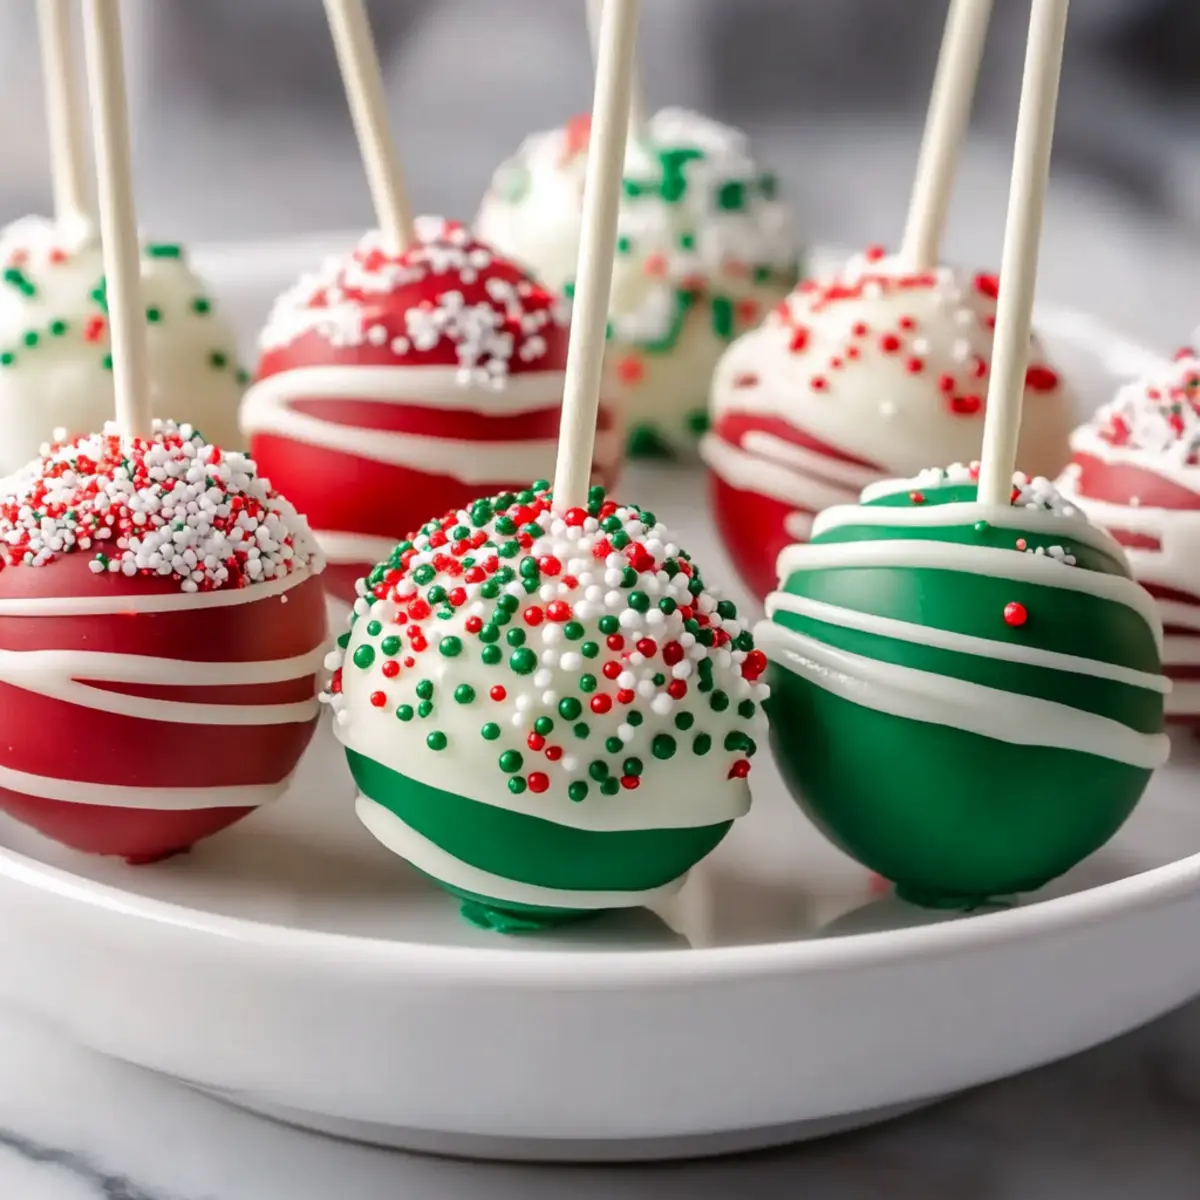
- Candy Melts – These offer a colorful, shiny finish to your pops. Choose any color to match your festive theme, adding to the appeal of your Festive Christmas Cake Pops!
For Assembly
- Lollipop Sticks – These make for easy handling and presentation of your scrumptious pops, ensuring they stay upright while drying.
For Decoration
- Sprinkles – A decorative touch that enhances visual appeal; opt for holiday-themed sprinkles to elevate your festive spirit!
How to Make Festive Christmas Cake Pops
Prepare Cake Mix: Start by following the package instructions for your boxed cake mix. Bake it in a preheated oven until a toothpick comes out clean. Allow the cake to cool completely before proceeding.
Crumble the Cake: Once the cake is cool, crumbling it into fine crumbs in a large mixing bowl. This texture will create the perfect consistency for your cake pops.
Mix with Frosting: Add one cup of frosting to the crumbled cake and mix until fully combined. The mixture should hold its shape when pressed together, creating a deliciously rich dough.
Shape the Pops: Roll tablespoon-sized portions of the mixture into balls and place them on a parchment-lined baking sheet. Refrigerate for at least one hour, or freeze for about 20 minutes to firm them up.
Melt Candy: In separate bowls, microwave your candy melts in 30-second intervals, stirring in between until smooth. This will create the glossy coating for your cake pops.
Insert Sticks: Dip the tip of a lollipop stick into the melted candy and then insert it halfway into each chilled cake ball. Chill again briefly for the coating to set and hold the sticks in place.
Coat the Cake Balls: Dip each cake ball into the melted candy until fully coated, allowing excess to drip off. Before the coating hardens, sprinkle your festive toppings on for a final touch of cheer!
Dry Completely: Let your finished cake pops stand upright in a glass or foam block to dry completely. This will help the coating set and prevent any mess.
Optional: Add a drizzle of contrasting melted candy on top for added visual flair!
Exact quantities are listed in the recipe card below.
What to Serve with Festive Christmas Cake Pops?
As you prepare to share these delightful bites, consider pairing them with treats that enhance their sweetness and charm.
Hot Cocoa: The warmth and richness of hot cocoa beautifully complement the sweetness of the cake pops, creating a cozy treat for cold winter nights.
Holiday Cookies: An assorted platter of holiday cookies adds variety to your dessert spread, allowing guests to indulge in different textures and flavors.
Fruit Platter: Fresh fruit offers a refreshing contrast to the sweetness of the cake pops, providing a well-rounded festive experience that’s as colorful as it is delicious.
Milk: A classic pairing, a tall glass of milk serves as a nostalgic complement that balances the sweetness of the cake pops, making it a childhood favorite.
Coffee or Tea: A warm cup of coffee or a soothing herbal tea brings a comforting element to your dessert table, cutting through the sweet flavors deliciously.
Festive Milkshake: Blend up some peppermint or gingerbread milkshakes for an indulgent drink, perfectly echoing the festive flavors of your cake pops.
Whatever you choose, these delightful companions will elevate your holiday gatherings, making your Festive Christmas Cake Pops the star of the show!
Expert Tips for Festive Christmas Cake Pops
Chill Thoroughly: Ensure cake balls are well-chilled before dipping. This prevents them from crumbling in the melted coating and results in neat, tasty pops.
Choose Colors Wisely: Use contrasting colors of candy melts for a more festive look. This adds vibrancy and makes your festive Christmas cake pops really stand out!
Sprinkle Strategy: Opt for smaller sprinkles that adhere better to the coating. Large sprinkles can slide off before the candy sets, leading to a messy appearance.
Use Quality Ingredients: Don’t skimp on frosting and candy melts; higher quality yields better texture and flavor, elevating your festive Christmas cake pops to bakery-level treats.
Presentation Matters: Stand your pops upright in a foam block for drying. This ensures even coating and creates a lovely display for serving or gifting.
Experiment Freely: Feel free to infuse different flavors or use seasonal decorations. Creativity adds a personal touch to your festive Christmas cake pops!
Festive Christmas Cake Pops Variations
Get ready to personalize your festive treats with these fun and tasty ideas that will spark joy!
Dairy-Free: Substitute regular frosting with coconut or almond milk frosting for a delightful non-dairy option. Your cake pops will maintain their rich flavor without the dairy!
Gluten-Free: Opt for a gluten-free cake mix to cater to those with dietary restrictions. This simple swap ensures everyone can join in on the holiday fun!
Flavor Infusion: Add flavored extracts like vanilla, peppermint, or almond to the cake mix for an unexpected twist. These bold flavors will elevate your cake pops to a new level of deliciousness!
Nutty Goodness: Fold in crushed nuts or chocolate chips into your cake mixture for a delightful crunch. It adds texture and makes each bite an adventure!
Spicy Surprise: For a kick, include a pinch of cinnamon or nutmeg in the frosting. This warm spice will embrace the holiday spirit and tantalize your taste buds!
Fun Shapes: Shape your cake pops into festive figures such as snowmen or Christmas trees before dipping them in candy. Not only charming, but it’ll also add a whimsical touch to your dessert table!
Theme Toppings: Decorate with themed toppings like mini candy canes or holiday-colored chocolate sprinkles for an extra festive flair. This will make your treats both beautiful and delicious!
Chocolate Coating: Instead of colorful candy melts, dip your pops in dark, milk, or white chocolate for a different flavor profile. There’s something irresistibly indulgent about chocolate-covered treats!
Make Ahead Options
These delightful Festive Christmas Cake Pops are perfect for busy home cooks looking to save time during the holiday rush! You can prepare the cake balls up to 24 hours in advance. Simply follow the recipe to crumble and mix the cake with frosting, then shape the balls and refrigerate them. For even longer storage, you can freeze the formed cake balls for up to 2 months. Just be sure to place them in an airtight container to maintain their moisture and flavor. When you’re ready to finish, simply thaw the frozen balls overnight in the refrigerator, coat them with melted candy melts, and add your festive sprinkles. This way, you can enjoy homemade treats with minimal effort on busy days!
Storage Tips for Festive Christmas Cake Pops
Room Temperature: Store your cake pops in an airtight container at room temperature for up to 3-4 days. This keeps them fresh and delightful for holiday snacking!
Fridge: If you prefer, you can also keep them in the refrigerator for up to a week. Just ensure they’re in an airtight container to prevent them from drying out.
Freezer: For longer storage, freeze the uncoated cake balls for up to 2 months. Thaw them in the fridge before dipping into candy melts for the perfect finish.
Reheating: There’s no need to reheat cake pops, but if you’ve stored them in the fridge, let them sit at room temperature for about 30 minutes before serving for best texture and flavor.
Festive Christmas Cake Pops Recipe FAQs
How do I choose the right boxed cake mix?
Absolutely! When selecting a boxed cake mix, look for a flavor that resonates with the holiday spirit, such as vanilla or chocolate. You’ll want to avoid mixes that have dark spots or an expiration date that has passed. For a personal touch, consider substituting with a homemade cake recipe filled with your favorite ingredients.
How should I store my cake pops for freshness?
To keep your Festive Christmas Cake Pops at their best, store them in an airtight container at room temperature for up to 3-4 days. If you prefer a longer storage method, refrigerate them for up to a week, making sure they’re well-sealed to avoid drying out.
Can I freeze cake pops, and how do I do it?
Yes, you can absolutely freeze cake pops! To do this, freeze the uncoated cake balls on a baking sheet for about 20 minutes until firm, then transfer them to an airtight container or freezer bag. They can be frozen for up to 2 months. Just thaw them in the fridge 24 hours before you plan to dip them in candy melts for a delightful treat!
What should I do if my candy coating is too thick?
If your candy coating is too thick, don’t worry—this happens to the best of us! Simply add a small amount of vegetable oil or shortening to the melted candy melts and stir until the desired consistency is achieved. This will help it glide over the cake pops smoothly and give you that shiny, even coating you’re looking for!
Are these cake pops suitable for gluten-free diets?
Yes, they can be! Just choose a gluten-free boxed cake mix and check your frosting and candy melts for gluten-free certification. With these adjustments, your Festive Christmas Cake Pops will be safe for gluten-sensitive family members and friends.
What if I want to customize flavors or add dietary restrictions?
Absolutely! You can play around with flavors by adding extracts like peppermint or almond to the cake mix. For dietary restrictions, consider using dairy-free alternatives for frosting or candy melts. Just ensure that all your ingredients fit the intended dietary needs, allowing everyone to enjoy these delightful treats!
Irresistibly Festive Christmas Cake Pops Recipe You’ll Love
Ingredients
Equipment
Method
- Prepare Cake Mix: Follow the package instructions and bake the cake. Let it cool completely.
- Crumble the Cake: Crumble the cooled cake into fine crumbs.
- Mix with Frosting: Combine crumbled cake with frosting until holding shape.
- Shape the Pops: Roll into balls and refrigerate for at least 1 hour.
- Melt Candy: Microwave candy melts until smooth, stirring frequently.
- Insert Sticks: Dip lollipop sticks into melted candy and insert into cake balls.
- Coat the Cake Balls: Dip the balls into melted candy, letting excess drip off. Add sprinkles.
- Dry Completely: Stand pops upright in a glass or foam block to set.