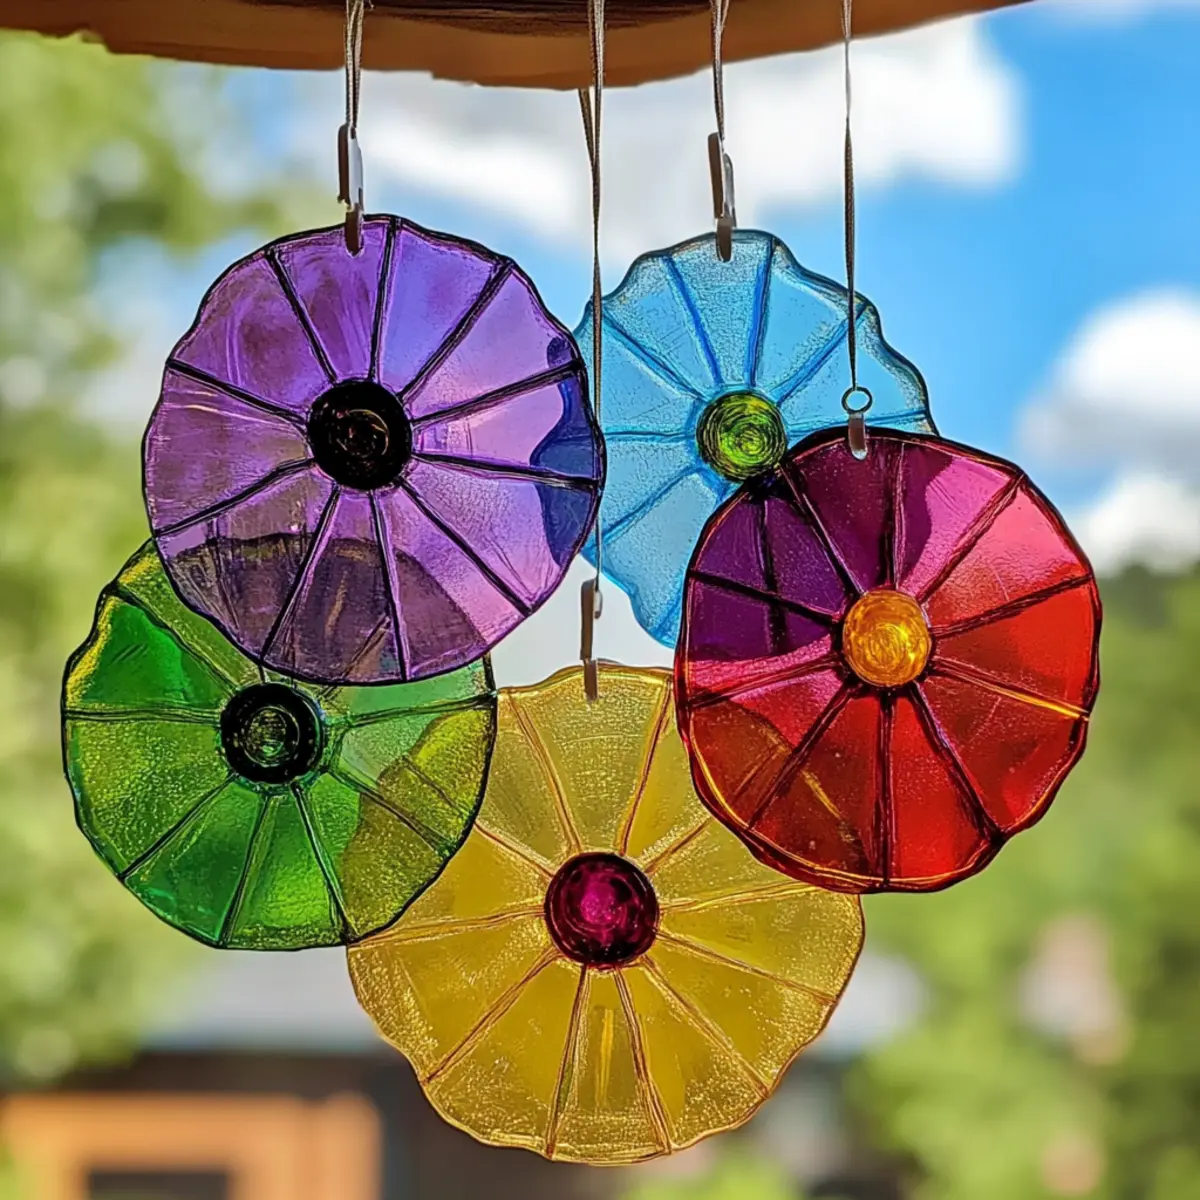
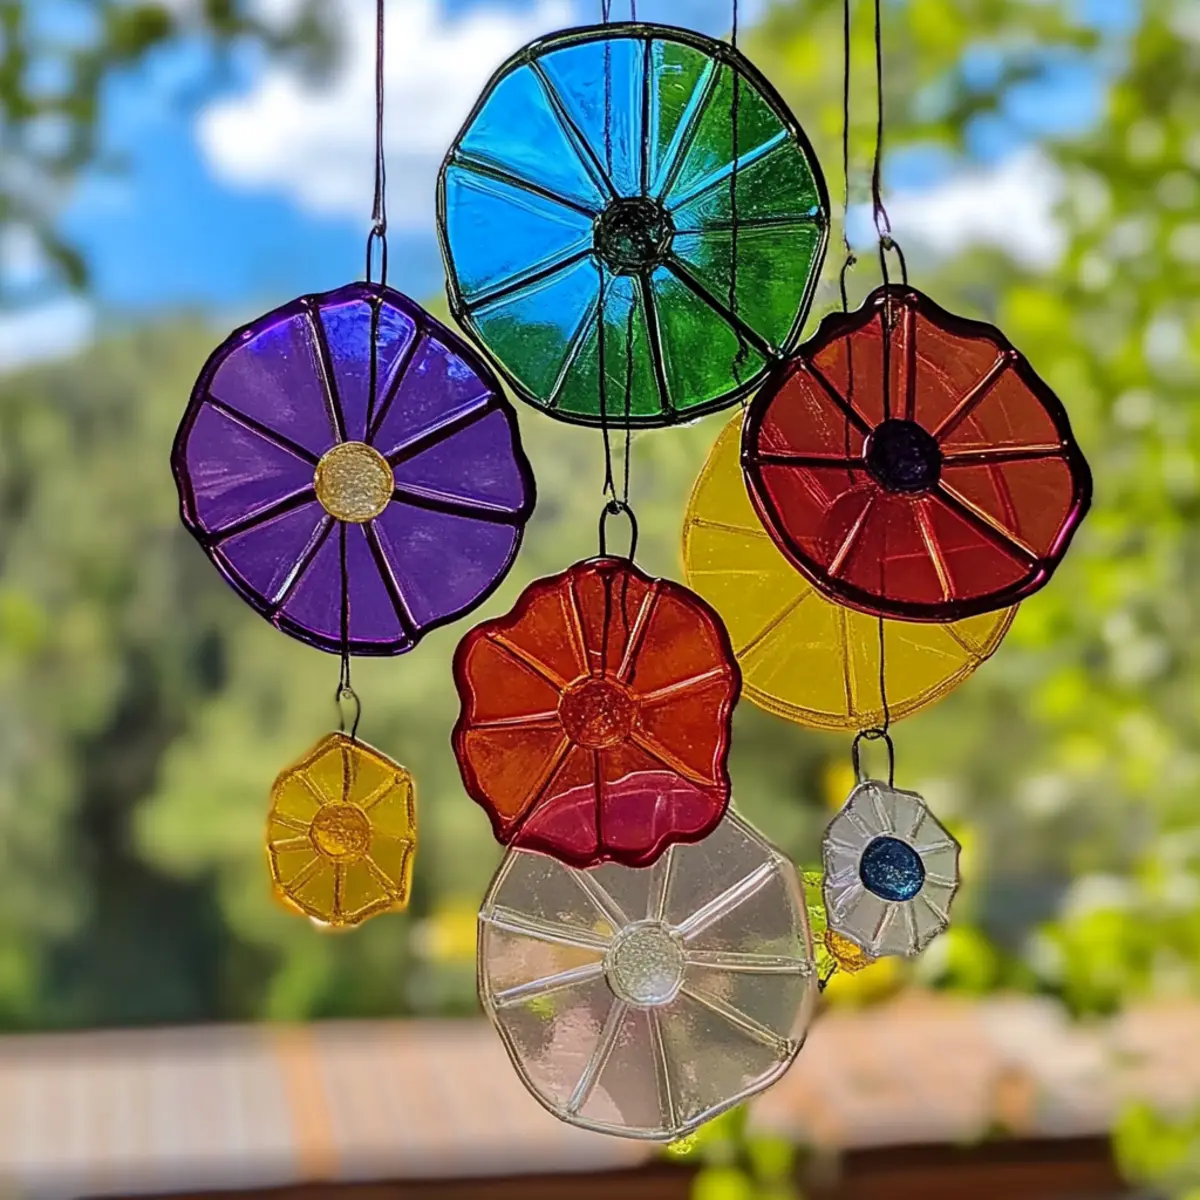
Bioplastic Suncatchers: The Best Eco-Friendly Craft for Kids
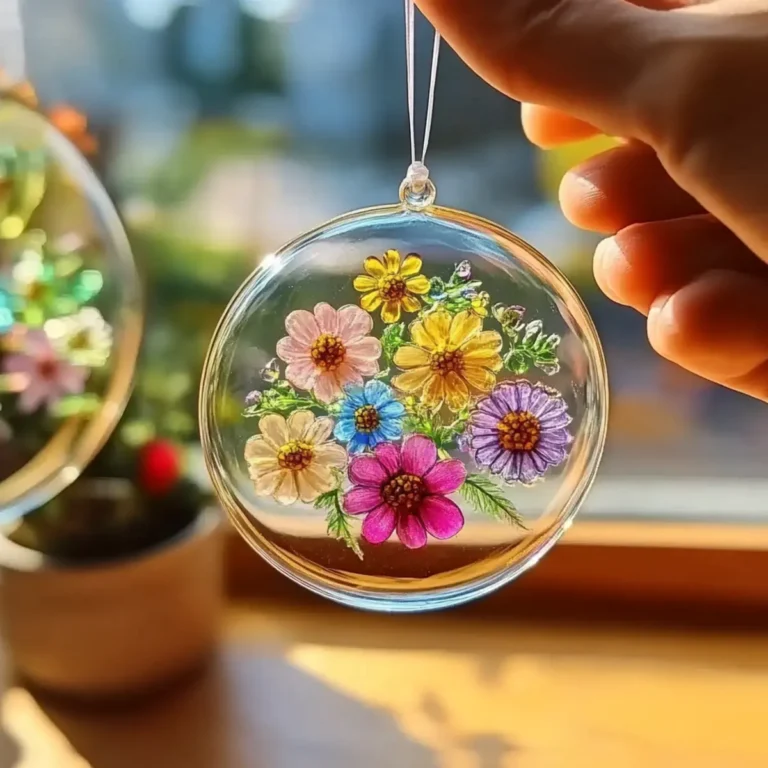
As the sun’s warm rays begin to filter through my kitchen window, I’m reminded of the joy that comes from bringing a bit of creative magic into the home. One day, when I was searching for a fun activity to do with my kids, I stumbled upon the idea of making bioplastic suncatchers. These vibrant decorations not only brighten up any space but also encourage us to reduce waste with eco-friendly materials. With just a few simple ingredients, we turned our everyday kitchen supplies into stunning pieces of art that dance with color and light. Whether you’re looking to entertain your little ones or simply want to add a pop of whimsy to your home, this DIY project is a delightful way to spark creativity and celebrate nature’s beauty right from your own window. Join me as we dive into the steps to create your very own melted bead suncatchers!
What makes bioplastic suncatchers so special?
Eco-Friendly: These vibrant suncatchers are a green alternative, allowing you to recycle everyday materials into beautiful artwork.
Creative Fun: Perfect for engaging kids, this project fosters creativity while keeping them entertained.
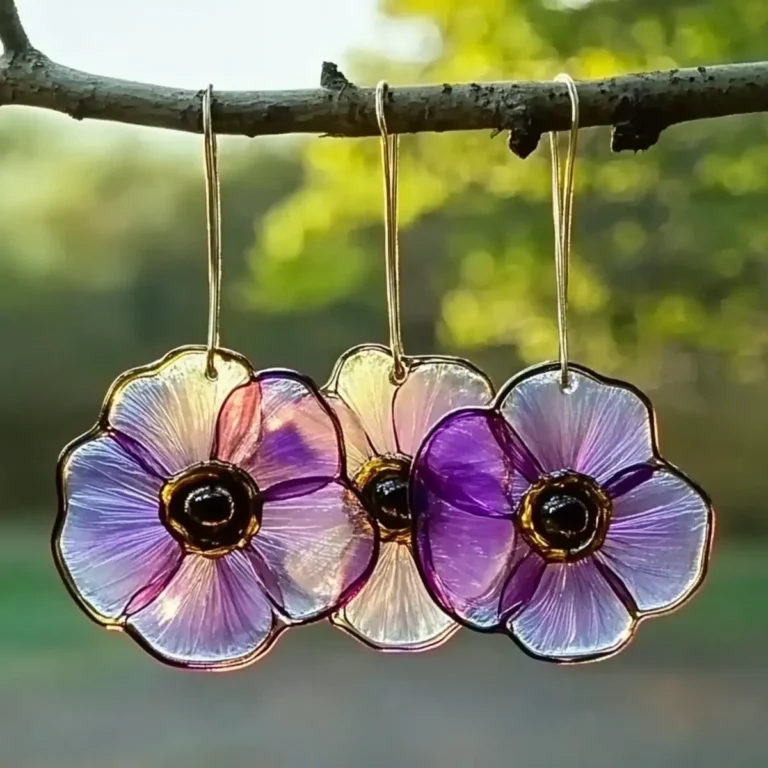
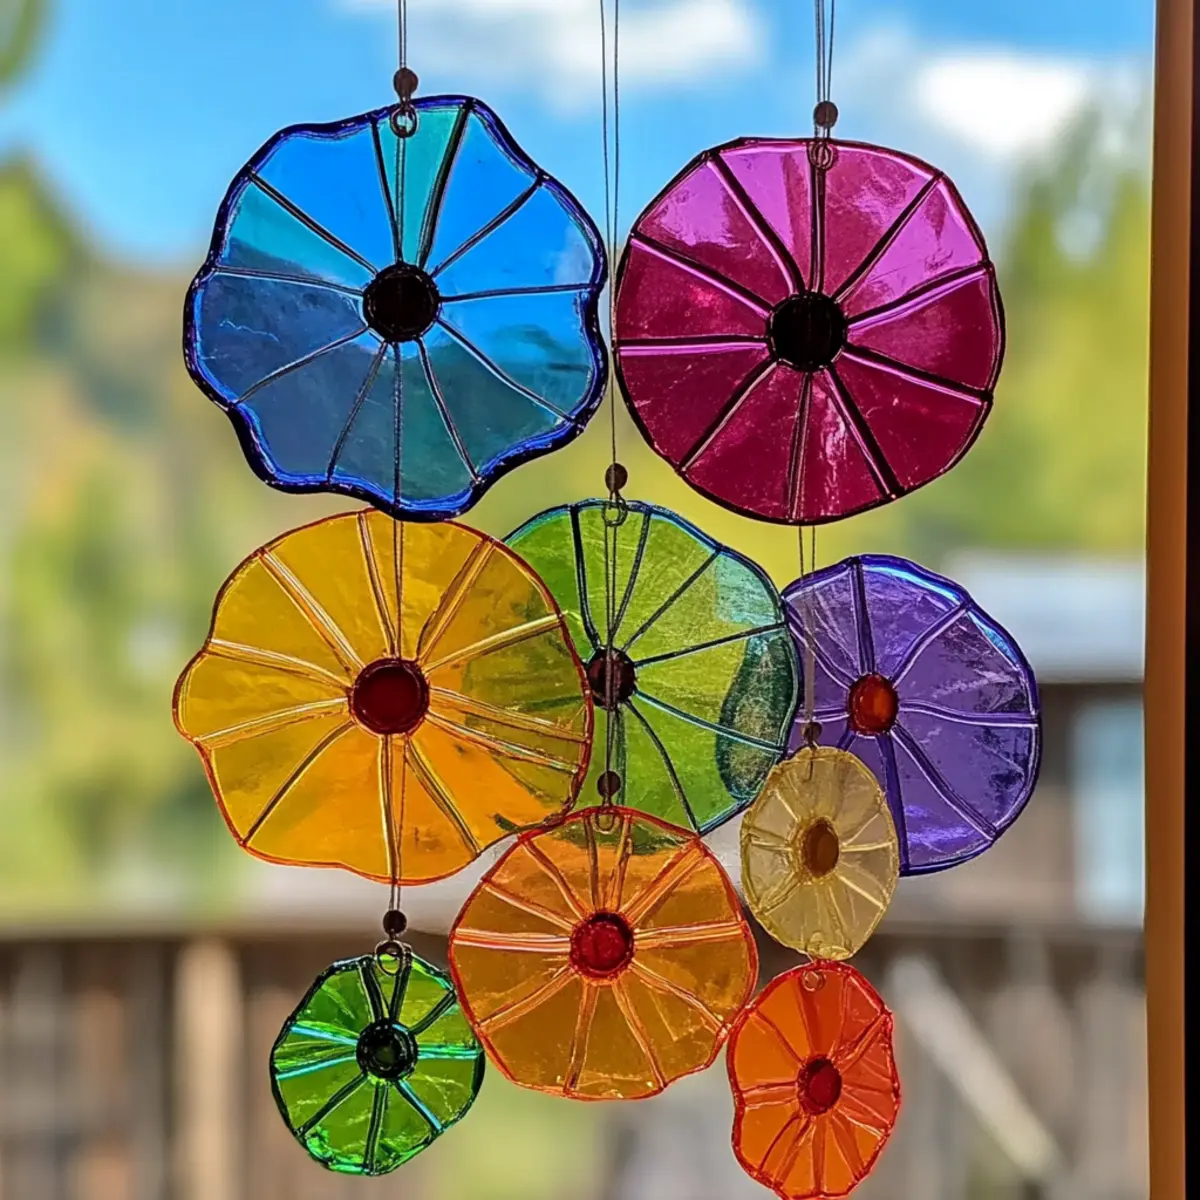
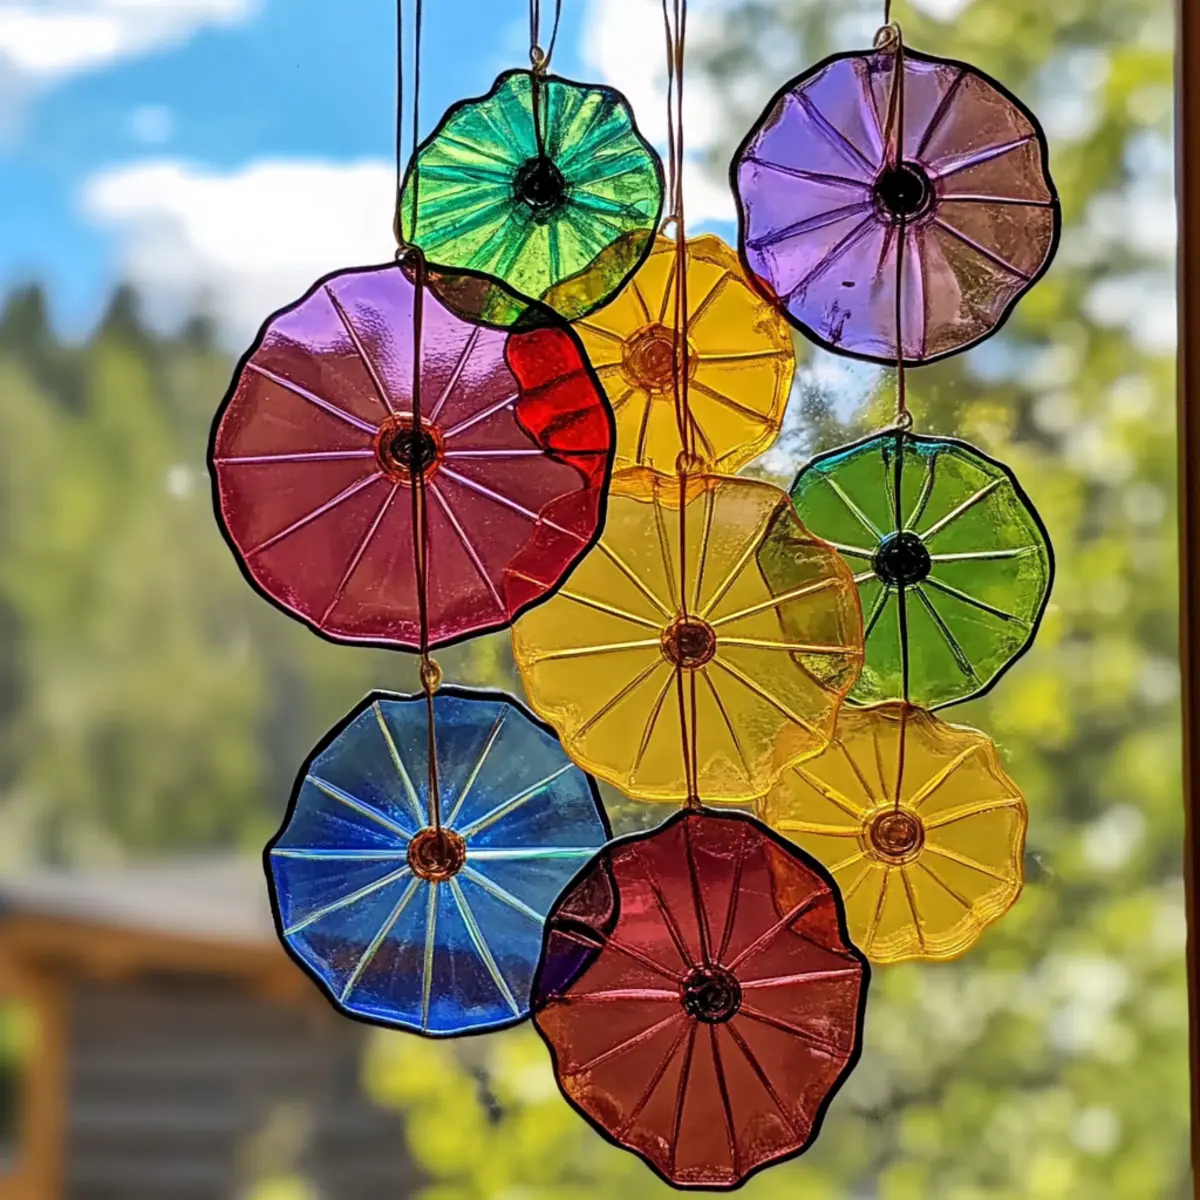
Eye-Catching Design: The end result glimmers in the sunlight, adding an enchanting touch to any space.
Simple Ingredients: With just a few pantry staples needed, you can whip up this craft quickly without fuss.
Educational Opportunity: It’s a great chance to teach children about sustainability and the importance of eco-conscious choices.
Looking for more engaging crafts? Check out our guide on eco-friendly projects to ignite your creativity!
Bioplastic Suncatchers Ingredients
For the Mixture
- Water – Adds moisture and facilitates melting; warm water yields better results.
- Cornstarch – Acts as a plant-based thickener; ensure it’s finely sifted for a smooth texture.
- White Vinegar – Serves as a natural preservative; don’t skip this for longer-lasting suncatchers.
- Unflavored Gelatin Powder – Provides the necessary structure; can be replaced with agar-agar for a vegan alternative.
For the Color
- Natural/Food-Safe Coloring – Used for tinting your suncatchers; popular options include food coloring or natural dyes like beet juice.
- Fine Glitter (optional) – Elevates the visual appeal; use eco-friendly glitter for an extra green touch.
- Flower Petals (optional) – Enhances the decorative aspect with a touch of nature; make sure they are dried.
- Tissue Paper (optional) – Introduces texture and color; use recycled bits for an eco-conscious choice.
Transforming these everyday materials into bioplastic suncatchers is not just a fun craft; it’s also an excellent way to enjoy creativity while staying eco-friendly. Happy crafting!
How to Make Bioplastic Suncatchers
Prepare Mixture: In a pot, combine warm water, cornstarch, and white vinegar over low heat. Stir continuously until the mixture thickens to a pudding-like consistency, which may take about 5-7 minutes.
Incorporate Gelatin: Add the unflavored gelatin powder to the thickened mixture. Stir it in well until it’s completely dissolved, ensuring a smooth blend without any lumps.
Add Color: Pour in your choice of natural or food-safe coloring, mixing until you achieve your desired hue. Remember, the colors may lighten once dried, so go bold!
Mold the Shape: Scoop the vibrant mixture into molds or onto a silicone mat, crafting your desired shapes. You can also use cookie cutters for playful designs!
Add Decorations: If you wish to enhance your suncatchers, sprinkle fine glitter, flower petals, or tissue paper on top of the mixture before it sets to add a whimsical touch.
Drying Process: Allow your creations to dry for 24 hours, flipping them halfway to ensure even drying. You’ll know they’re ready when they’re firm and dry to the touch.
Finish & Display: Peel the suncatchers carefully from the molds or mat and hang them in a sunny spot to brighten your space. Watch them come alive with dancing colors!
Optional: Pair with some cheerful music while crafting for an extra fun atmosphere!
Exact quantities are listed in the recipe card below.
Make Ahead Options
These DIY Melted Bead Suncatchers are perfect for busy home cooks looking to create something beautiful with less fuss! You can prepare the mixture (water, cornstarch, and vinegar) up to 24 hours in advance. Simply store it in an airtight container in the refrigerator to keep it fresh. Another option is to mold the suncatchers and let them set for a few hours, then cover them with plastic wrap and refrigerate until you’re ready to finish the drying. When you’re ready to delight in your crafting joy, simply follow the final steps: sprinkle in decorations and dry as instructed. This way, you save time on crafting day, allowing you to enjoy the final art with your loved ones!
Storage Tips for Bioplastic Suncatchers
- Room Temperature: Store your bioplastic suncatchers in a cool, dry place out of direct sunlight. They can last for several weeks if kept in a protective container.
- Fridge: If you notice them becoming sticky, you can refrigerate them for up to 2 days to restore firmness, but allow them to return to room temperature before displaying.
- Display Considerations: Hang or place the suncatchers in an area that avoids extreme heat or humidity, which can cause them to warp or lose their shape over time.
- Long-Term Storage: For extended preservation, wrap in tissue paper and store flat in a container, ensuring that they don’t touch each other to avoid sticking or breaking.
Expert Tips for Bioplastic Suncatchers
Use Warm Water: Ensure you use warm water, as it helps the cornstarch dissolve effectively and results in a smoother mixture.
Keep It Low Heat: Avoid overheating the mixture; maintaining a steady low heat prevents lumps and ensures a smooth texture for your bioplastic suncatchers.
Thin Layers: Pouring the mixture in thin layers promotes quicker drying times and prevents the suncatchers from becoming too thick or heavy.
Choose the Right Molds: Silicone molds are ideal as they make it easier to peel off the completed suncatchers without breaking; avoid metal molds if possible.
Experiment with Colors: Don’t be afraid to mix different natural or food-safe colorings to create unique designs; just remember they might lighten once dry!
Add Natural Decor: Incorporate dried flower petals or recycled tissue paper for added beauty and texture, giving your suncatchers an extra touch of charm.
Bioplastic Suncatchers Variations
Get ready to unleash your creativity and personalize these delightful suncatchers!
- Vegan Option: Substitute unflavored gelatin with agar-agar to create a plant-based suncatcher that still holds its lovely shape. Go on, explore the world of vegan crafting!
- Alternative Thickeners: Swap cornstarch for arrowroot or tapioca starch for a unique texture and different drying results. Each thickener has its own charm, offering something new for everyone!
- Natural Dyes: Experiment with colorful alternatives like beet juice, turmeric, or spirulina for different hues that can brighten your artwork naturally. Nature’s palette is wide; embrace it!
- Add Herbs: Toss in small, dried herbs like lavender or rosemary for an aromatic touch that adds character to your suncatchers. Imagine the delightful fragrance wafting through the room!
- Layered Designs: Create ombre effects by layering colors. Pour one color, let it set a bit, then add another for a stunning, eye-catching look! Why settle for one shade when you can have a rainbow?
- Textured Options: Rather than tissue paper, use pieces of recycled cardboard or fabric to introduce interesting textures and designs within your suncatchers. Adding dimension takes creativity up a notch!
- Decorative Molds: Get playful with fun-shaped cookie cutters or silicone molds that turn your suncatchers into charming thematic designs, from hearts to stars. Perfect for seasonal decorations!
- Seasonal Sprinkles: Adorn with seasonal decorations, like confetti for festive occasions or snowflakes for winter wonders, enchanting your suncatchers for any celebration. Bring on the seasonal spirit!
What to Serve with Bioplastic Suncatchers?
Brighten your crafting day with fun and whimsical sides that complement the creative spirit of making eco-friendly art!
Refreshing Lemonade: A cool, tart drink to keep you hydrated as you craft; the zesty flavor is a fantastic way to energize your creativity.
Fruit Kabobs: Colorful, bite-sized treats that mirror the vibrant hues of your suncatchers, they offer a healthy, sweet snack for kids and adults alike.
Colorful Veggie Platter: Crisp vegetables paired with a tangy dip can be a nutritious way to fuel your crafting session, adding a crunchy texture to balance the sweetness of treats.
Homemade Granola Bars: Whip up a batch of these chewy snacks! They provide an easy-to-eat, sweet boost as you let your artistic side shine.
Ice Cream Sundaes: Indulge in this fun dessert to celebrate your creations! The rainbow of toppings can even inspire new color combinations for your suncatchers.
Crafting Music Playlist: Not a food item, but a carefully curated playlist to dance alongside your crafting—a perfect backdrop for those chirpy suncatchers! Enjoy the rhythm as you bring your art to life!
Bioplastic Suncatchers Recipe FAQs
What type of water should I use for the mixture?
Absolutely! Using warm water is key to help the cornstarch dissolve effectively, resulting in a smooth and even mixture. Warm water allows the ingredients to blend seamlessly and thickens more efficiently than cold water.
How should I store my bioplastic suncatchers?
To maintain their beauty, store your bioplastic suncatchers in a cool, dry place away from direct sunlight. They can last up to several weeks if kept in a protective container. If they become sticky, refrigerate them for up to 2 days to firm them up again. Remember, allow them to return to room temperature before displaying them to avoid warping.
Can I freeze bioplastic suncatchers for long-term storage?
While freezing is not recommended, you can keep your bioplastic suncatchers stored flat in a cool, dry place for prolonged life. If you’re looking to maintain their condition for several months, wrap each suncatcher in tissue paper and store them in a container, ensuring they don’t touch to prevent sticking.
What should I do if my mixture doesn’t thicken properly?
If your mixture isn’t thickening after 5-7 minutes, ensure you’re using low heat and that you’re continuously stirring. If it remains too runny, you can mix in a tiny bit more cornstarch (mix it with some cold water first to form a slurry) and then add it to the pot while stirring. Make sure to give it time to heat and thicken again.
Can my pets be around when I make these suncatchers?
Very! The ingredients are generally safe for kids and pets, as they are non-toxic and made from common kitchen supplies. However, it’s always good practice to supervise pets during crafting sessions to prevent any playful snatching of materials like glitter or small items.
What if I don’t have gelatin powder?
No problem at all! You can substitute unflavored gelatin with agar-agar to create a vegan option. Simply follow the same steps as you would for gelatin, but soak the agar-agar in warm water according to the package instructions before adding it to your mixture. This will allow it to dissolve just like gelatin would, ensuring a firm structure for your suncatchers.
These bioplastic suncatchers are not just a delightful craft, they’re also a wonderful way to engage with eco-friendly practices while having fun. Happy crafting!
Bioplastic Suncatchers: The Best Eco-Friendly Craft for Kids
Ingredients
Equipment
Method
- Prepare Mixture: In a pot, combine warm water, cornstarch, and white vinegar over low heat. Stir continuously until the mixture thickens to a pudding-like consistency, which may take about 5-7 minutes.
- Incorporate Gelatin: Add the unflavored gelatin powder to the thickened mixture. Stir it in well until it's completely dissolved, ensuring a smooth blend without any lumps.
- Add Color: Pour in your choice of natural or food-safe coloring, mixing until you achieve your desired hue. Remember, the colors may lighten once dried, so go bold!
- Mold the Shape: Scoop the vibrant mixture into molds or onto a silicone mat, crafting your desired shapes. You can also use cookie cutters for playful designs!
- Add Decorations: If you wish to enhance your suncatchers, sprinkle fine glitter, flower petals, or tissue paper on top of the mixture before it sets to add a whimsical touch.
- Drying Process: Allow your creations to dry for 24 hours, flipping them halfway to ensure even drying. You'll know they’re ready when they’re firm and dry to the touch.
- Finish & Display: Peel the suncatchers carefully from the molds or mat and hang them in a sunny spot to brighten your space. Watch them come alive with dancing colors!