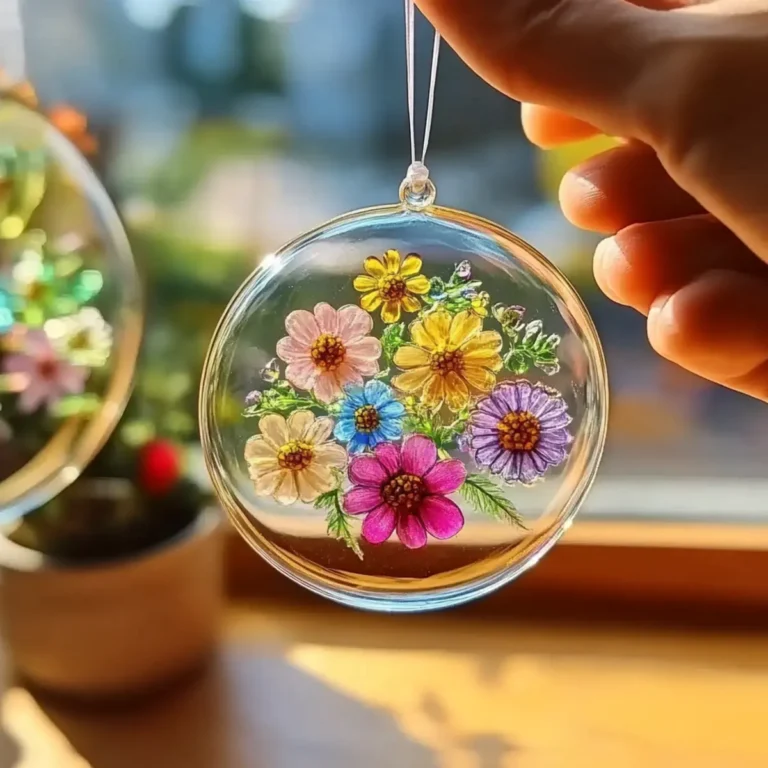
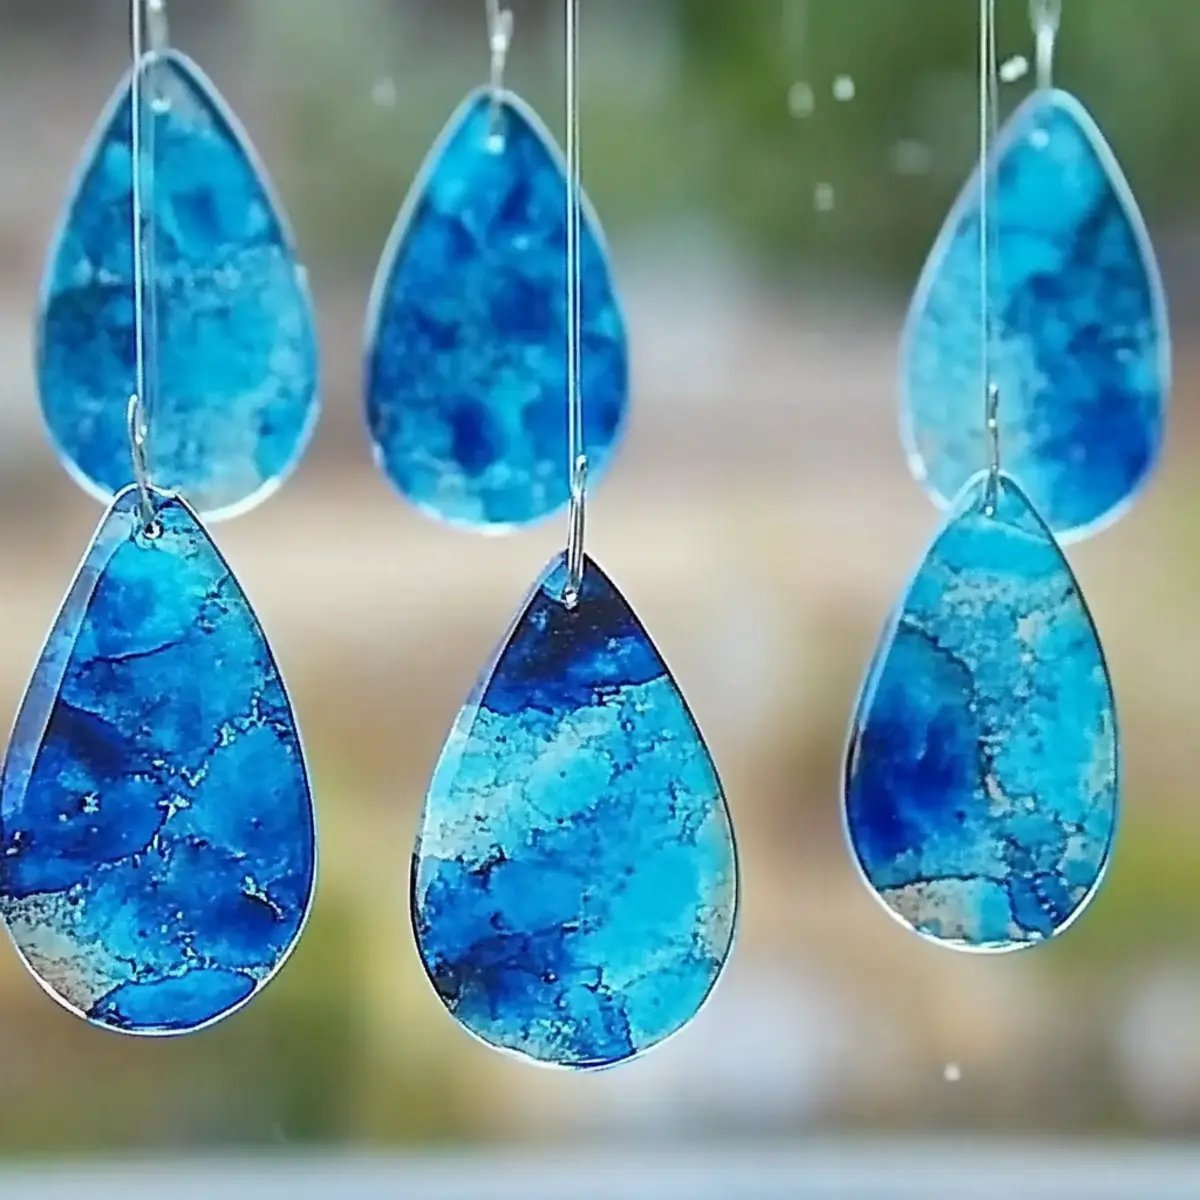
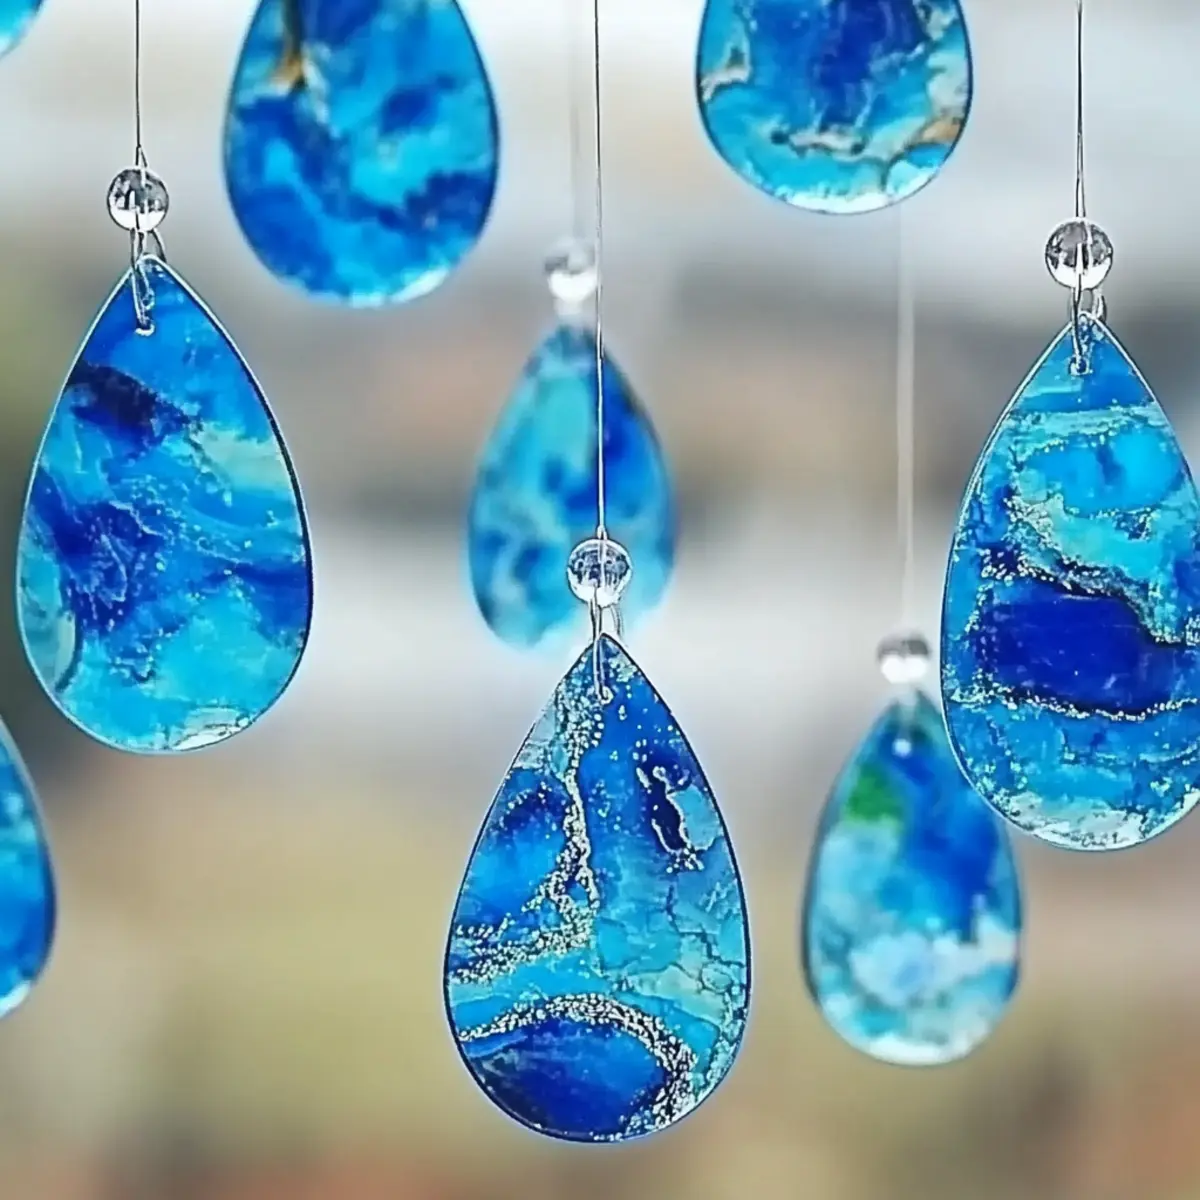
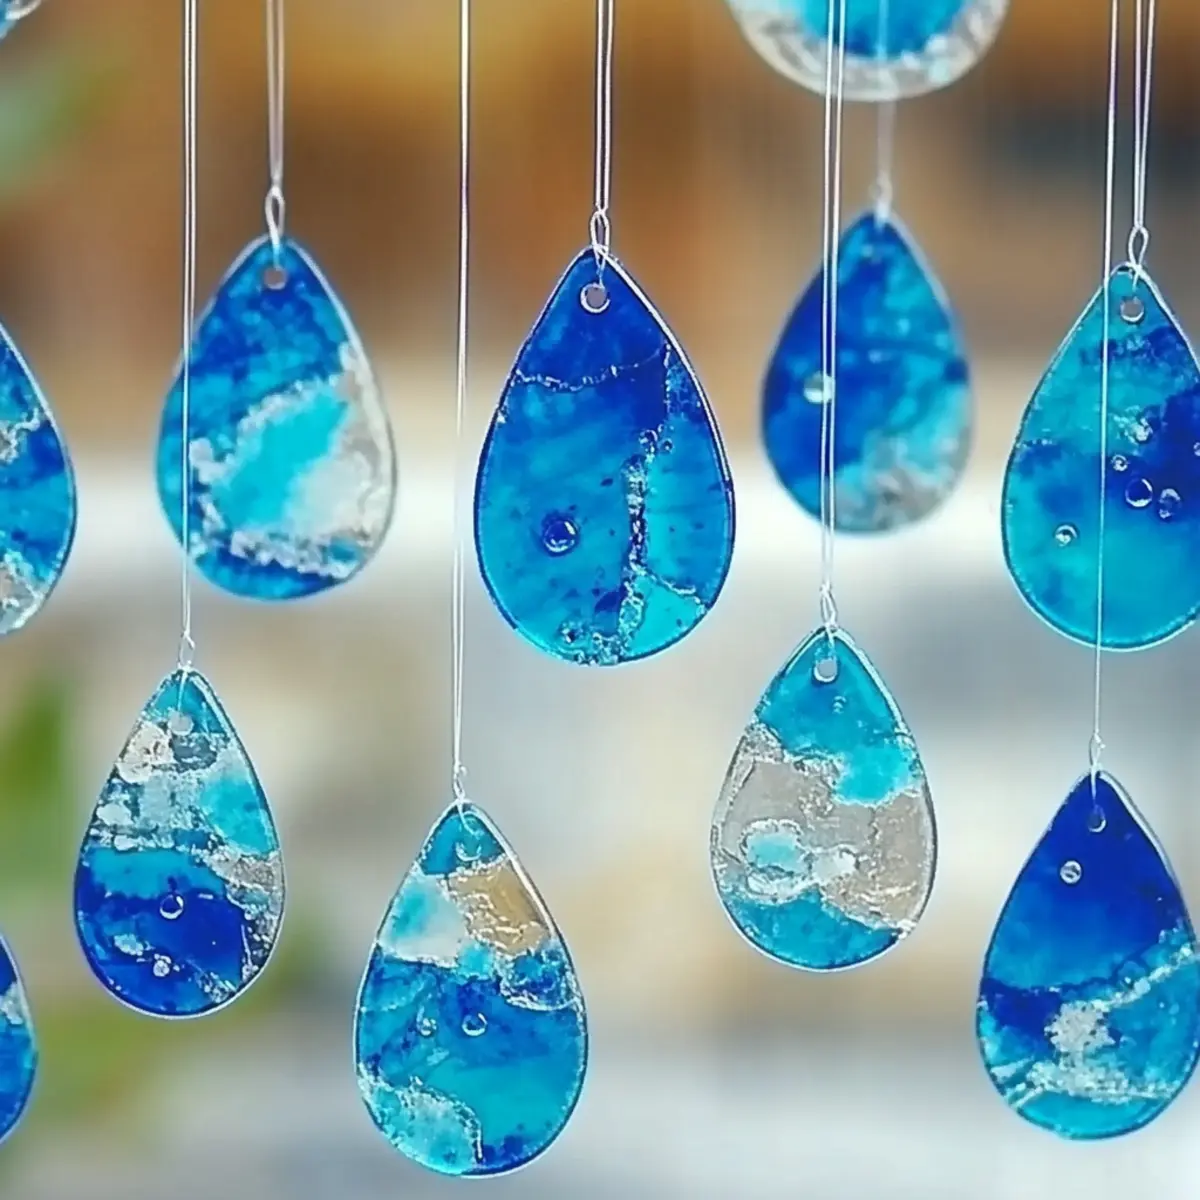
Brighten Rainy Days with Blue Crayon Raindrop Suncatchers 💙
There’s something enchanting about the soft glow of the sun streaming through a beautifully crafted suncatcher. On a particularly gloomy, rain-soaked afternoon, I found myself reminiscing about summers spent at the beach, watching light dance on the waves. This inspired me to create a project that captures that sparkling essence—introducing the Blue Crayon Raindrop Suncatchers!
In just 20 minutes, you can make these vibrant, shimmering pieces of art that brighten any window and uplift your spirits on the rainiest of days. Not only are they a fun DIY craft for all ages, but they also offer a delightful sensory experience as you melt colorful crayon shavings to form a layered oceanic masterpiece. Perfect for a creative escape or a way to bond with loved ones, these suncatchers are a reminder that even the grayest days can sparkle with imagination. So, grab your blue crayons and let’s dive into this colorful craft adventure!

Blue Crayon Raindrop Suncatchers: Why You’ll Love Them
Bright, Fun Activity: This Blue Crayon Raindrop Suncatchers project is an easy and enjoyable way to get creative while spending quality time with family or friends.
Quick to Make: In just 20 minutes, you can transform simple materials into stunning décor that brings joy.
Sensory Delight: Melting crayons creates a mesmerizing experience for all ages, allowing everyone to embrace their inner artist.
Inspiring Creativity: Experiment with different shades of blue to create a unique ocean effect, making each suncatcher a personal masterpiece.
Perfect Home Décor: These gorgeous suncatchers not only brighten your windows but also lift spirits on gloomy days. Embrace the whimsy of sunny days even when it’s raining!
Feel free to explore more about other exciting craft ideas that ignite your creativity while browsing through our engaging DIY projects!
Blue Crayon Raindrop Suncatcher Ingredients
• Let’s gather the colorful essentials for your crafting adventure!
For the Suncatcher
• Blue Crayons – Provide the vibrant colors that mimic ocean waves; mix various shades for depth and contrast.
• Waxed Paper – This will hold your crayon melty goodness together; smooth sheets yield better results.
• Iron – Needed for melting the crayons in between the waxed paper; remember, adult supervision is crucial during this step.
• Scissors – Essential for cutting your suncatcher into beautiful shapes once cooled.
For Hanging
• Embroidery Floss or String – This fun element will allow you to hang your finished piece; choose a complementary color to enhance your design.
• Hole Punch – Perfect for creating holes in your suncatcher for easy string threading.
For Design Enhancements
• Marker – Use to trace raindrop shapes or other designs; unleash your creativity with your artistic vision!
• Old Towel or Parchment Paper – Protect your ironing surface while melting; this will ensure a smooth crafting experience.
Dive into your crafting session with these ingredients, and let’s create stunning Blue Crayon Raindrop Suncatchers that will surely brighten any rainy day!
How to Make Blue Crayon Raindrop Suncatchers
Prep Materials: Gather your blue crayons, waxed paper, scissors, and all necessary tools. Cut two pieces of waxed paper to your desired size, ensuring they are smooth for better results.
Grate Crayons: Use a pencil sharpener to shave the blue crayons into small bits. This helps the crayons melt evenly and creates a layered look.
Layer Crayons: Place the colorful crayon shavings between the two sheets of waxed paper. Arrange the bits creatively to replicate the beautiful texture of ocean waves.
Iron Carefully: Set an old towel or parchment paper on the ironing board. Place the wax paper sandwich on top and gently iron on low heat until the crayons melt and fuse together.
Cut Shapes: After the melted crayon sheets have cooled down, take your scissors and cut out fun shapes like raindrops or waves—let your imagination run wild!
Create Hanging Holes: Use a hole punch to make holes on top of your shapes. This will allow you to easily thread your string through for hanging.
Hang and Display: Thread your embroidery floss or string through the holes and hang your fabulous suncatchers in a window. Watch them shimmer and twirl in the light!
Optional: Add a touch of glitter before melting for an extra sparkle!
Exact quantities are listed in the recipe card below.
What to Serve with Blue Crayon Raindrop Suncatchers?
Transform a rainy day into a sparkling opportunity with delightful pairings for your colorful craft project!
- Bright Lemonade: A refreshing drink that adds a zesty twist, reminiscent of sun-kissed days amidst the rain. Perfect to sip while crafting!
- Fruit Kabobs: Colorful and nutritious, these kabobs bring a rainbow of flavors, making them a fun and healthy snack for your crafting crew.
- Homemade Cookies: Soft, chewy cookies provide a comforting treat while you create. Choose flavors like chocolate chip or sugar cookies for a delightful indulgence.
- DIY Bath Bomb Kit: For those who love sensory activities, creating bath bombs will keep the fun going—even after the suncatchers are done!
- Rainbow Fruit Smoothies: Filled with vibrant colors and flavors, this easy-to-make smoothie brings a cheerful brightness to any gloomy day.
- Crafty Playlist: While crafting, play some upbeat music that inspires creativity and gets everyone humming along, adding to the joyful atmosphere!
- Cozy Blankets: Snuggle up with soft blankets while you let your creations dry, making the whole crafting experience warm and inviting.
- Storytime Books: As your suncatchers are hanging to catch the light, gather the family for a cozy read-aloud of ocean-themed stories to inspire even more creativity.
Blue Crayon Raindrop Suncatchers: Fun Variations
Feel free to add your own flair to these charming suncatchers and make them uniquely yours!
- Diverse Colors: Swap blue crayons for other vibrant colors to create seasonal variations, like warm oranges and browns for autumn vibes.
- Foil Layering: Add a layer of aluminum foil between the wax paper for a reflective, metallic shine that enhances the oceanic sparkle.
- Nature Shapes: Use cookie cutters to create shapes of flowers, leaves, or stars instead of raindrops for a twist on the design.
- Additional Scents: Blend in a few drops of essential oils before melting the crayons to introduce a delightful aroma alongside the visuals.
- Multi-Texture: Mix in some crushed dried flowers or glitter from the craft store for added texture, creating visual interest and depth.
- Stained Glass Effect: Try using translucent colored wrappers from candies instead of wax paper for a stained glass look when the suncatcher catches the light.
- Personalization: Let kids draw designs on the wax paper with non-toxic markers before adding the crayon shavings for a personal touch.
- Glow-in-the-Dark: Incorporate glow-in-the-dark crayons for a surprise nighttime effect that continues to brighten your space after the sun sets.
How to Store and Freeze Blue Crayon Raindrop Suncatchers
Room Temperature: Keep your finished suncatchers displayed in a sunny window where they can sparkle and brighten any room.
Fridge: If not displayed immediately, store suncatchers flat between sheets of waxed paper for up to a week to prevent distortion.
Freezer: Freezing is not recommended for suncatchers as it may lead to cracking or losing their vibrant colors.
Reheating: No reheating is necessary for suncatchers. Simply hang them in a window and enjoy their beauty!
Make Ahead Options
These Blue Crayon Raindrop Suncatchers are perfect for busy crafters looking to prepare in advance! You can grate the blue crayons and create your layered crayon shavings up to 24 hours ahead of time. Simply store the shavings in an airtight container to keep them fresh and vibrant. Additionally, you can cut your waxed paper to size and even trace your desired shapes for cutting later. When you’re ready to complete the suncatchers, just melt the crayon layers as usual and punch the holes for hanging. This way, you’ll enjoy a delightful crafting session with minimal setup, ensuring your suncatchers turn out just as beautiful and shimmering as if made on the spot!
Expert Tips for Blue Crayon Raindrop Suncatchers
Ironing Technique: Always keep the iron on low heat to avoid burning the crayons or waxed paper. Supervise kids closely during ironing.
Color Blending: Layer different shades of blue for a mesmerizing ocean effect. Don’t be afraid to mix and match colors; each suncatcher will be unique!
Shape Stencils: Use cookie cutters or stencils for uniform shapes. This takes your creativity to the next level, especially with raindrops and waves.
Cut with Care: Once cooled, cut shapes steadily to prevent cracking. A jagged edge can ruin the beauty of your Blue Crayon Raindrop Suncatchers.
Storage Tips: Store your finished suncatchers flat between sheets of waxed paper in a cool, dry place to maintain their beauty if not displayed immediately.
Blue Crayon Raindrop Suncatchers Recipe FAQs
How do I choose the right blue crayons?
Absolutely! When selecting blue crayons, look for vibrant shades and consider mixing different hues for a layered ocean effect. Experiment with darker blues versus lighter, sky blues for contrast. This not only enhances the visual appeal but also adds depth to your suncatchers.
What is the best way to store finished suncatchers?
To keep your Blue Crayon Raindrop Suncatchers looking their best, store them flat between sheets of waxed paper in a cool, dry place. This prevents any distortion and preserves their shimmer. If displayed, they can stay in sunny windows to brighten up your space!
Can I freeze these suncatchers?
Freezing is not recommended for your suncatchers, as it can lead to cracking or fading colors. Instead, enjoy them at room temperature. If you’re not ready to display them immediately, keep them flat and cool until the ideal moment strikes.
What if my suncatchers crack when cutting them?
No worries! If you find cracks in your suncatchers, it’s best to adjust your cutting technique. Use steady, even pressure with scissors and avoid cutting while the crayon is still warm. If the sheets are too thin, consider adding a bit more crayon shavings in areas to reinforce the design and prevent cracking.
Are there any dietary considerations for pets or allergies?
While these suncatchers are safe for crafting, keep them out of reach of pets and small children, as crayon material can pose a choking hazard if ingested. Although they are non-toxic, it’s always wise to supervise crafting sessions, ensuring everyone’s safety and enjoyment!
Can I add glitter or other decorations?
Definitely! Adding glitter to the crayon mixture before melting can provide an enchanting sparkle. Just remember to use it sparingly for the best results. Consider using shaped confetti or stickers on your finished suncatchers for extra personalization and flair.
Brighten Rainy Days with Blue Crayon Raindrop Suncatchers 💙
Ingredients
Equipment
Method
- Gather your blue crayons, waxed paper, scissors, and all necessary tools. Cut two pieces of waxed paper to your desired size, ensuring they are smooth for better results.
- Use a pencil sharpener to shave the blue crayons into small bits for even melting.
- Place the colorful crayon shavings between the two sheets of waxed paper, arranging creatively.
- Set an old towel or parchment paper on the ironing board. Place the wax paper sandwich on top and gently iron on low heat until melted.
- After cooling, cut out fun shapes like raindrops or waves with scissors.
- Use a hole punch to create holes at the top for string threading.
- Thread the embroidery floss or string through the holes and hang your suncatchers in a window.