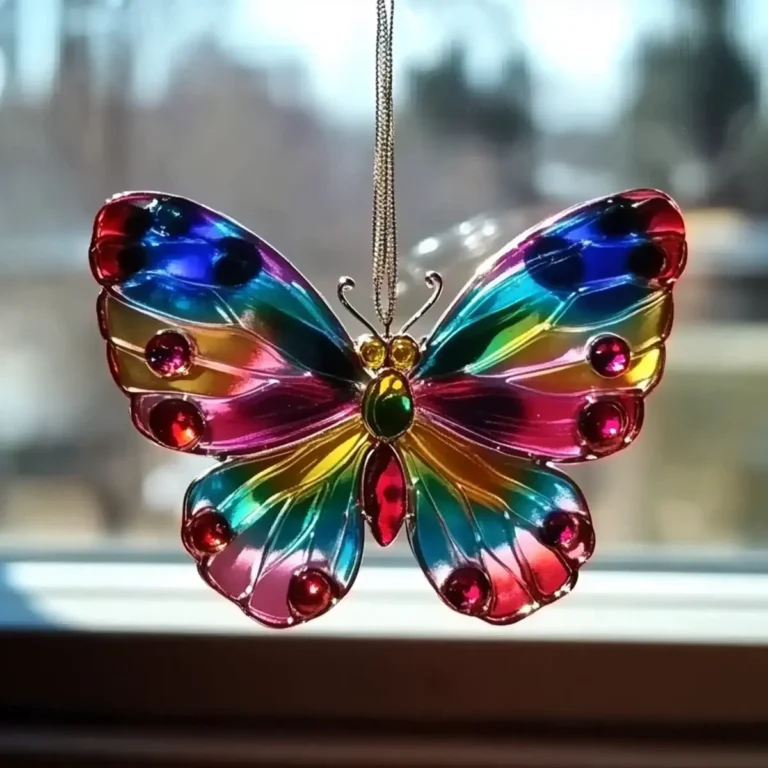
Clear Glue Flower Suncatcher: Brighten Your Home with Joy!
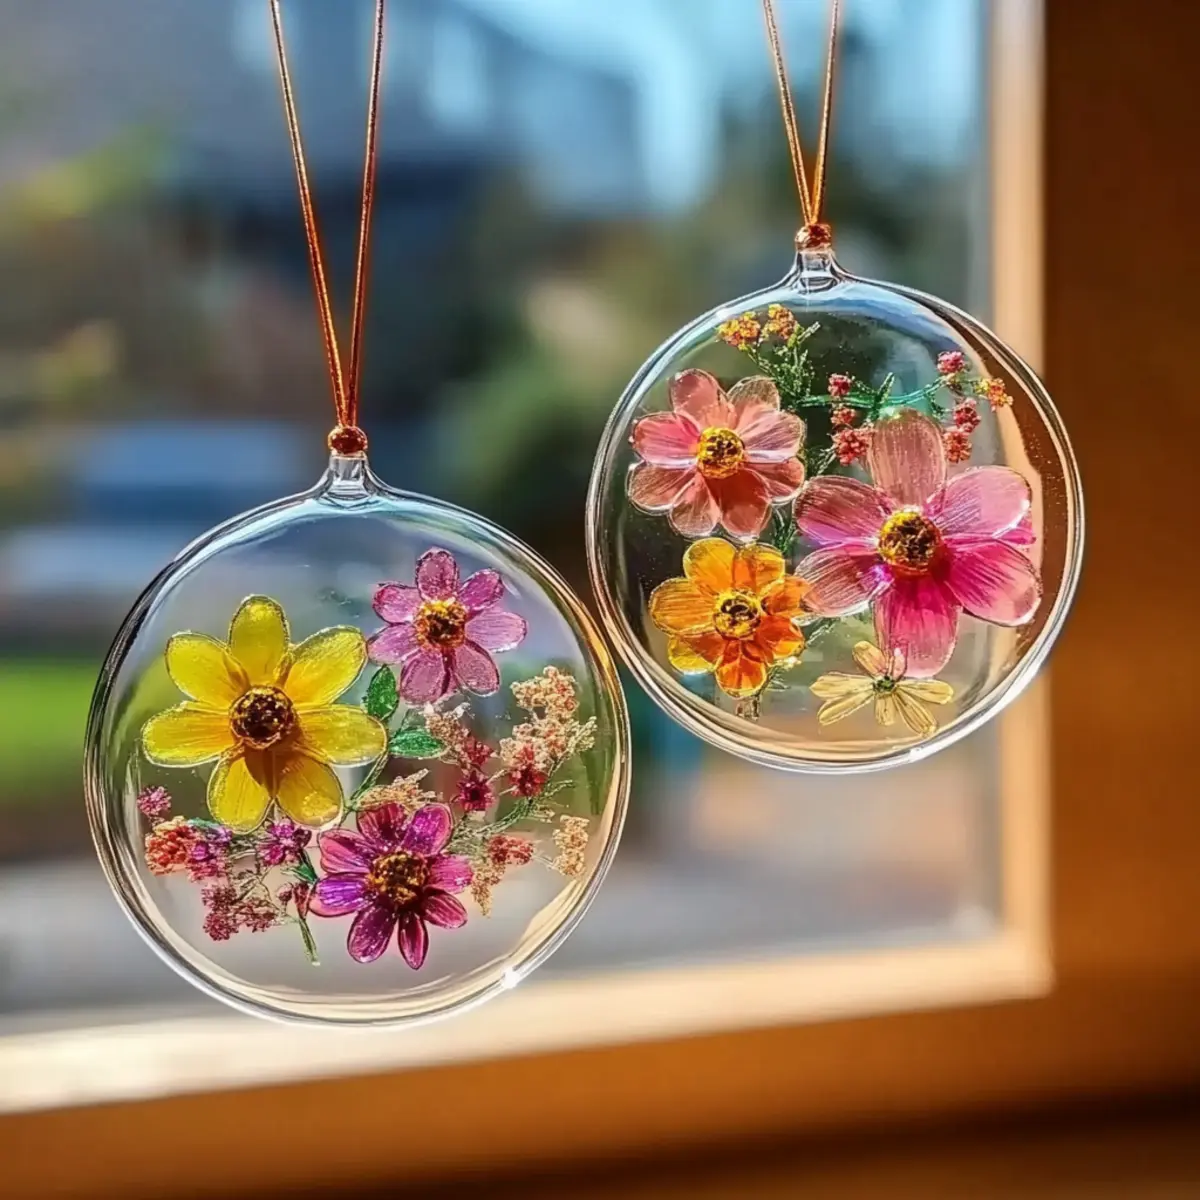
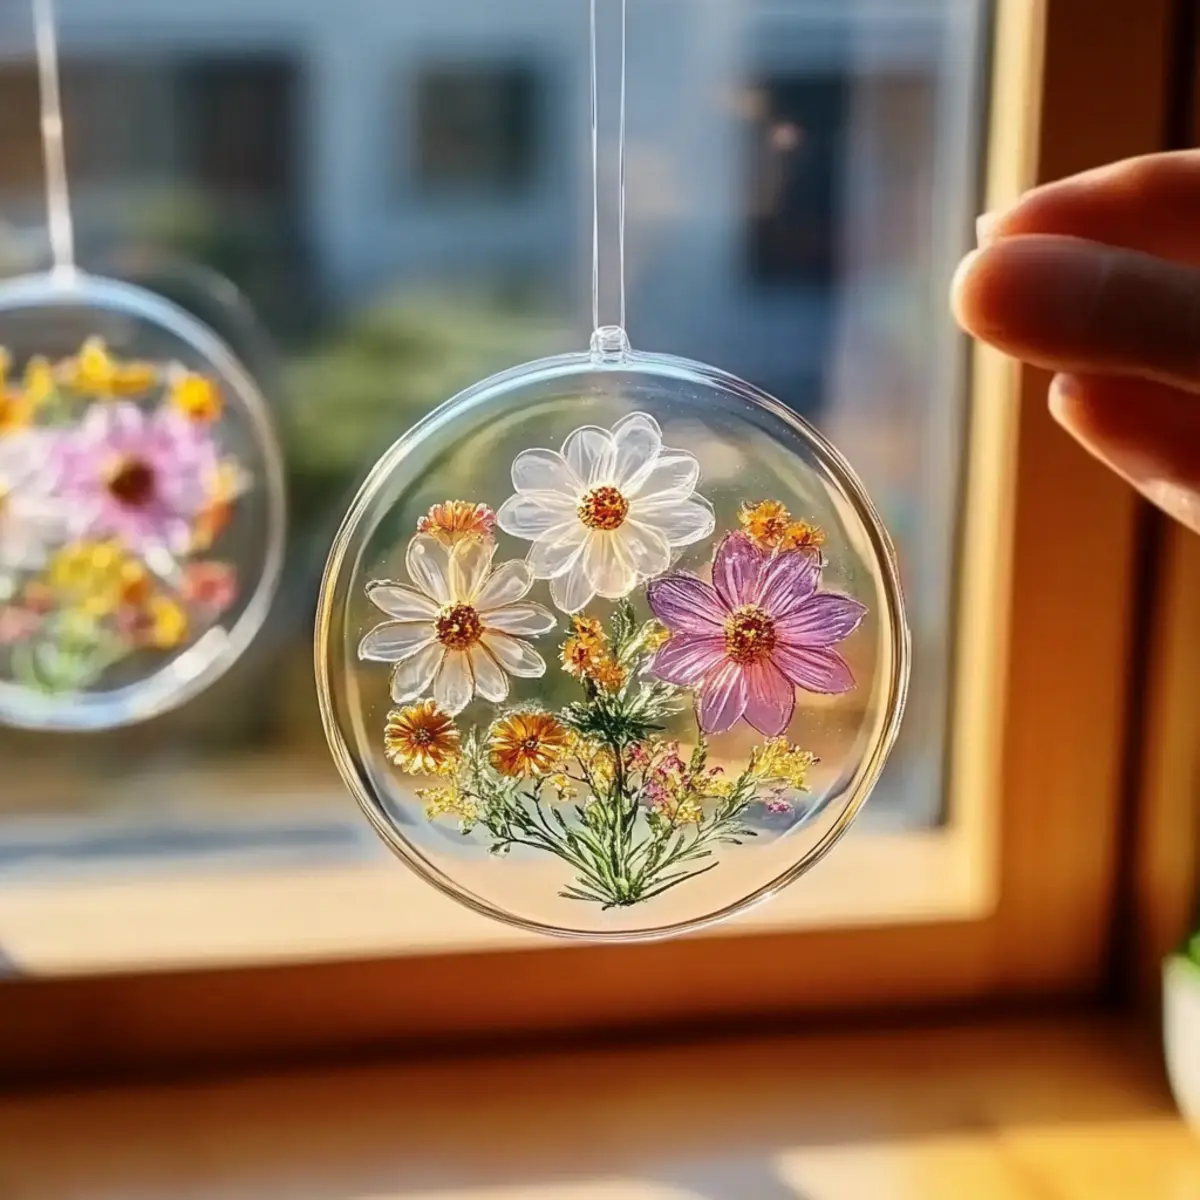
When the sun streams through my kitchen window, there’s a delightful moment of magic that transforms my home. The shimmering colors from my homemade Clear Glue Flower Suncatcher dance across the walls, filling the room with warmth and joy. This beautiful DIY project isn’t just a fun afternoon activity; it’s a wonderful way to embrace creativity while adding a personal touch to your decor.
In just 10 minutes, you can create a stunning suncatcher that showcases vibrant pressed flowers, custom-colored embellishments, and your artistic flair. It’s an ideal craft for all ages, bringing together friends and family for a unique bonding experience. Plus, these eye-catching decorations not only brighten your space but also serve as a charming reminder of sunny days to come. So grab your craft supplies, and let’s get started on making your own joyful suncatcher that will radiate beauty in every season!
Why Love This Clear Glue Flower Suncatcher?
Creative Fun: This Clear Glue Flower Suncatcher is an engaging way for anyone to express their creativity.
Vibrant Colors: The pressed flowers brightens up your windows, casting colorful light around your home.
Personalized Touch: Customize with different flowers and embellishments for a unique creation.
Quick & Easy: With just 10 minutes of prep, you’ll have a beautiful craft ready to hang.
Multi-Generational Appeal: Perfect for family crafting days, this project brings people together, fostering creativity and joy.
Don’t forget to check out more activities that inspire creativity and fun, like our fantastic guide on how to make pressed flower bookmarks!
Clear Glue Flower Suncatcher Ingredients
• Get ready to gather your crafting supplies!
For the Base
• Clear School Glue – Used for easy application, it ensures transparency for the best light diffusion.
• Plastic Lid/Clear Acetate Sheet – This is the perfect flat base for your suncatcher; any clear surface will do!
For the Decor
• Pressed Flowers – These provide vibrant colors and a natural touch; feel free to mix store-bought or homemade blooms.
• Optional Add-ins – Think tissue paper scraps, glitter, sequins, or even dried leaves to give your creation a personal flair!
For Hanging
• String or Suction Cup Hook – Essential for displaying your beautiful work of art once it’s dry.
For Trimming
• Scissors – Handy for tidying up your edges once the creation is complete.
For Protection
• Wax Paper/Parchment Paper – Protects your work surface while crafting.
Optional Frame
• Black Marker or Dark Paper – Use this for adding a decorative frame around your vibrant suncatcher.
Now you’re all set to create a delightful Clear Glue Flower Suncatcher that brightens your windows and adds a cheerful touch to your home!
How to Make a Clear Glue Flower Suncatcher
Prepare your workspace: Lay down wax paper or parchment paper to keep your area clean and protected from any glue spills as you get started.
Apply the glue: Generously spread clear school glue onto the flat surface you’ve chosen, whether it’s a plastic lid or an acetate sheet, ensuring even coverage for best results.
Arrange the flowers: Gently place your pressed flowers over the glue. Remember not to overcrowd your design; leave some space between flowers to create a beautiful visual effect.
Add embellishments: If you wish, sprinkle in optional add-ins like glitter or sequins for an extra layer of sparkle and fun in your suncatcher.
Let it dry: Allow your suncatcher to dry completely overnight, giving it ample time to harden and set. Patience here is key for a lovely finish!
Trim the edges: Once everything is dry, carefully use scissors to trim any excess flower material around the edges, creating a clean and polished look.
Hang it up: Finally, attach a string or suction cup hook to display your stunning suncatcher in a window where it can bask in the sunlight!
Optional: Use a black marker to outline the edges for a decorative frame.
Exact quantities are listed in the recipe card below.
Storage Tips for Clear Glue Flower Suncatchers
Room Temperature: Keep your suncatcher in a cool, dry place if you’re not hanging it immediately, away from direct sunlight to maintain its vibrant colors.
Fridge: If your pressed flowers begin to lose their shape or vibrancy, you can briefly store the suncatcher in the fridge for up to 1 day, which helps retain freshness before display.
Freezer: While not recommended for finished suncatchers, store any unused pressed flowers in an airtight container in the freezer for up to 6 months to preserve their color and texture for future projects.
Reheating: Should your suncatcher bow or sag, gently reapply heat from a warm window or hairdryer at a low setting for a temporary fix, but avoid excessive heat to prevent damage to the glue.
Clear Glue Flower Suncatcher Variations
Invite your inner artist to flourish and explore different twists on this delightful project!
Seasonal Blooms: Use flowers that reflect the current season—think vibrant daisies in spring or rich autumn leaves for a unique seasonal touch.
Color Pop: Incorporate colored tissue paper or even painted dried flowers to add a playful burst of color, making your suncatcher more vivid.
Nature’s Touch: Add in small twigs or pebbles alongside your flowers for a more rustic look. These natural elements add texture and interest.
Personal Messages: Write a short, sweet message on dark paper or acetate to enhance the design. Personalized touches can make these gifts even more special.
Glittery Stars: Incorporate glitter to give your creation an enchanting shimmer, especially lovely for evening light play; a touch of sparkle can make a world of difference.
Shaped Bases: Experiment with different shapes—hearts, stars, or circles—when selecting your base for a unique and playful design, inviting more creativity into your crafting.
Layered Techniques: Try layering clear glue under and above your flowers for depth. This not only secures your elements but creates a stunning 3D effect to captivate onlookers.
Themed Collections: Create a set for gifts using a consistent color theme or flower type. This gives a cohesive look and can turn your suncatchers into a cherished keepsake.
What to Serve with Clear Glue Flower Suncatcher?
As you brighten your home with these stunning suncatchers, consider complementing them with delightful touches that enhance the creative atmosphere.
- Fresh Flowers: A vibrant bouquet enhances the beauty of your decor, tying in the natural theme of your suncatchers beautifully.
- Scented Candles: Add warmth and comfort to your crafting space; choose floral or citrus scents that evoke joyfulness.
- Colorful Fabrics: Drape patterned tablecloths or cushions nearby to echo the colors of your suncatchers and create a cohesive look.
- DIY Magnets: Create matching pressed flower magnets for your fridge; it’s a fun and creative way to showcase your crafting skills.
- Artisan Tea: Brew a cup of herbal or floral-infused tea, offering a sensory experience that pairs beautifully with your crafting session.
- Baked Treats: Whip up some light cookies; the sweet aroma and indulgent bite will keep smiles bright while working on your craft.
- Crafting Playlist: Curate a blissful playlist of uplifting tunes or nature sounds to foster creativity and elevate the crafting mood.
Let these elements amp up the charm of your crafting experience, encouraging laughter and creativity in every corner.
Tips for the Best Clear Glue Flower Suncatcher
Choose Flat Flowers: Ensure your pressed flowers are flat to avoid uneven surfaces; this creates a smoother finish for your suncatcher.
Avoid Overcrowding: Leave gaps between flowers when arranging them on the glue; this enhances visibility and makes for a more appealing design.
Check Drying Time: Patience is key! Allow your suncatcher to dry overnight for best results; rushing this step may lead to sagging or damage.
Play with Colors: Mix and match different flowers, colors, and embellishments to elevate your Clear Glue Flower Suncatcher and make it uniquely yours.
Securely Hang It: Use a strong string or suction cup hook to ensure your suncatcher stays in place, avoiding accidental falls that could ruin your creation.
Make Ahead Options
These Clear Glue Flower Suncatchers are perfect for busy home cooks looking to combine creativity with efficiency! You can prepare the base by applying clear school glue and arranging pressed flowers up to 24 hours in advance. Just be sure to cover your suncatcher with wax paper to prevent dust and ensure that the flowers stay vibrant. When you’re ready to finish, simply let it dry overnight for ideal results, then trim any excess material and attach your hanging hardware. This way, you’ll have a beautiful and personalized decoration ready to hang with minimal last-minute effort!

Clear Glue Flower Suncatcher Recipe FAQs
What type of glue should I use for my suncatcher?
Absolutely use clear school glue! It’s perfect for achieving transparency, allowing the sunlight to shine through beautifully. Make sure to spread it evenly on your base for the best results!
How should I store my completed suncatcher?
Keep your suncatcher in a cool, dry place away from direct sunlight if you’re not hanging it right away to maintain its vibrant colors. This way, you can enjoy its sparkle for longer!
Can I freeze my pressed flowers for later use?
Yes! Store your unused pressed flowers in an airtight container in the freezer for up to 6 months. This method helps preserve their color and texture, making them perfect for future suncatcher projects!
What should I do if my suncatcher starts to sag?
If you notice your suncatcher sagging or bowing, you can gently reapply heat from a warm window or use a hairdryer on a low setting to help it regain its shape. However, be cautious not to apply too much heat, as that could damage the glue.
How long does it take for the suncatcher to dry completely?
It’s best to let your suncatcher dry overnight. This allows the glue to set properly and ensures a smooth finish. Rushing this step may lead to sagging or a poor visual effect.
Is it safe to hang my suncatcher in a window where pets can reach it?
Yes, your clear glue flower suncatcher is safe to hang! Just ensure that it’s securely attached with a strong string or suction cup hook. However, be mindful of your pets and the potential for them to bump or knock it down. Happy hanging!

Clear Glue Flower Suncatcher: Brighten Your Home with Joy!
Ingredients
Equipment
Method
- Prepare your workspace by laying wax paper or parchment paper to protect from glue spills.
- Generously spread clear school glue onto the flat surface of your choice.
- Gently place your pressed flowers over the glue, leaving space between them.
- Optional: Sprinkle add-ins like glitter or sequins for extra sparkle.
- Allow your suncatcher to dry completely overnight.
- Trim any excess flower material around the edges using scissors.
- Attach a string or suction cup hook to hang your suncatcher in a sunny window.