Brilliant Clear Glue Flower Suncatchers: Easy Art for All Ages
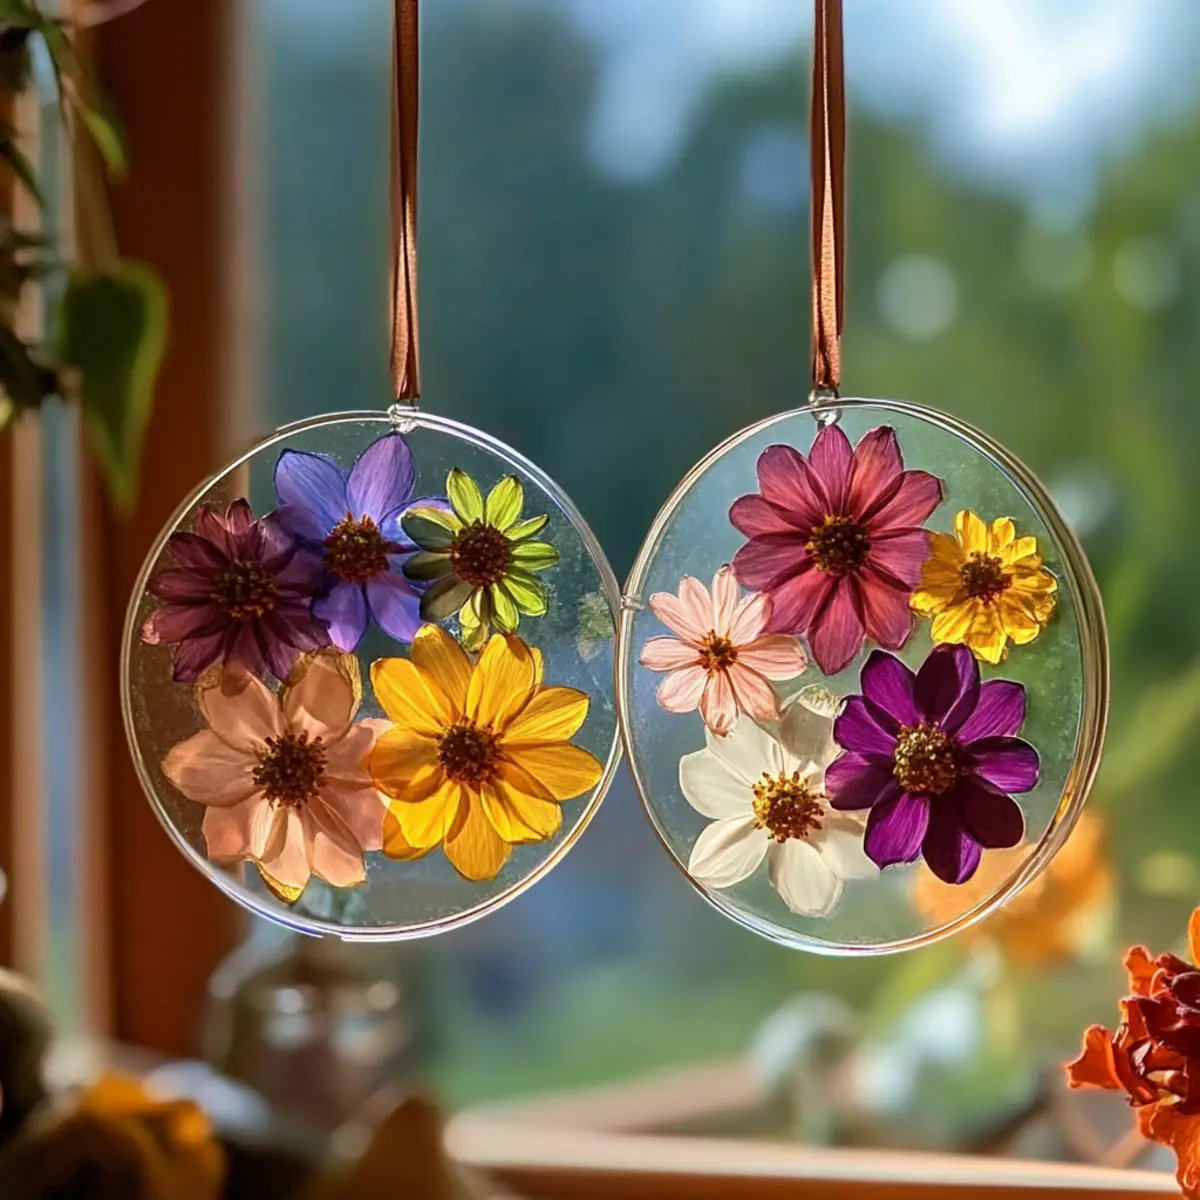
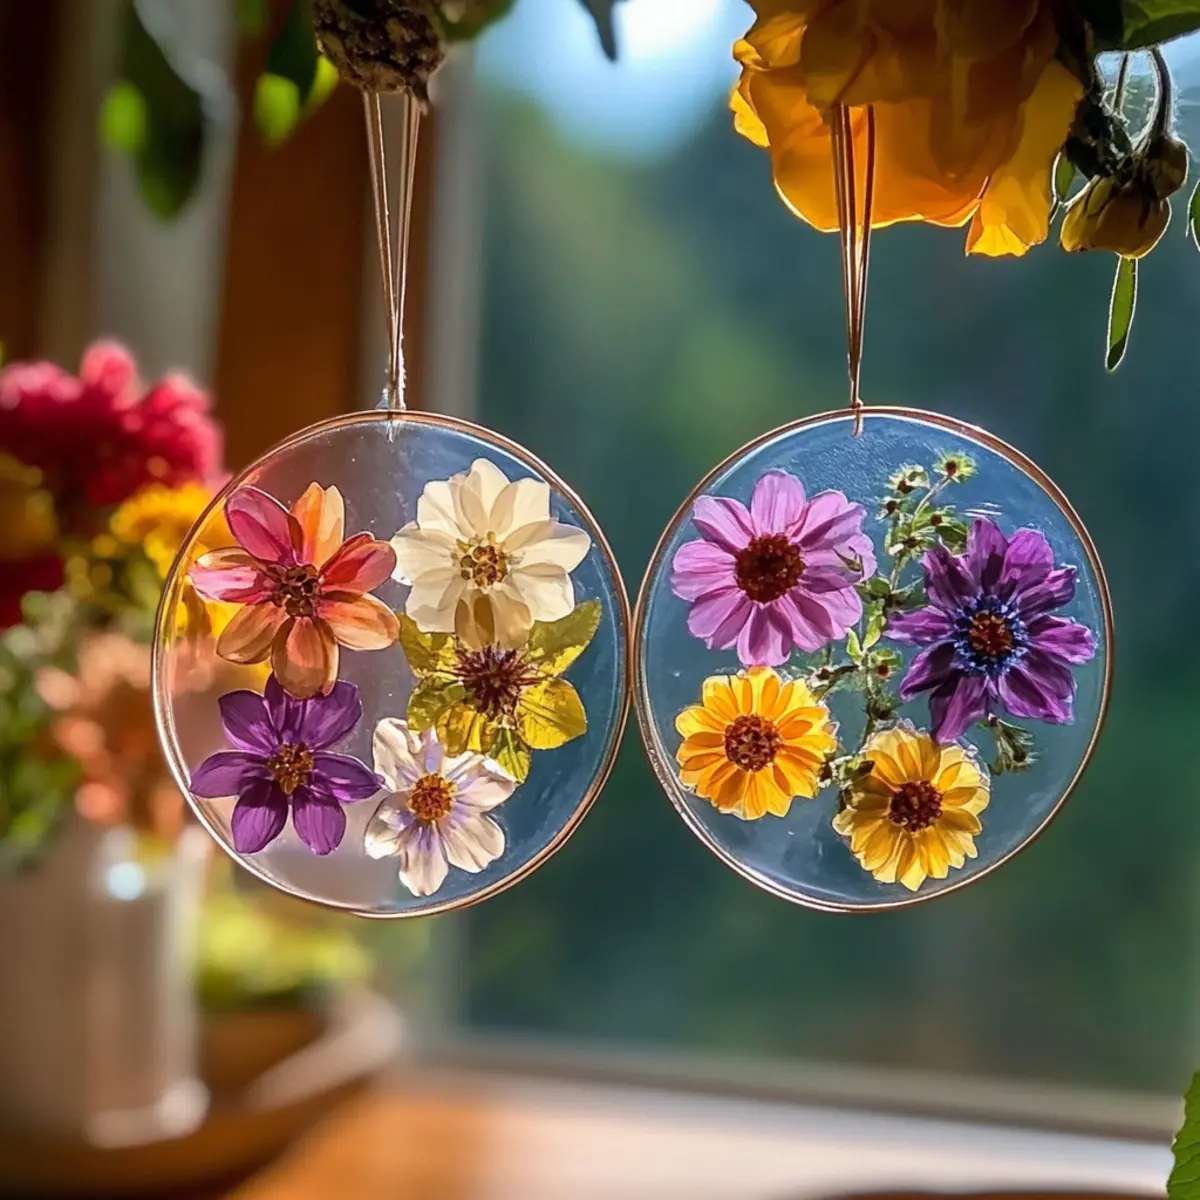
There’s something enchanting about transforming ordinary materials into vibrant works of art. When I first experimented with clear glue and flowers, I stumbled upon a simple yet breathtaking craft that brought a splash of color to my sunny kitchen. These Clear Glue Flower Suncatchers are not just a delightful way to embrace your creativity; they also make charming decorations that dance with the light throughout your home.
Perfect for all ages, this DIY activity invites everyone to explore their artistic side by incorporating natural elements like pressed flowers and colorful tissue paper. The joy of seeing your unique designs come to life as they catch the sunlight is simply irresistible. Plus, with endless variations — from adding a sprinkle of glitter to using seasonal leaves — you’ll find that every creation tells its own story.
So grab your materials, gather the family, and let’s turn sunlight into art together!
Why You’ll Love Clear Glue Flower Suncatchers
Creativity Unleashed: The joy of crafting these flower suncatchers is truly extraordinary, making it an engaging activity for family across generations.
Nature Inspired: By incorporating pressed flowers and colorful tissue paper, you bring a touch of the outdoors into your decor.
Versatility at Play: Experiment with different elements like sequins or seasonal leaves to create unique designs every time.
Easy Clean-Up: Using wax paper ensures a mess-free crafting experience, allowing you to focus on your creativity rather than cleanup.
Brighten Your Space: Once completed, these stunning suncatchers will reflect sunlight beautifully, transforming any room into a cozy haven.
For more delightful crafts, check out our guide on easy DIY projects perfect for kids and adults.
Clear Glue Flower Suncatcher Ingredients
• Get ready to craft a stunning piece of art!
For the Base
- Clear school glue – Essential for creating the suncatcher; swap with clear craft adhesive if you can’t find it.
- Plastic lid or clear acetate sheet – Your mold for the suncatcher’s shape; ensure it’s non-stick for easy removal later.
For the Design
- Pressed flowers – Bring vibrant natural beauty to your project; use various shapes and colors for a striking look.
- Tissue paper scraps – Perfect for a mosaic effect; feel free to substitute with colored paper or skip for simplicity.
- Glitter – Adds that extra sparkle; optionally replace with sequins or omit if you prefer a subtler design.
- Dried leaves – Introduces lovely texture; use fresh leaves if they’re adequately pressed and dried.
For Finishing Touches
- String, ribbon, or suction cup hook – Choose based on how you plan to display your suncatcher.
- Scissors – Necessary for trimming materials to your desired sizes.
- Wax paper or parchment – Protects your work surface, ensuring an easy cleanup.
- Hole punch – For creating a hole to hang your finished suncatcher.
- Marker (optional) – Enhance your design by framing edges with a waterproof marker for longevity.
Get ready to turn those ordinary ingredients into breathtaking Clear Glue Flower Suncatchers!
How to Make Clear Glue Flower Suncatchers
Prepare your workspace by laying down wax paper or parchment; this will prevent sticking and make cleanup a breeze.
Pour clear glue into your plastic lid or acetate sheet to create the base layer. Aim for about a quarter-inch thickness to ensure it’s sturdy.
Arrange your pressed flowers and tissue paper scraps within the glue. Be creative here; make sure the pieces are evenly spread for a beautiful final effect!
Sprinkle glitter over the design if desired, or add sequins for an extra pop of color and sparkle to your suncatcher.
Allow the suncatcher to dry completely for up to 24 hours in a well-ventilated area. Patience is key for the best results!
Peel the dried suncatcher gently from the mold. Use a hole punch to create a hanging point, ensuring it’s ready for display.
Attach a string, ribbon, or suction cup hook to hang your creation wherever the sunlight can reach it for maximum beauty.
Optional: Add a decorative frame with a marker to enhance its overall presentation.
Exact quantities are listed in the recipe card below.
Expert Tips for Clear Glue Flower Suncatchers
- Even Glue Application: Ensuring the glue is spread evenly will prevent weak spots, which could break easily. Take your time here!
- Proper Flower Preparation: Use pressed flowers that are completely dried to avoid issues with mold forming. Fresh leaves can mold, so dry them well.
- Ample Drying Time: Allow the suncatcher to dry for a full 24 hours. Rushing this step may lead to incomplete adhesion and disappointment.
- Decorative Variations: Don’t shy away from experimenting! Try using different colors of tissue paper or adding seasonal leaves to make your Clear Glue Flower Suncatchers uniquely yours.
- Be Creative with Shapes: When arranging your flowers and tissue paper, think outside the box! Overlapping pieces can create dynamic visual interest.
- Protect Your Surfaces: Always craft on wax paper or parchment to ensure a quick and easy cleanup, keeping your creative space neat.
Storage Tips for Clear Glue Flower Suncatchers
Safe Storage: Use a flat surface to store your completed suncatchers, keeping them away from direct sunlight to prevent fading and damage.
Avoid Stacking: Store them individually and flat to avoid crushing or warping the design. This helps maintain their vibrant appearance and integrity.
Display Recommendations: Hang them in sunny spots for maximum light interaction; the glow will enhance their beauty and transform your space.
Make-Ahead Tip: If you’re crafting multiple suncatchers, make them in advance and they can last for several weeks before displaying.
Make Ahead Options
These Clear Glue Flower Suncatchers are perfect for busy families looking to craft ahead! You can prepare the base layer with clear glue and arrange your pressed flowers and tissue paper scraps up to 24 hours in advance. Simply cover your completed designs with wax paper to prevent dust and preserve their vibrancy. When you’re ready to unleash your creativity, allow the suncatchers to dry completely for another 24 hours. Once they are fully set, peel them from the mold, punch a hole for hanging, and attach your decorative string or ribbon. This way, you’ll have stunning suncatchers ready to brighten your space with minimal last-minute effort and just as beautiful as if made freshly!
Clear Glue Flower Suncatcher Variations
Feel free to let your creativity run wild with these exciting twists and turns for your suncatcher craft, making it truly unique!
- Colorful Tissue: Swap in vibrant shades of tissue paper for a burst of color. Play around with different patterns and combinations for mesmerizing effects.
- Seasonal Leaves: Use fresh or pressed seasonal leaves for a nature-inspired twist. This will create a beautiful sense of time in your decor, reflecting the changing seasons.
- Mini Flowers: Rather than large pressed flowers, try using tiny blossoms like daisies or violets for a delicately intricate look. These miniatures will add a whimsical charm to your suncatcher.
- Metallic Paint: Brush the edges with metallic paint to give your suncatcher a shiny, modern finish. It adds an elegant touch that can catch even more light!
- Glitter Galore: If you want extra sparkle, mix multiple glitter colors into the glue. The more, the merrier; it multiplies the twinkle as the sun hits it!
- Personalized Messages: Use a waterproof marker to write inspirational words or quotes on your suncatcher’s edges. This will not only brighten your space but also your spirit!
- Ocean Vibes: Opt for shades of blue and green tissue paper mixed with seashells or sand for a beachy theme, reminiscent of summer days by the shore.
- Layered Textures: Combine textured scrapbook paper with your usual materials for a tactile experience. Different layers will create visual depth that mesmerizes the eye.
Remember, each variation is an opportunity to tell a new story in your home, inviting light and joy into your crafting adventures!
What to Serve with Clear Glue Flower Suncatchers?
Transform your crafting day into a delightful family affair with treats that will brighten your spirit!
Colorful Fruit Salad: A vibrant mix of seasonal fruits adds a fresh, juicy note, making it a perfect complement to your creative process.
Iced Lemonade: Refreshing and tangy, this drink keeps everyone cool as you craft, ensuring that the fun remains uninterrupted.
Homemade Brownies: Rich, chocolaty goodness satisfies sweet cravings, and their fudgy texture pairs wonderfully with the colorful suncatchers you create.
Veggie Platter with Dip: Light and crunchy, this option keeps everyone energized without weighing them down, perfect for all ages.
Popcorn with Sprinkles: Sweetened popcorn brings a playful element to your crafting, echoing the colors of your suncatchers in a bite-sized treat.
Chocolate-Covered Pretzels: The perfect balance of sweet and salty, these treats are an easy way to indulge while you craft your unique designs.
Let the creativity flow and the treats enhance your crafting experience, creating lasting memories with every suncatcher!
Clear Glue Flower Suncatcher Recipe FAQs
What kind of pressed flowers should I use?
Absolutely! It’s best to use a variety of pressed flowers that are completely dried to prevent mold. Look for flowers like pansies, violets, or daisies for colorful options. Make sure they’re not too thick, as thinner petals will adhere better to the glue.
How should I store my completed flower suncatchers?
To keep your Clear Glue Flower Suncatchers in tip-top shape, store them flat on a shelf or in a box. Avoid stacking them to prevent any crushing or warping; keeping them in a cool, dry place away from direct sunlight is essential to maintain their vibrant colors.
Can I freeze my completed suncatchers?
No, it’s not recommended to freeze your suncatchers as the cold can weaken the glue bond and affect the integrity of the flowers and tissue paper. Instead, display them indoors where they can enjoy the light and warmth!
What should I do if my suncatcher doesn’t dry properly?
Very good question! If your suncatcher is still tacky after 24 hours, it means that it possibly wasn’t spread evenly or needs more air circulation. Try placing it in a well-ventilated area or under a fan. If it remains sticky, gently peel it off and try again, ensuring an even glue application next time.
Are there any allergens I should consider when using flowers or leaves?
Definitely! While many flowers are safe, it’s important to consider potential allergies for anyone who may be handling them. If you or your family members have sensitivities to certain plants or pollen, choose flowers that are known to be hypoallergenic or consult with a local expert to ensure safety.
Can I use homemade natural glue instead of clear school glue?
Yes, you can! If you’re feeling adventurous, a homemade glue made from flour and water will work, though it may take longer to dry and hold less effectively. For optimal results, however, clear school glue or craft adhesive is the most dependable option for these beautiful Clear Glue Flower Suncatchers.
Brilliant Clear Glue Flower Suncatchers: Easy Art for All Ages
Ingredients
Equipment
Method
- Prepare your workspace by laying down wax paper or parchment to prevent sticking and make cleanup a breeze.
- Pour clear glue into your plastic lid or acetate sheet to create the base layer, aiming for about a quarter-inch thickness.
- Arrange your pressed flowers and tissue paper scraps within the glue, making sure the pieces are evenly spread.
- Sprinkle glitter over the design if desired, or add sequins for an extra pop of color.
- Allow the suncatcher to dry completely for up to 24 hours in a well-ventilated area.
- Peel the dried suncatcher gently from the mold and use a hole punch to create a hanging point.
- Attach a string, ribbon, or suction cup hook to hang your creation in sunlight.
- Optionally, enhance its presentation with a waterproof marker.