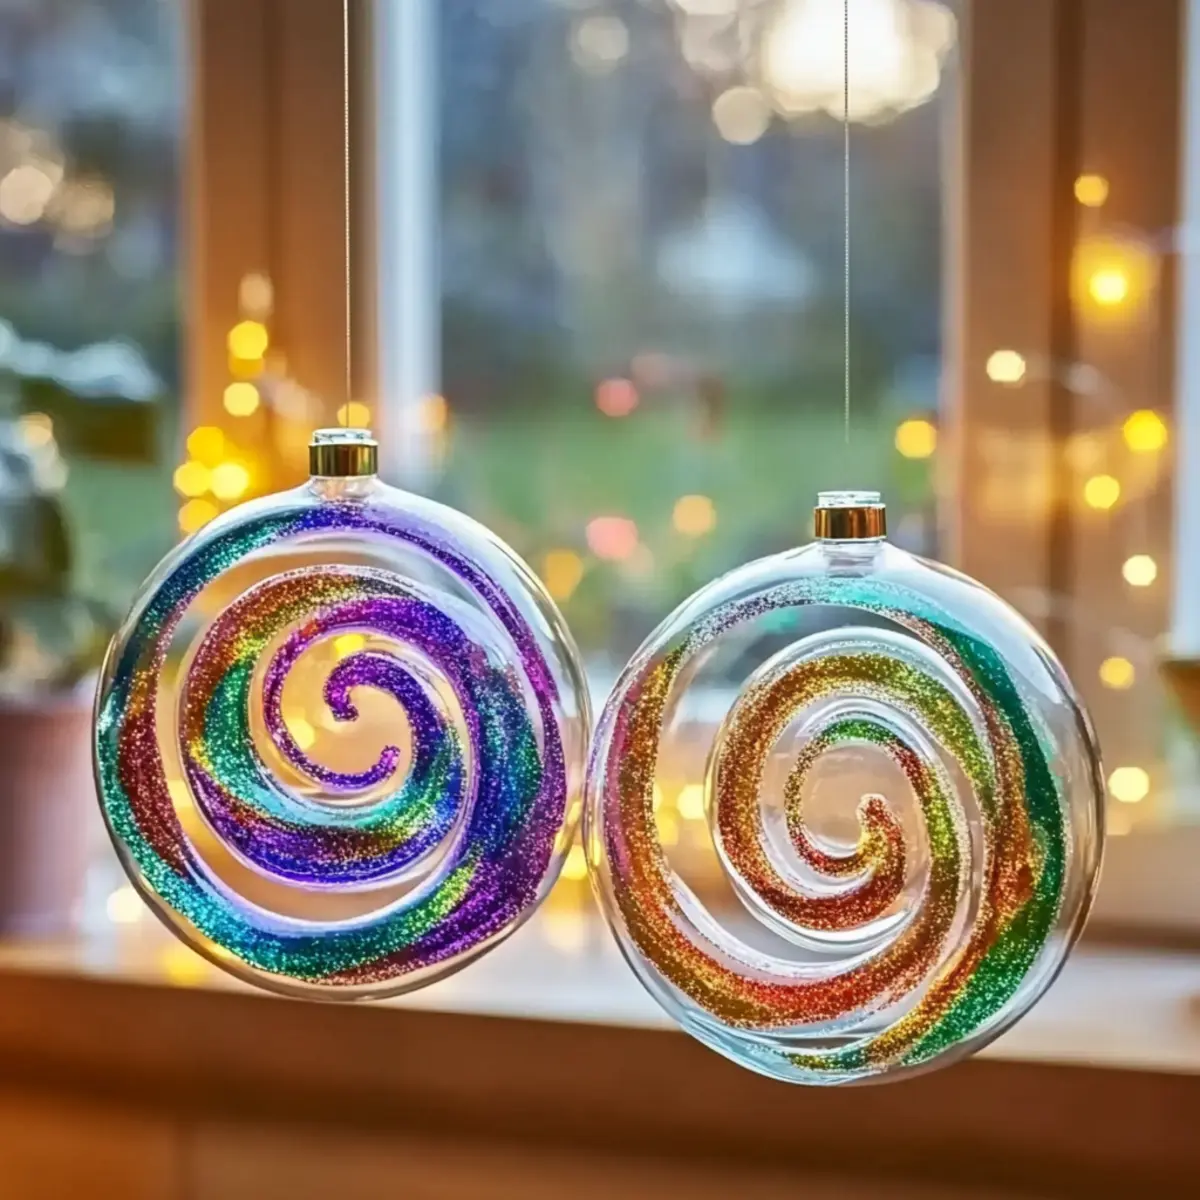
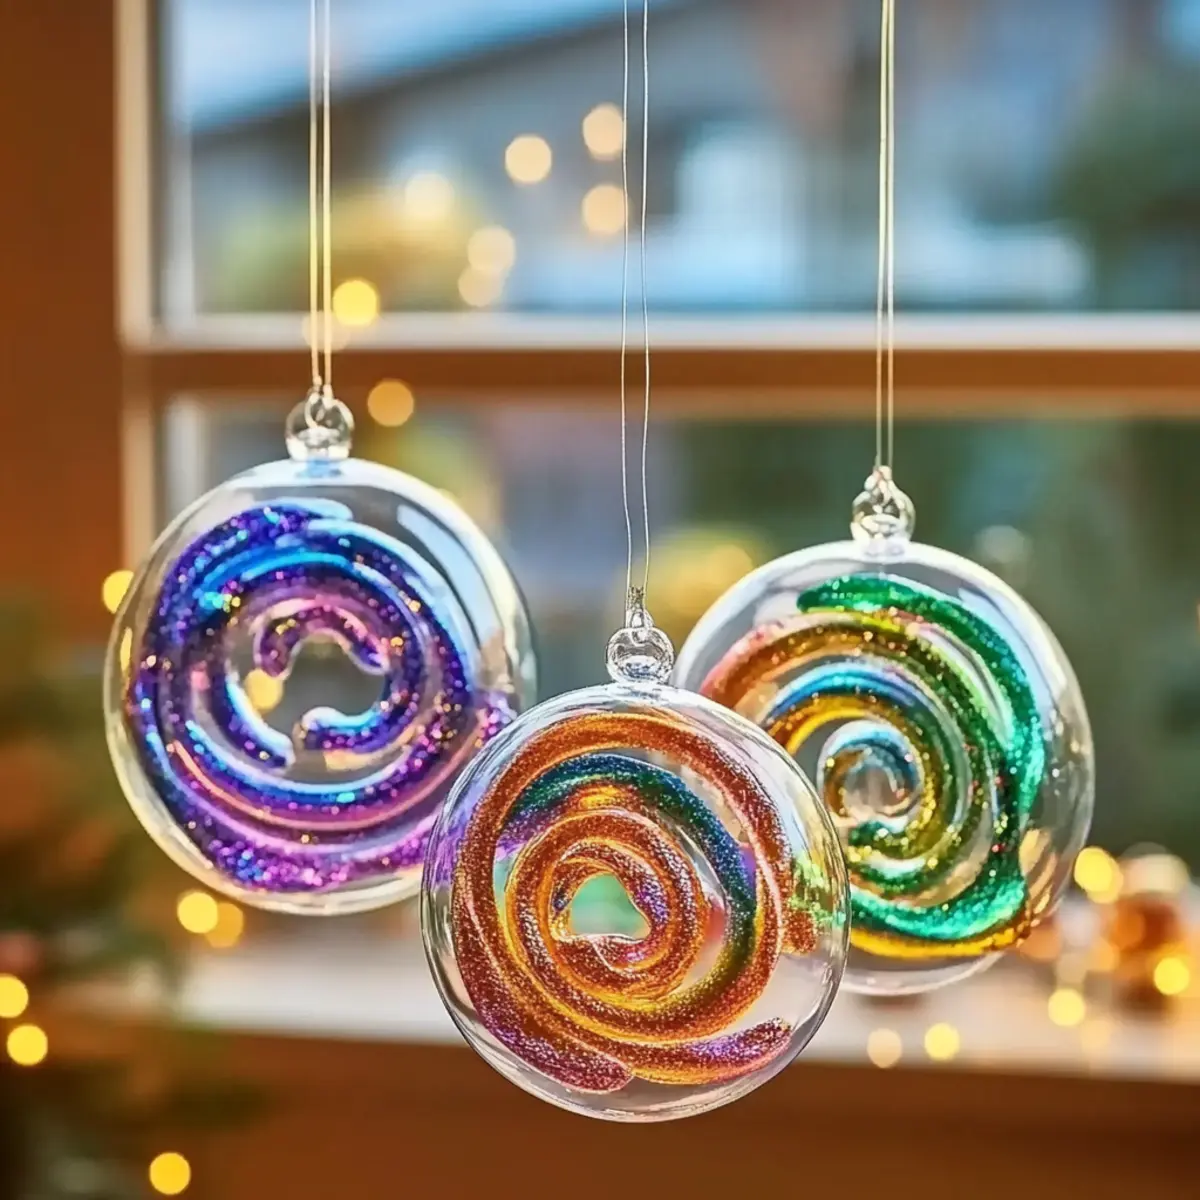
Clear Glue Suncatcher Craft: Brighten Your Home with Joy!
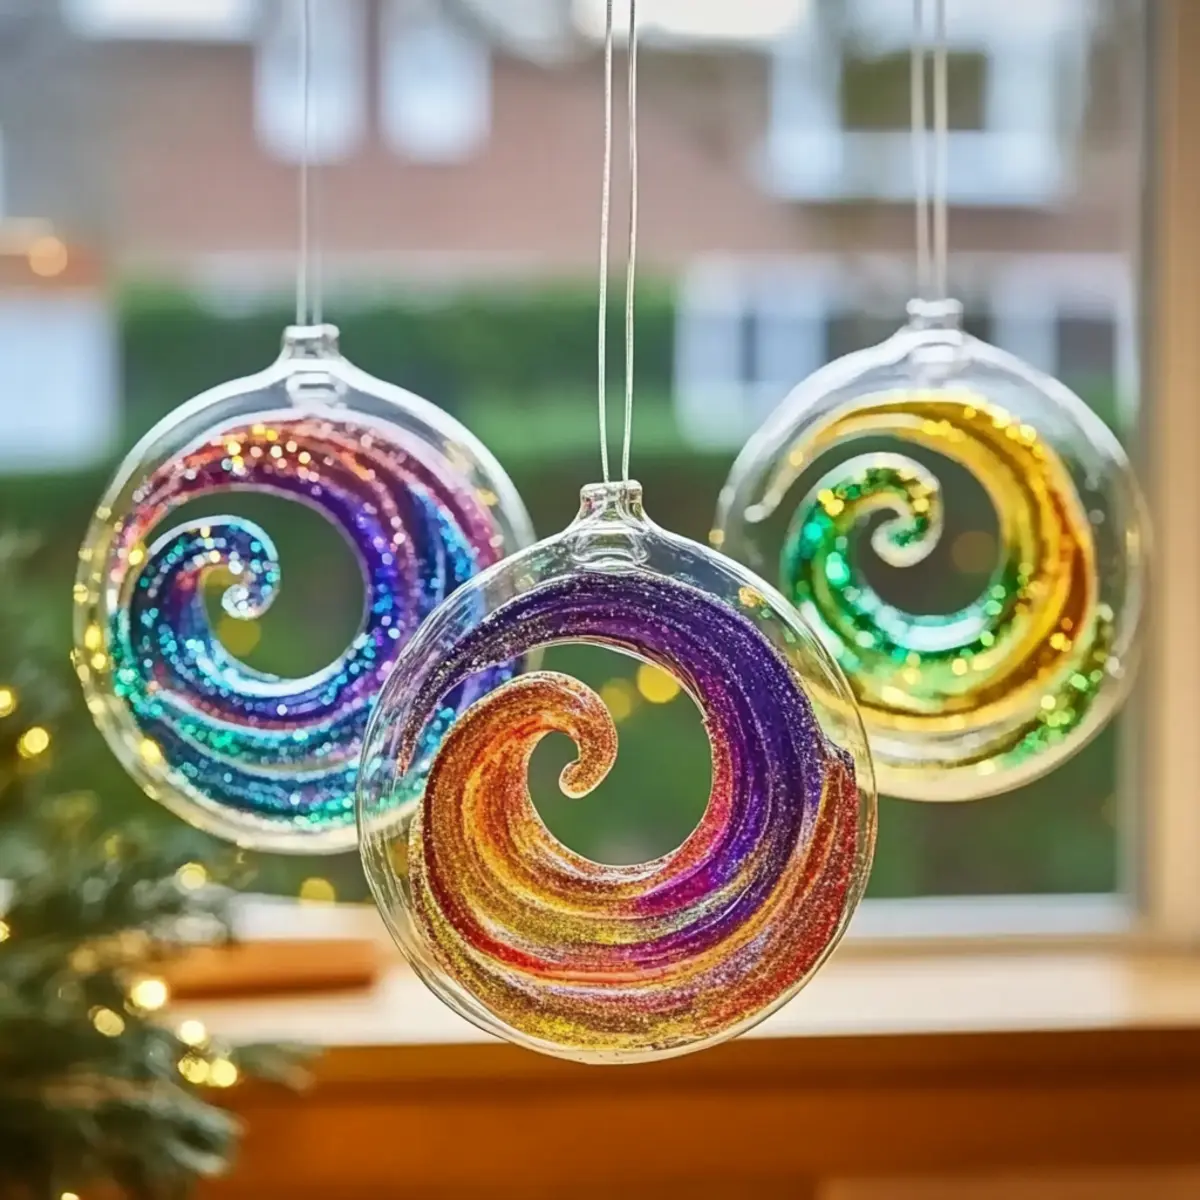
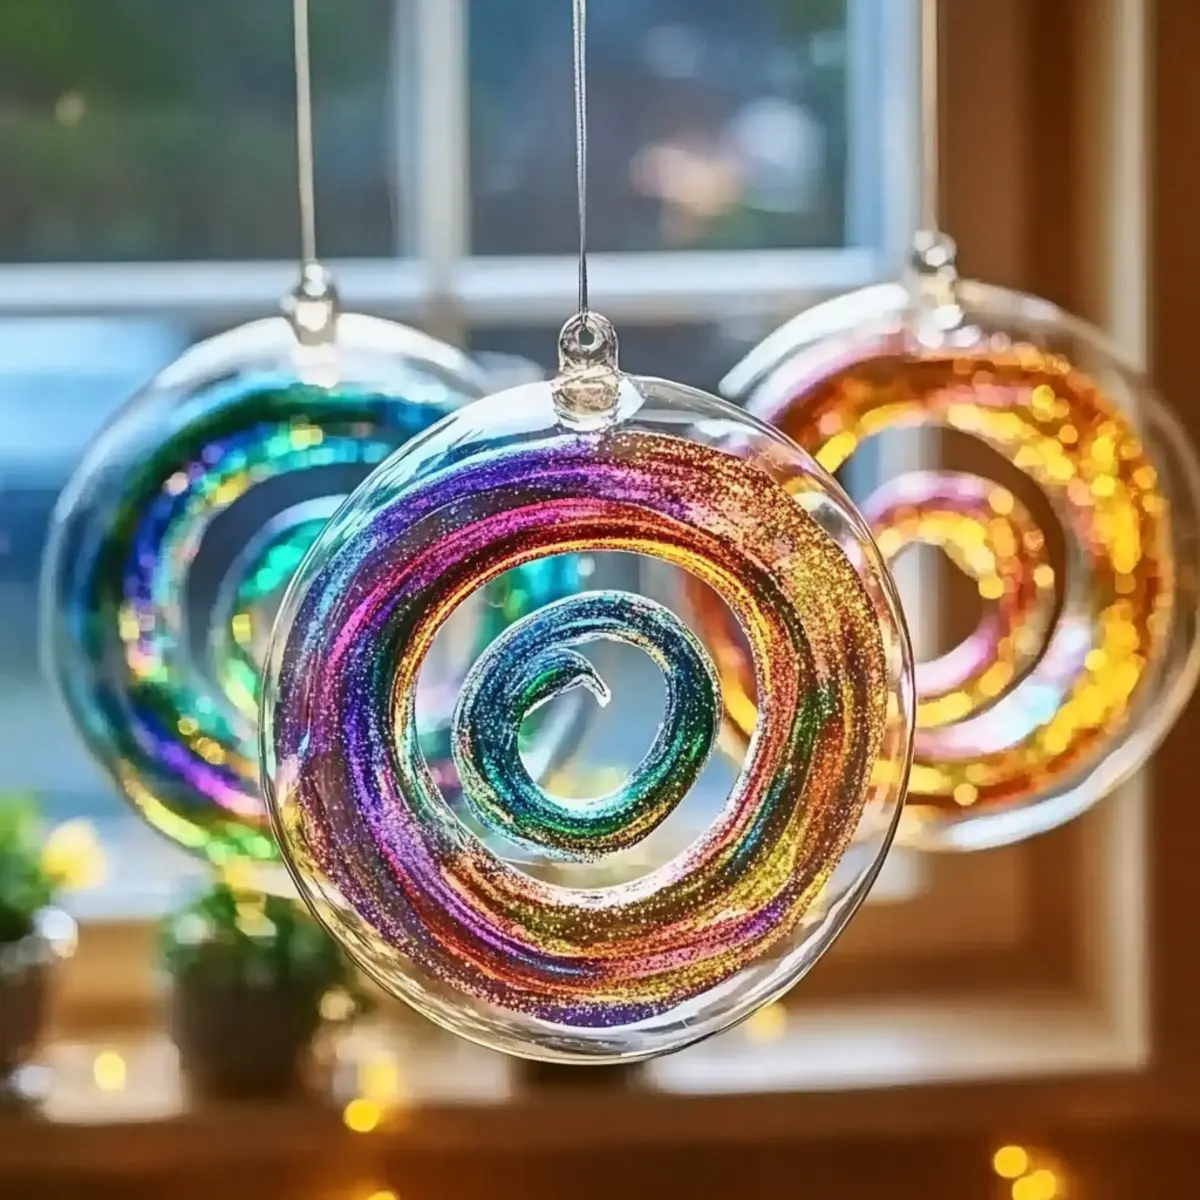
As the sunlight streams through the window on a lazy afternoon, the idea for a colorful craft brightens my day—a delightful DIY Suncatcher! This whimsical project is more than just a craft; it’s a creative journey that transforms simple ingredients into a shimmering mosaic of colors that will dance across your space. Perfect for kids and the young at heart, this easy-to-follow activity encourages imagination while creating stunning decor to hang in your home. Each suncatcher becomes a unique masterpiece that not only captures light but also brings smiles and warmth to every room. Whether you’re looking for a fun weekend project or a vibrant gift, grab your clear glue, some food coloring, and let’s get crafting!
Why love this Clear Glue Suncatcher Craft?
Joyful Creativity: This project sparks imagination, making it an engaging experience for all ages.
Colorful Transformations: Watch as clear glue becomes a dazzling canvas for vibrant colors!
Easy-to-Follow: No special skills required; just gather a few simple materials and start crafting!
Memorable Keepsakes: Each suncatcher is a unique masterpiece, perfect for personal display or gifting.
Versatile Design: Customize your creation with glitter, sequins, or seasonal themes for endless fun!
Create beautiful decor that brightens any window and adds a touch of whimsy to your home.
Clear Glue Suncatcher Ingredients
• Get ready to gather these fun materials for your Clear Glue Suncatcher Craft!
For the Base
- Clear school glue – The essential adhesive that holds your masterpiece together; Elmer’s is a great choice!
- Plastic lid – Serves as the perfect mold for shaping your suncatcher; yogurt lids work wonderfully.
For Coloring
- Food coloring or liquid watercolor paints – Adds vibrant shades to your creation; experiment with fewer drops for beautiful swirling effects!
For Creating Design
- Toothpick or paintbrush – Use these tools to swirl your colors and craft unique patterns in the glue.
- Scissors – Handy for any trimming and adjustments needed during your crafting adventure.
For Decor
- Glitter (optional) – Sprinkle in some sparkle to elevate the magic of your suncatcher!
- Sequins (optional) – Use these to add festive flair and color to your designs.
- Beads (optional) – Embed lightweight beads into the glue for extra texture and charm.
For Hanging
- String or suction cup hook – Perfect for displaying your spectacular suncatcher once it’s dry!
Let your creativity shine as you transform these simple ingredients into a stunning suncatcher that captures the sunlight beautifully!
How to Make a Clear Glue Suncatcher
Prepare Your Workspace:
Set the mood for crafting by laying down wax or parchment paper on a flat surface. This will protect against any glue spills and keep the fun mess-free!Spread the Glue:
Pour a generous amount of clear school glue into your chosen plastic lid. Use your fingers or a brush to spread the glue evenly, creating a solid base for your suncatcher design.Add Color:
Drops of food coloring or liquid watercolor paints should be carefully added to the glue. Use a toothpick or paintbrush to swirl the colors together for a beautiful marbled effect!Add Sparkle:
If you’re feeling extra creative, sprinkle in some glitter, sequins, or lightweight beads on top of the colored glue. This will add dimension and personality to your suncatcher!Let It Dry:
Allow your suncatcher to dry completely for about 24 hours. This step is crucial to ensure durability and prevent any warping; patience will pay off!Hang It Up:
Once dried, gently peel your suncatcher off the plastic lid. Attach string or a suction cup hook, and hang it in your favorite window to watch it come alive in the sunlight!
Optional: Try experimenting with different color schemes based on the seasons!
Exact quantities are listed in the recipe card below.
Clear Glue Suncatcher Craft Variations
Feel free to unleash your creativity with these fun twists and substitutions for your suncatcher project!
Seasonal Themes:
Tailor your colors to match the seasons! Think warm shades of red and orange for autumn or bright pastels for spring.Metallic Magic:
Swap in metallic paints for a shimmering effect that catches the eye. The light will reflect beautifully, making your suncatchers even more mesmerizing.Glitter Galore:
Use various types of glitter to enhance your design with different textures. Consider star-shaped glitter for a whimsical touch or iridescent glitter for a magical finish.Nature-Inspired Elements:
Add small, lightweight leaves or pressed flowers into the glue for a unique and organic suncatcher. It’ll give a fresh look that reflects the beauty of nature.Glow-in-the-Dark:
Incorporate glow-in-the-dark paint for a nighttime surprise! Imagine your suncatcher glowing gently in the dark—it’s sure to be a hit!Interactive Suncatcher:
Use removable stickers on the glue before it dries. Once dried and peeled off, they create fun shapes and designs that kids will love.Themed Colors:
Pick a color scheme based on favorite characters or holidays—think red and green for Christmas or shades of blue for an underwater theme.Doodle Design:
After pouring the glue, use a toothpick to create doodles or letters in the mix before adding colors. This adds a personal touch to each suncatcher!
Remember, the joy of crafting lies in exploring new ideas, so get ready to brighten your space with a burst of creativity!
Storage Tips for Clear Glue Suncatcher Craft
Cool, Dry Place: Store completed suncatchers flat between sheets of wax paper to prevent scratches and damage. Keep them in a cool, dry area for the best preservation.
Avoid Direct Sunlight: Although they catch sunlight beautifully, keep your suncatchers out of direct sun when not hung up, as this can fade colors over time.
Re-display After Seasons: If you want to change the decor for seasons, gently remove the string or suction cup and use the same storage method until you’re ready to hang them again.
Cleaning: If your suncatcher collects dust, simply wipe it with a soft, dry cloth. Avoid using water or cleaners that may damage the colors or glue.
Expert Tips for Clear Glue Suncatcher Craft
Workspace Safety: Ensure your workspace is covered with wax or parchment paper. This simple step will save you from messy glue spills and make cleanup a breeze!
Color Blending: Be mindful of the amount of food coloring you add. Start with just a few drops; you can always add more for bolder colors without overwhelming the glue.
Weight Matters: If you decide to include beads, choose lightweight options. Heavier beads can cause the suncatcher to sag or break during drying.
Drying Time: Don’t rush the drying process! Allow the suncatcher to cure for a full 24 hours to ensure it sets properly, avoiding any potential warping or smudging.
Hanging Options: For an easier display, consider using suction cup hooks. They allow you to adjust the height and placement of your suncatcher with ease!
Let these tips guide you in creating beautiful Clear Glue Suncatcher Crafts that will dazzle in your home!
Make Ahead Options
These DIY Suncatchers are perfect for busy home cooks and crafty parents looking to save time during the week. You can prepare the colorful glue base up to 24 hours in advance by pouring the glue into the plastic lids and adding your chosen food coloring, then swirling them with a toothpick. To maintain quality, cover the lids with plastic wrap and refrigerate until you’re ready to create. When you’re ready to finish, simply sprinkle in the glitter, sequins, or beads, and let the suncatcher dry for another 24 hours. This way, you’ll have your suncatcher ready to hang in no time, brightening your space with minimal effort!
What to Serve with DIY Colorful Suncatchers?
As you gather materials for your crafting adventure, consider how to pair your colorful creations with equally delightful home decor or gifts that bring joy to your environment.
Sunshine-themed Party: Host a small gathering where friends can craft their suncatchers. Cozy up with snacks and lemonade to celebrate creativity together!
Gift Wrapping Supplies: Beautifully wrap your finished suncatchers with cheerful tissue paper and ribbons, making them ready for gifting on special occasions.
Decorative String Lights: Enhance the beauty of your suncatchers by displaying them near twinkling string lights, creating a magical nighttime ambiance in your home.
Seasonal Plant Arrangements: Add a touch of nature by placing freshly cut flowers or potted plants nearby. This combination brings life and vibrancy to your crafting area.
Child-Friendly Snacks: Serve up some colorful fruit skewers or rainbow veggies that compliment the bright hues of your suncatchers, making for a fun, interactive snack time.
Crafting Playlist: Curate a playlist of upbeat songs to energize your crafting session. Let the music inspire creativity as the colors blend and swirl!
Personalized Thank You Notes: Create matching cards to accompany your suncatchers, expressing warmth and appreciation to those you gift them to.
Embrace these ideas to elevate your crafting experience and celebrate the joy these DIY suncatchers bring to your home!
Clear Glue Suncatcher Recipe FAQs
What type of glue is best for this craft?
Absolutely! For making your Clear Glue Suncatcher, it’s best to use clear school glue, such as Elmer’s, which creates a smooth base and dries clear. Avoid using white glue, as it may dry with an opaque finish, which won’t give you that beautiful stained glass effect!
How should I store my completed suncatchers?
To ensure your suncatchers remain in pristine condition, store them flat between sheets of wax paper. This prevents scratches and keeps them from sticking together. Ideally, keep them in a cool, dry place, away from direct sunlight, which can fade their vibrant colors over time.
Can I freeze my suncatchers?
Freezing isn’t necessary for suncatchers, and I wouldn’t recommend it! The glue may not hold up well under freezing temperatures, leading to warping or damage. Instead, just store them properly in a cool place, and they’re good to go when it’s time to display them!
What if my suncatcher starts to warp during drying?
If you notice warping while your suncatcher is drying, ensure you’ve spread the glue evenly in the base. Use a flat, stable surface to dry your suncatcher, and avoid adding too many heavy decorations like beads on one side, as that can cause sagging. If it warps, you can try to gently reshape it by placing a heavy object on top while it finishes drying.
Is this project safe for kids?
Absolutely! This Clear Glue Suncatcher craft is kid-friendly, supervised by an adult. Just make sure to use non-toxic materials, and help younger children with tasks that involve scissors or managing small decorations. It’s a wonderful way to bond and promote creativity!
Can I use other types of paint instead of food coloring?
Very much so! Liquid watercolor paints are a fantastic alternative that can add vibrant and unique results. Just ensure that whatever paint you choose mixes well with the glue to avoid clumping or separation. Experimenting with metallic or fluorescent paints can yield stunning, eye-catching suncatchers too!
Clear Glue Suncatcher Craft: Brighten Your Home with Joy!
Ingredients
Equipment
Method
- Prepare your workspace by laying down wax or parchment paper to protect against glue spills.
- Pour a generous amount of clear school glue into your chosen plastic lid and spread it evenly.
- Carefully add drops of food coloring or liquid watercolor paints and swirl with a toothpick or paintbrush.
- Sprinkle glitter, sequins, or beads on top of the colored glue.
- Allow your suncatcher to dry completely for about 24 hours.
- Once dried, peel off the suncatcher and attach a string or suction cup hook to hang it.